
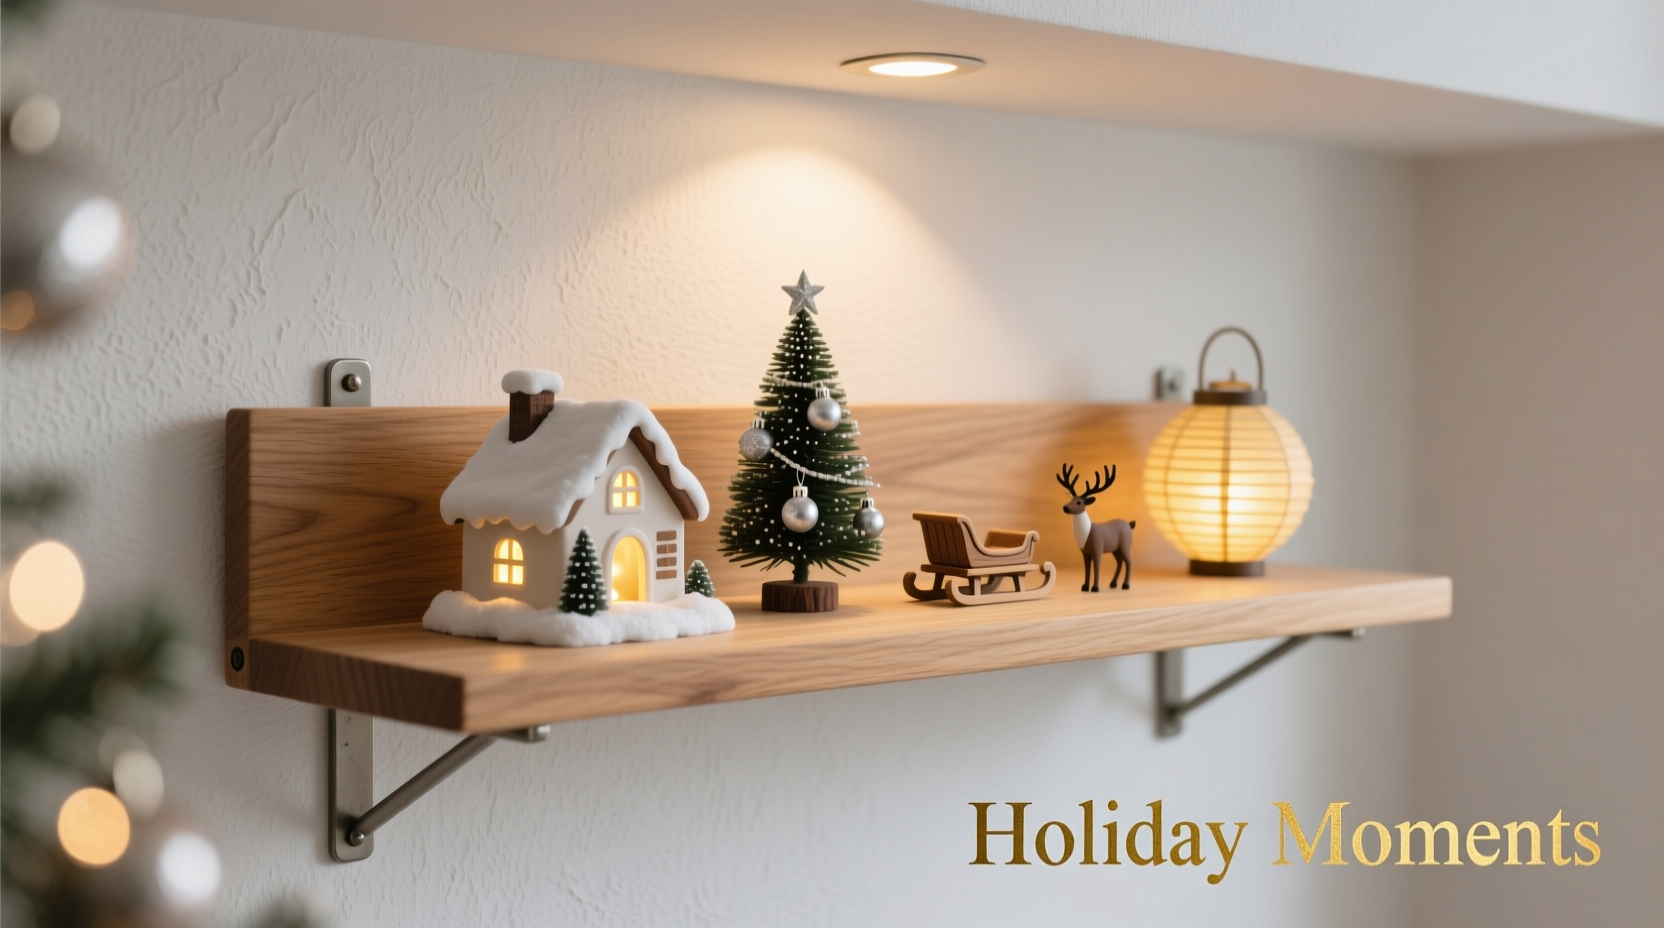
Creating a Christmas village is one of the most cherished holiday traditions, but limited floor space can make it difficult to showcase your collection. A floating shelf display offers an elegant, space-efficient solution that elevates your miniature buildings, figurines, and lights without cluttering your living area. When built properly, a floating shelf not only supports delicate decorations but also becomes a striking focal point in your home. This guide walks you through designing, constructing, and styling a custom floating shelf tailored specifically for small Christmas village pieces.
Selecting the Right Location and Assessing Load Capacity
Before any tools are picked up, determine where the shelf will go. Ideal spots include empty wall sections near windows, above door frames, or along stairwells—areas that receive natural light and foot traffic. Avoid placing shelves above radiators or near vents where temperature fluctuations could affect materials like resin or ceramic.
Wall type is critical. Drywall requires anchors or studs for secure mounting; plaster may need specialty fasteners; concrete or brick walls demand masonry bits and anchors. Use a stud finder to locate wooden studs behind drywall—these provide the strongest support. If studs aren’t aligned with your desired shelf position, toggle bolts or heavy-duty drywall anchors rated for at least 50 pounds per fixing point are essential.
Materials and Tools Checklist
Building a sturdy, invisible-support shelf means choosing the right components. The goal is strength with minimal visual intrusion—your decorations should be the stars, not the hardware.
“Floating shelves for decorative use must balance aesthetics and engineering. Even lightweight items accumulate weight, especially when combined with lighting elements.” — Daniel Reeves, Residential Woodworker & Designer
Essential Materials
- Hardwood board (birch, oak, or poplar), ¾” thick, cut to desired length (typically 24–48 inches)
- Steel floating shelf bracket kit (rated for 75+ lbs) or custom steel L-bracket
- Wood stain or paint (matte or satin finish recommended)
- Sandpaper (120 and 220 grit)
- Wood filler (for patching screw holes)
- Clear polyurethane sealant (optional, for durability)
- Level, drill, spade bit (for routing bracket channel)
- Painter’s tape, clamps, measuring tape
Optional Enhancements
- LED strip lighting (warm white, battery or plug-in)
- Non-slip shelf liner (felt or clear rubber)
- Backsplash trim (¼” x ¼” wood strip to prevent items from falling backward)
Step-by-Step Construction Guide
Follow this sequence to install a secure, level floating shelf capable of supporting a full Christmas village scene.
- Measure and mark shelf height. Standard eye-level placement is 48–60 inches from the floor. Use a pencil and level to draw a horizontal line across the wall.
- Locate and mark wall studs. Confirm spacing with a stud finder. If using drywall anchors, mark anchor points every 12 inches along the line.
- Prepare the shelf board. Cut the hardwood to size. Sand edges smooth, then sand the entire surface starting with 120-grit, finishing with 220-grit paper.
- Stain or paint the board. Apply in a well-ventilated area. Allow 24 hours drying time between coats. Two coats of stain plus one of polyurethane offer protection against minor moisture from seasonal humidity.
- Route the internal channel (if using hidden bracket). Place the bracket against the back edge of the board. Trace the mounting plate, then use a spade bit or router to carve a recessed channel so the metal plate sits flush. Depth should match bracket thickness exactly.
- Mount the bracket to the wall. Align the vertical plate with your level line and stud marks. Drill pilot holes, insert lag screws, and tighten securely. Double-check with a level.
- Slide the shelf onto the bracket. Carefully lower the routed channel onto the wall-mounted plate. Secure from above with included screws if required.
- Finish installation. Fill visible screw heads with matching wood filler. Touch up with stain. Attach backsplash trim with small brad nails if desired.
Design Considerations for Christmas Village Displays
A successful display balances visual storytelling with structural safety. Miniature villages thrive on depth, contrast, and whimsy—but all must be anchored to stable surfaces.
Weight Distribution Strategy
Place heavier items—like ceramic train stations or lit churches—near the center and close to the wall. Lighter resin deer, figures, or trees go toward the front edge. Never exceed 80% of the shelf’s maximum rated load.
Lighting Integration
LED strips add magical ambiance. Adhere warm-white strips along the back edge beneath the shelf or behind a backsplash to create a soft glow. Battery-powered options eliminate cord clutter; USB-rechargeable models reduce battery waste. Ensure wiring doesn’t interfere with mounting hardware.
Thematic Arrangement Tips
- Create a “street” layout with buildings facing inward, leaving a central path for tiny figures or trains.
- Use faux snow (cotton batting or artificial flocking) sparingly to avoid accumulation near electronics.
- Incorporate elevation with stacked books under cloth (hidden behind the shelf) to raise select buildings.
“A well-placed floating shelf turns unused vertical space into narrative real estate. Think of it as a stage for holiday memories.” — Lila Chen, Interior Stylist & Seasonal Display Consultant
Do’s and Don’ts: Shelf Safety and Longevity
| Do | Don’t |
|---|---|
| Use non-slip liner to prevent sliding during vibrations or accidental bumps | Place hot wax candles directly on wood—use LED flameless versions instead |
| Check shelf stability monthly during display season | Overhang decorations more than 2 inches beyond the shelf edge |
| Clean dust with a microfiber cloth; avoid wet wipes | Install above televisions or speakers where vibrations may loosen fixtures |
| Store decorations in labeled bins post-holiday for easy reassembly | Forget seasonal humidity—keep shelf away from steamy bathrooms or kitchens |
Real Example: A Brooklyn Apartment’s Holiday Transformation
Maria S., a graphic designer in Brooklyn, lives in a 550-square-foot apartment with no mantel or console table. Each year, her growing collection of Department 56 Snow Village pieces sat in storage due to lack of display space. In November 2023, she installed a 36-inch floating shelf above her hallway entrance—a narrow stretch of wall previously used only for coats.
She used a steel bracket system rated for 100 pounds, mounted into two wall studs. After staining the birch board to match her existing shelving, she added a thin pine backsplash painted white. She arranged six village buildings in a semi-circle, with battery-powered twinkle lights woven through faux snow at the back. A motion-sensor LED strip activated when someone walked by.
The result? A conversation-starting display that preserved floor space and protected fragile pieces from pet traffic. “It feels like magic every time I walk in,” Maria said. “And I finally get to share my collection instead of hiding it.”
Frequently Asked Questions
Can I build a floating shelf without drilling into the wall?
No truly secure floating shelf can support village decorations without wall anchoring. Adhesive shelves sold for lightweight items (like keys or spices) fail under sustained loads. For anything over 10 pounds, direct wall attachment into studs or heavy-duty anchors is mandatory.
How do I hide cords for lit decorations?
Use cord concealers—plastic raceways that stick to walls and blend with baseboards. Route wires down the wall into an outlet behind furniture. Alternatively, opt for battery-powered decorations grouped on a single rechargeable strip to minimize plugs.
Is wood the best material for a Christmas village shelf?
Yes. Solid hardwood resists warping, provides a warm aesthetic, and dampens vibrations better than glass or acrylic. Plywood works if sealed thoroughly, but solid wood looks more refined and lasts longer under seasonal use.
Final Checklist Before Installation
- ✓ Confirm wall type and choose appropriate fasteners
- ✓ Measure total weight of planned decorations
- ✓ Purchase bracket rated for at least double that weight
- ✓ Test-fit bracket and shelf before finishing wood
- ✓ Plan lighting layout and power access
- ✓ Install during daylight to assess natural light interaction
- ✓ Perform a shake test after loading: gently nudge shelf to check for wobble
Conclusion: Bring Your Holiday Story to New Heights
A floating shelf isn’t just a storage hack—it’s a way to honor tradition in modern spaces. With careful planning and attention to detail, you can craft a display that protects your cherished Christmas village while transforming overlooked walls into seasonal highlights. Whether you live in a high-rise condo or a cozy cottage, vertical space is often the last frontier for holiday creativity. By anchoring beauty safely into the wall, you ensure that every glowing window and snowy rooftop tells a story—one that rises above the everyday.


 浙公网安备
33010002000092号
浙公网安备
33010002000092号 浙B2-20120091-4
Comments
No comments yet. Why don't you start the discussion?