
Wearable technology has evolved beyond smartwatches and fitness trackers. One of the most intriguing frontiers is embedding computing power directly into everyday items—like shoes. A functional shoe computer isn't just a sci-fi fantasy; it's an achievable DIY project that combines electronics, coding, and creative engineering. Whether you're interested in tracking movement, monitoring health metrics, or simply exploring the limits of wearable tech, this guide walks you through building your own shoe-integrated computer from scratch.
Understanding the Shoe Computer Concept
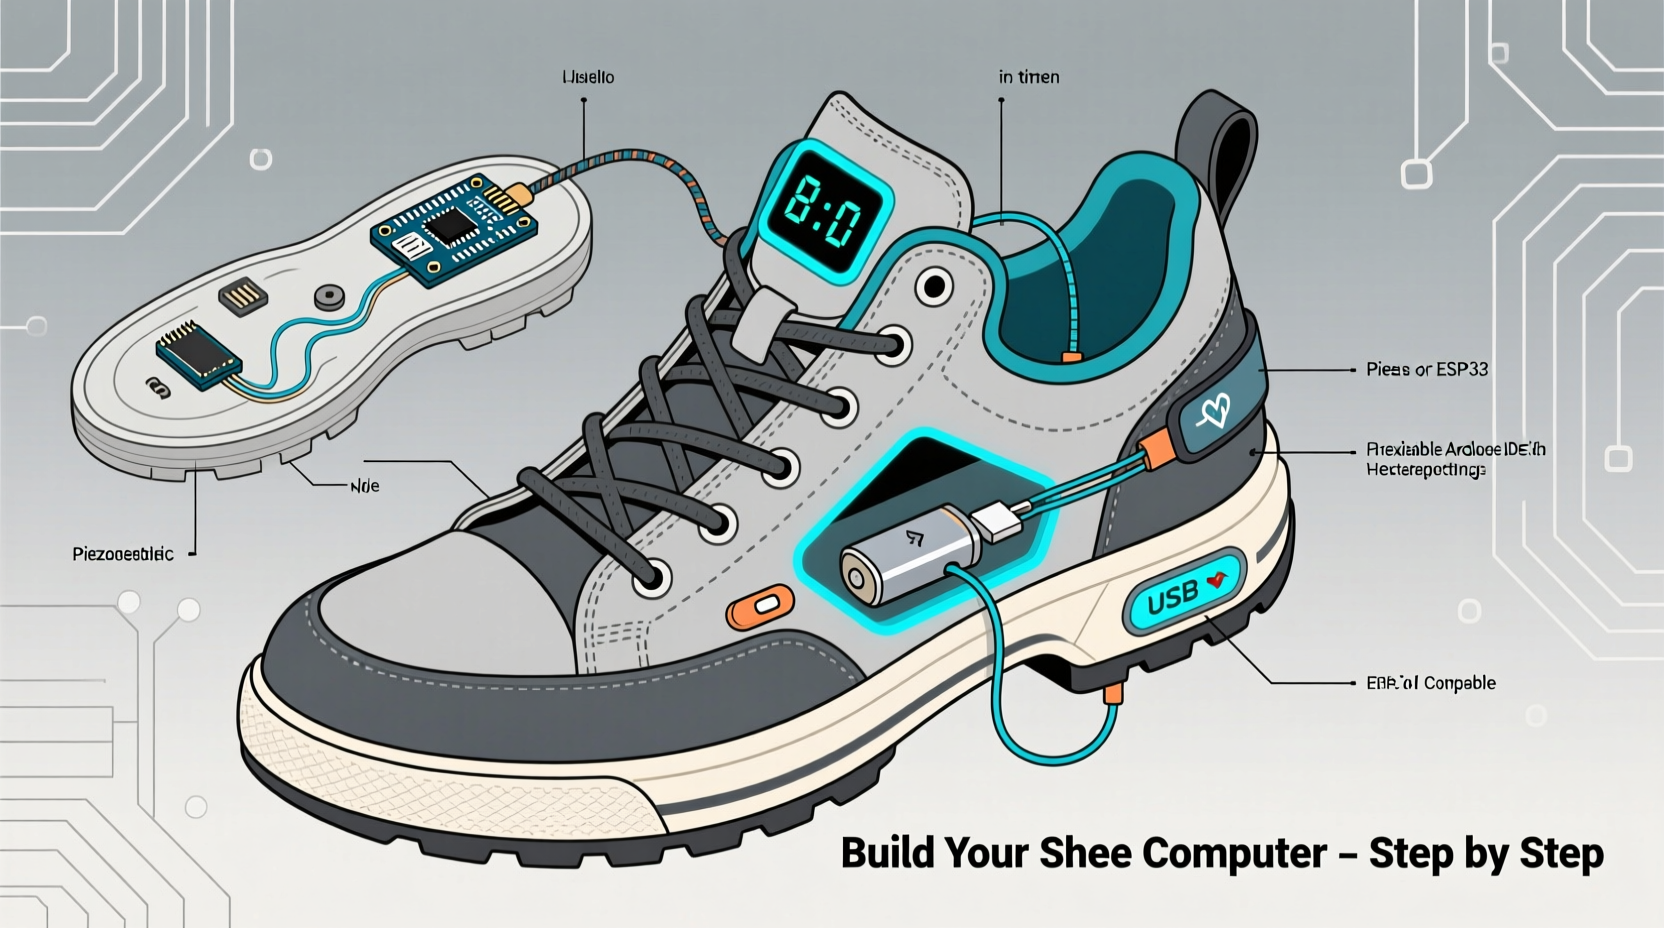
A shoe computer integrates microelectronics into footwear to collect data, respond to environmental stimuli, or communicate with other devices. Unlike commercial wearables, a DIY shoe computer allows full customization—choose what sensors to include, how data is processed, and how feedback is delivered. Common applications include gait analysis, step counting, pressure mapping, GPS tracking, or even gesture-based controls.
The core idea is miniaturization and durability. Components must be lightweight, shock-resistant, and moisture-protected while remaining unobtrusive during walking or running. The system typically includes a microcontroller, sensors, power supply, and wireless communication—all embedded within or attached to the shoe.
Essential Components and Tools
Before beginning assembly, gather all necessary hardware and tools. Most components are widely available online or from electronics suppliers. Below is a checklist of what you’ll need:
Core Electronics
- Microcontroller (e.g., ESP32 or Arduino Nano)
- Inertial Measurement Unit (IMU) sensor (MPU-6050 or BNO055)
- Pressure sensors (FSR or FlexiForce)
- Battery (3.7V LiPo, 500–1000 mAh)
- Charging module (micro-USB or magnetic)
- Bluetooth/Wi-Fi module (integrated in ESP32)
- Micro SD card module (optional, for local data logging)
Mechanical & Protective Materials
- 3D-printed enclosure or waterproof project box (mini)
- Silicone sealant or heat-shrink tubing
- Foam padding or EVA inserts for comfort
- Conductive thread or thin gauge wires
- Dual-lock tape or adhesive pads
Tools Required
- Soldering iron and solder
- Wire strippers and cutters
- Multimeter
- Hot glue gun
- Needle-nose pliers
- Computer with Arduino IDE or PlatformIO
“Wearable computing succeeds when form meets function. The shoe is one of the most underutilized platforms for biomechanical sensing.” — Dr. Lena Patel, Human-Computer Interaction Researcher, MIT Media Lab
Step-by-Step Assembly Guide
Follow this structured process to assemble your shoe computer safely and effectively. Work carefully to avoid damaging sensitive components or compromising shoe integrity.
- Design the Layout: Sketch where each component will go. Place the microcontroller near the heel, sensors under the insole, and the battery along the arch. Avoid high-pressure zones like the ball of the foot.
- Prepare the Insole: Cut shallow recesses in a removable insole using a craft knife to house sensors and wiring. Ensure openings don’t weaken structural support.
- Mount Sensors: Attach FSR sensors at key pressure points (heel, forefoot, big toe). Use conductive thread or wires to connect them to the microcontroller’s analog pins.
- Integrate IMU: Secure the MPU-6050 to the heel area using foam padding. This sensor captures motion, orientation, and acceleration—critical for gait analysis.
- Connect Power System: Solder the LiPo battery to a charging module. Enclose both in a silicone-sealed case taped to the outer sole. Route power lines via the shoe’s lace channels.
- Program the Microcontroller: Upload code that reads sensor values, processes data, and transmits results via Bluetooth to a smartphone app.
- Seal and Test: Apply silicone around wire joints and enclosures. Power on and test sensor responsiveness using a serial monitor before finalizing placement.
Data Handling and Software Integration
Raw sensor data is only useful when interpreted. The microcontroller runs firmware that samples inputs at regular intervals (e.g., 50 Hz) and packages them for transmission. Using the ESP32’s built-in Bluetooth, data can stream to a mobile application in real time.
On the receiving end, apps built with MIT App Inventor or Flutter can visualize step count, pressure distribution, or detect abnormal gait patterns. For advanced users, Python scripts on a Raspberry Pi can analyze historical data for trends.
| Sensor | Function | Data Output |
|---|---|---|
| FSR-402 | Foot pressure detection | Analog voltage (0–5V) |
| MPU-6050 | Acceleration & rotation | I²C digital signals |
| ESP32 | Processing & communication | Bluetooth Serial (UART) |
Real-World Application: Gait Analysis for Runners
Consider Maya, a long-distance runner recovering from a knee injury. She built a shoe computer using this guide to monitor her foot strike pattern. By placing dual FSR sensors under the heel and forefoot, she detected an imbalance—her left heel struck first 78% of the time, indicating overpronation.
She paired the device with a custom Android app that alerted her via vibration when asymmetry exceeded 20%. Over six weeks, she adjusted her stride using biofeedback, reducing joint stress. Her physical therapist later confirmed improved alignment during treadmill assessments.
This example shows how a DIY shoe computer can deliver personalized health insights without expensive clinical equipment.
Common Pitfalls and How to Avoid Them
Even experienced makers encounter challenges when embedding electronics in footwear. Awareness of these issues improves success rates:
- Moisture damage: Feet sweat. Always encapsulate circuits in waterproof resin or sealed enclosures.
- Loose wiring: Movement causes fatigue. Secure wires with braided sleeving and strain relief anchors.
- Battery life: Small batteries drain quickly. Implement sleep modes and reduce sampling frequency when idle.
- Discomfort: Bulky components disrupt natural movement. Prioritize flat, flexible materials and distribute weight evenly.
Frequently Asked Questions
Can I wash my shoes if they have a computer inside?
No. Remove all electronic modules before cleaning. Design your system with detachable units using magnetic connectors or snap-fit housings for easy removal.
Is it safe to walk with electronics in my shoes?
Yes, as long as components are securely mounted and insulated. Avoid sharp edges, ensure no exposed circuits touch skin, and use non-toxic sealing materials.
Can I use this for sports other than running?
Absolutely. Skaters, dancers, and martial artists have used similar setups to analyze balance, jump force, and footwork precision. Customize sensor placement based on activity-specific mechanics.
Conclusion
Building a functional shoe computer opens doors to personal health monitoring, athletic performance enhancement, and experimental interaction design. What begins as a simple step counter can evolve into a sophisticated biomechanical feedback system—all within the footprint of your daily footwear. With affordable components, open-source software, and careful craftsmanship, anyone can turn an ordinary shoe into an intelligent wearable.


 浙公网安备
33010002000092号
浙公网安备
33010002000092号 浙B2-20120091-4
Comments
No comments yet. Why don't you start the discussion?