
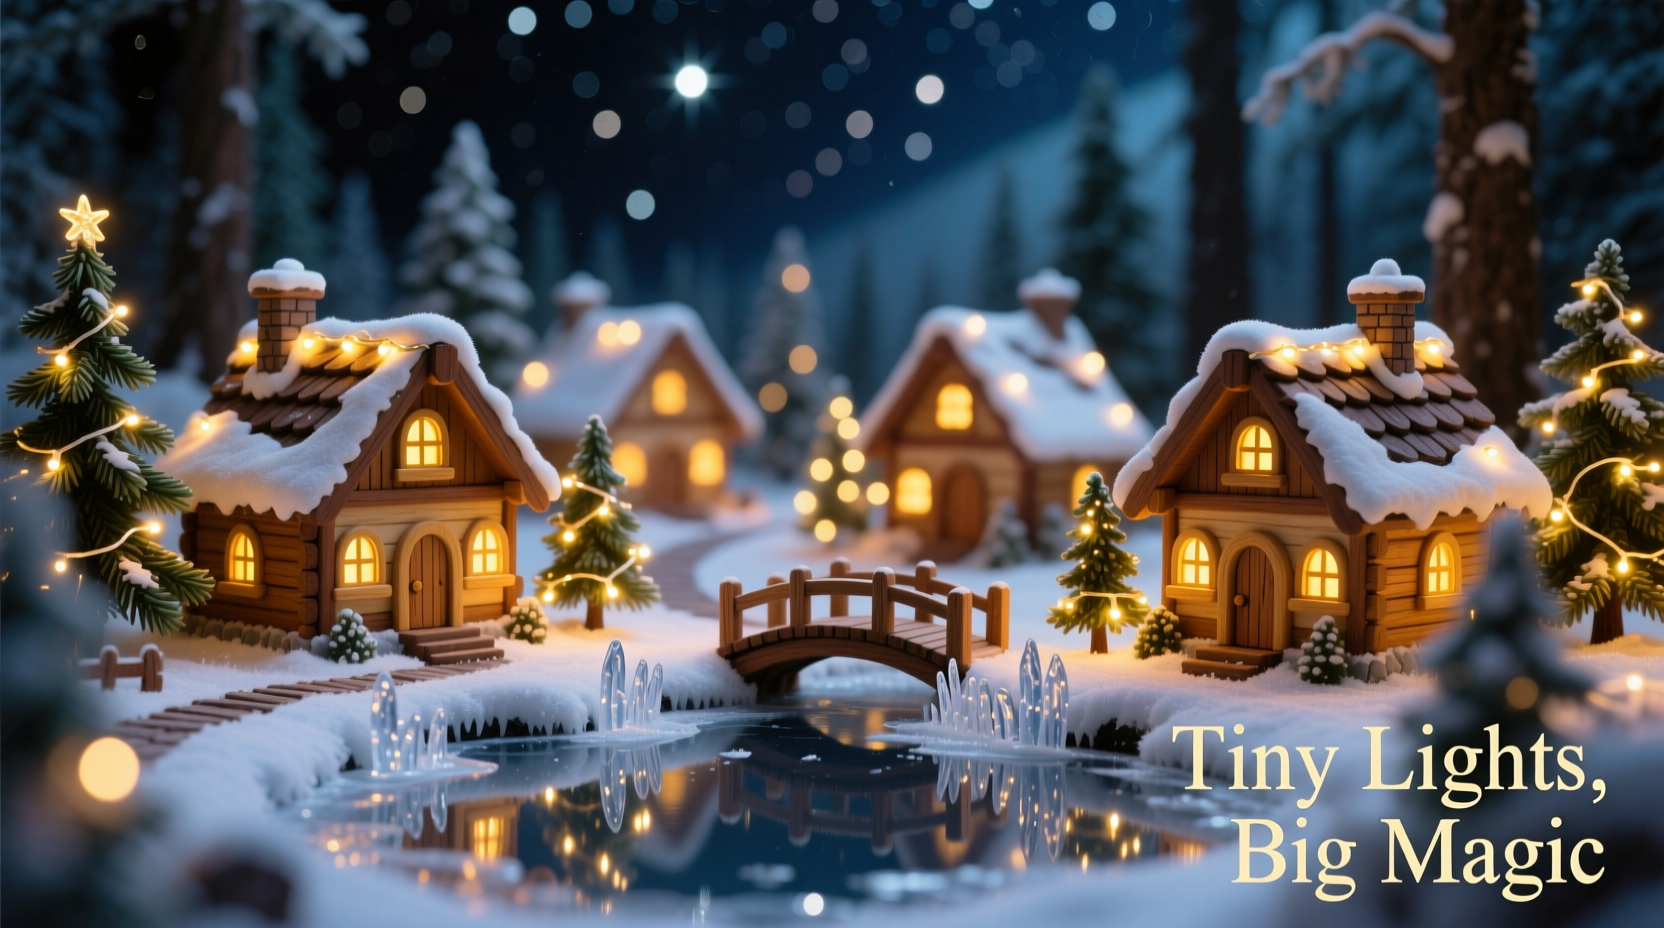
There’s something quietly magical about a miniature Christmas village: snow-dusted rooftops, glowing windows, tiny evergreens dusted with faux frost—all nestled on a shelf, mantel, or tabletop. What transforms a nostalgic decoration into a captivating centerpiece is light—not harsh or glaring, but soft, warm, and intentional. Micro LEDs offer the perfect solution: low-voltage, energy-efficient, cool-running, and incredibly versatile. Unlike traditional string lights or bulky plug-in sets, micro LEDs integrate seamlessly into scaled-down architecture without overwhelming delicate details. This guide walks through every phase of building a fully illuminated mini village—from material selection and circuit design to final placement and seasonal maintenance—grounded in real-world experience, tested techniques, and safety-first principles.
Why Micro LEDs Are Ideal for Mini Villages
Micro LEDs (typically 2–3 mm in diameter) differ significantly from standard 5 mm LEDs or incandescent fairy lights. Their small size allows them to disappear into rooflines, window frames, and chimney stacks while delivering consistent luminance. More importantly, they operate at ultra-low current (often 2–5 mA per diode) and low voltage (1.8–3.3 V DC), making them safe for hands-on assembly—even for beginners unfamiliar with electronics. They generate negligible heat, eliminating fire risk near foam, wood, or paper-based structures. And because many micro LED kits include pre-wired, insulated leads with built-in current-limiting resistors, you avoid the complexity of calculating resistor values or breadboarding circuits.
Unlike AC-powered alternatives, micro LED systems run on batteries or regulated DC adapters—ideal for villages displayed away from outlets, like on bookshelves or in glass cabinets. A single CR2032 coin cell can power up to eight warm-white micro LEDs for 40+ hours; AA or AAA battery packs extend runtime to weeks. This portability and simplicity are why hobbyists, educators, and holiday decorators increasingly choose micro LEDs over older lighting methods.
Essential Materials & Tools Checklist
Building a cohesive, illuminated village requires thoughtful curation—not just of lights, but of structural components, adhesives, and finishing elements. Below is a field-tested checklist based on dozens of completed villages (including those used in museum displays and retail window installations). Prioritize quality over quantity: one well-placed warm-white LED glows more authentically than ten mismatched cool-white ones.
- Micro LEDs: 20–40 warm-white (2700K–3000K) 2 mm or 3 mm LEDs (e.g., Kingbright APT1608SGC or generic SMD 0603 equivalents)
- Power source: One 3V CR2032 holder (for 5–10 LEDs), or a 4.5V AAA battery pack (for 15–30 LEDs); include an inline SPST toggle switch
- Wiring: 30 AWG insulated stranded wire (red/black), 6–12 inches per LED; pre-tinned ends recommended
- Village structures: Pre-cut wooden kits (e.g., Lemax or Department 56 starter sets), laser-cut plywood houses, or hand-built foam-core buildings
- Adhesives: Low-temp hot glue (for quick positioning), PVA wood glue (for permanent structural bonds), and clear-drying craft glue (for delicate paper or fabric details)
- Finishing supplies: White acrylic paint (for snow base), fine-grit sandpaper (220+), flocking powder, matte Mod Podge, and tweezers (precision tip, stainless steel)
- Tools: Wire strippers (micro-gauge), needle-nose pliers, magnifying lamp (optional but highly recommended), and a digital multimeter (for continuity checks)
Step-by-Step Assembly: From Circuit to Illumination
Lighting a mini village isn’t about brute-force wiring—it’s about strategic placement, layered circuitry, and preserving visual integrity. Follow this proven sequence to avoid backtracking or damaging structures.
- Plan your layout: Sketch a top-down map of your village footprint. Mark each building’s location and identify “light zones”: windows (interior glow), chimneys (subtle ember effect), streetlamps (upward-facing), and snow banks (edge-lit shimmer).
- Test and sort LEDs: Group LEDs by forward voltage (Vf) and luminous intensity (mcd) using your multimeter’s diode test mode. Match similar-output LEDs within the same building for uniformity.
- Wire in parallel (not series): Connect all anodes to red wire and cathodes to black wire. Parallel wiring ensures consistent brightness—even if one LED fails, the rest stay lit. Use 3–4 inch wire segments between LEDs to allow flexibility during mounting.
- Embed LEDs before final assembly: Drill 2.2 mm pilot holes for 2 mm LEDs (or 3.2 mm for 3 mm) using a pin vise. Insert LEDs so the lens sits flush with the interior surface—never protruding into the room space. Secure with a dab of clear-drying glue on the base only.
- Route wires discreetly: Run wires along roof rafters, behind false walls, or inside hollow bases. Use hot glue dabs every 1.5 inches to anchor wires without tension. Never staple or tape wires directly to foam or thin wood—they’ll pull loose when moved.
- Install the power system: Mount the battery pack in the largest building’s base or beneath the snow platform. Place the switch where it’s accessible but hidden (e.g., behind a removable fence panel). Seal all connections with heat-shrink tubing—not electrical tape—which degrades near wood glue fumes.
- Final test & refine: Power on before applying snow or flocking. Adjust LED angles with tweezers: tilt window LEDs slightly downward to simulate interior lamp glow; point chimney LEDs upward at 15° for ember illusion.
Design Principles for Authentic Lighting
Realism comes not from brightness, but from intentionality. A village lit uniformly feels artificial; one with variation feels lived-in. Consider these proven lighting strategies used by professional model railroaders and miniature set designers:
| Light Zone | Recommended Technique | Why It Works |
|---|---|---|
| Windows | Use warm-white micro LEDs mounted 1/8\" behind frosted vellum or tracing paper “window panes” | Diffuses light evenly, eliminates hotspots, mimics incandescent bulb warmth |
| Chimneys | Insert a single amber LED pointing upward, partially covered with translucent orange tissue | Creates subtle “glowing ember” effect without overpowering adjacent lights |
| Streetlamps | Mount LEDs inside hollow lamp posts, angled upward to reflect off white-painted interiors | Produces soft ambient pool of light—no visible bulb or glare |
| Snow Banks | Place cool-white LEDs horizontally beneath white foam base, facing upward at 45° | Lights flocking from below creates depth and texture, not flat brightness |
| Evergreen Trees | Wrap 3–5 micro LEDs around trunk base, hidden under bark-textured clay | Suggests buried fairy lights—no visible wiring, natural glow-from-ground-up |
Resist the urge to illuminate everything. In real life, not every window is lit at dusk—and that asymmetry builds narrative. Leave 20–30% of windows dark. Let one house glow warmly while its neighbor remains shadowed. This selective illumination invites closer inspection and rewards repeated viewing.
Mini Case Study: The Maple Street Village (Portland, OR)
In late 2022, retired schoolteacher Marta Lin built a 24-inch-wide village for her granddaughter’s kindergarten classroom. Using $42 worth of materials—including repurposed cardboard boxes, thrift-store ceramic figurines, and a $12 micro LED kit—she created a functional, child-safe display that ran continuously for 17 days during December. Her breakthrough was abandoning rigid wiring for “modular lighting”: each house had its own 3V coin-cell holder glued beneath the base, with LEDs wired directly to terminals. When one battery died, students simply swapped it out—no tools, no rewiring. She added motion-activated micro switches (using simple reed switches and magnets) so lights activated only when children leaned in close, conserving power and creating delightful interactivity. Teachers reported increased engagement in storytelling and spatial reasoning activities. As Marta noted in her workshop notes: “The lights aren’t the point—they’re the invitation. Once the kids see the glow, they want to know who lives there, what’s cooking in the kitchen, why the bakery door is open.”
“Micro LEDs changed how we think about miniature lighting—not as decoration, but as embedded storytelling. A single warm point of light in a window implies presence, warmth, memory. That’s irreplaceable.” — Dr. Alan Reyes, Director of the Miniature Museum of New England and author of Scale & Light: Illumination in Model Making
FAQ: Troubleshooting & Best Practices
Can I mix different colored micro LEDs in one circuit?
Yes—but only if they share the same forward voltage (Vf) and are wired in parallel. Warm-white (2.9V), red (1.8V), and blue (3.2V) LEDs require separate current-limiting resistors when powered from the same source. For simplicity, group by color and Vf, or use pre-resisted LED modules designed for mixed-color operation.
How do I prevent flickering or dimming after several hours?
Flickering usually indicates poor contact or battery depletion. Check solder joints (if used) or crimp connections for cold joints; ensure battery contacts are clean and spring-loaded. Dimming over time points to undersized batteries: upgrade from CR2032 to AAA pack for villages with >12 LEDs. Also verify wire gauge—30 AWG is sufficient for ≤20 LEDs at 3V, but add a 28 AWG main feed for larger layouts.
Is it safe to leave the village lit overnight?
Yes—with caveats. Micro LEDs draw so little current that thermal risk is virtually nonexistent. However, always use fresh, high-quality batteries and inspect wires monthly for insulation nicks. Never enclose batteries in airtight compartments—heat buildup accelerates discharge and may cause leakage. For extended unattended use (e.g., retail displays), opt for regulated USB power banks with auto-shutoff.
Conclusion: Your Village Awaits Its First Glow
A mini Christmas village illuminated with micro LEDs is more than a seasonal decoration—it’s a tactile act of creation, a quiet rebellion against mass-produced perfection. Every drilled hole, every twisted wire, every carefully angled LED reflects patience and presence. You don’t need engineering credentials or a dedicated workshop. You need curiosity, a steady hand, and willingness to start small: one house, three windows, two warm-white points of light. That first glow—soft, golden, unmistakably alive—is the moment the village stops being craft and begins telling its story. So gather your materials, sketch your first layout, and trust the process. Build slowly. Test often. Embrace the slight asymmetry—the crooked roofline, the uneven snow drift, the one window that glows just a little brighter. Those imperfections are where magic takes root. And when December arrives, and your village rests on the shelf, softly aglow, remember: you didn’t just assemble lights and wood. You built wonder—one micro LED at a time.


 浙公网安备
33010002000092号
浙公网安备
33010002000092号 浙B2-20120091-4
Comments
No comments yet. Why don't you start the discussion?