
Every holiday season, millions of homes light up with festive displays, but few offer the flexibility to adapt year after year without starting from scratch. Traditional setups often involve tangled wires, mismatched strands, and hours spent rewiring or replacing burned-out bulbs. A better approach is to build a modular Christmas light grid—a structured, reusable system that allows you to rearrange, expand, or downsize your display with minimal effort.
A modular grid transforms seasonal decorating from a chore into a creative process. By designing your lighting infrastructure around standardized, interchangeable units, you can swap configurations, repurpose sections for different areas, and store components efficiently. Whether you're illuminating a rooftop, wrapping trees, or outlining windows, this system saves time, reduces waste, and enhances visual consistency across years.
Why Go Modular? The Long-Term Benefits
Traditional Christmas lights are often strung in long, fixed sequences. Once installed, they’re difficult to modify. If one section fails, it can take down an entire run. Worse, storage usually results in knots and damaged sockets, leading to replacement costs every few seasons.
A modular grid solves these problems by breaking the display into independent, self-contained units. Each module operates autonomously, so failure in one doesn’t affect others. You can test, repair, or replace individual segments without dismantling the whole setup. This modularity also supports scalability—start small and grow your display over time.
“Modular systems aren’t just about convenience—they’re about sustainability. When lights are designed for reuse and repair, families cut their holiday waste by up to 60%.” — Marcus Tran, Smart Holiday Lighting Consultant
Beyond environmental impact, modularity improves safety. With shorter, standardized runs, voltage drop is minimized, reducing overheating risks. Power distribution becomes predictable, and troubleshooting is faster. For homeowners who enjoy evolving their displays annually, a modular grid offers unmatched creative freedom.
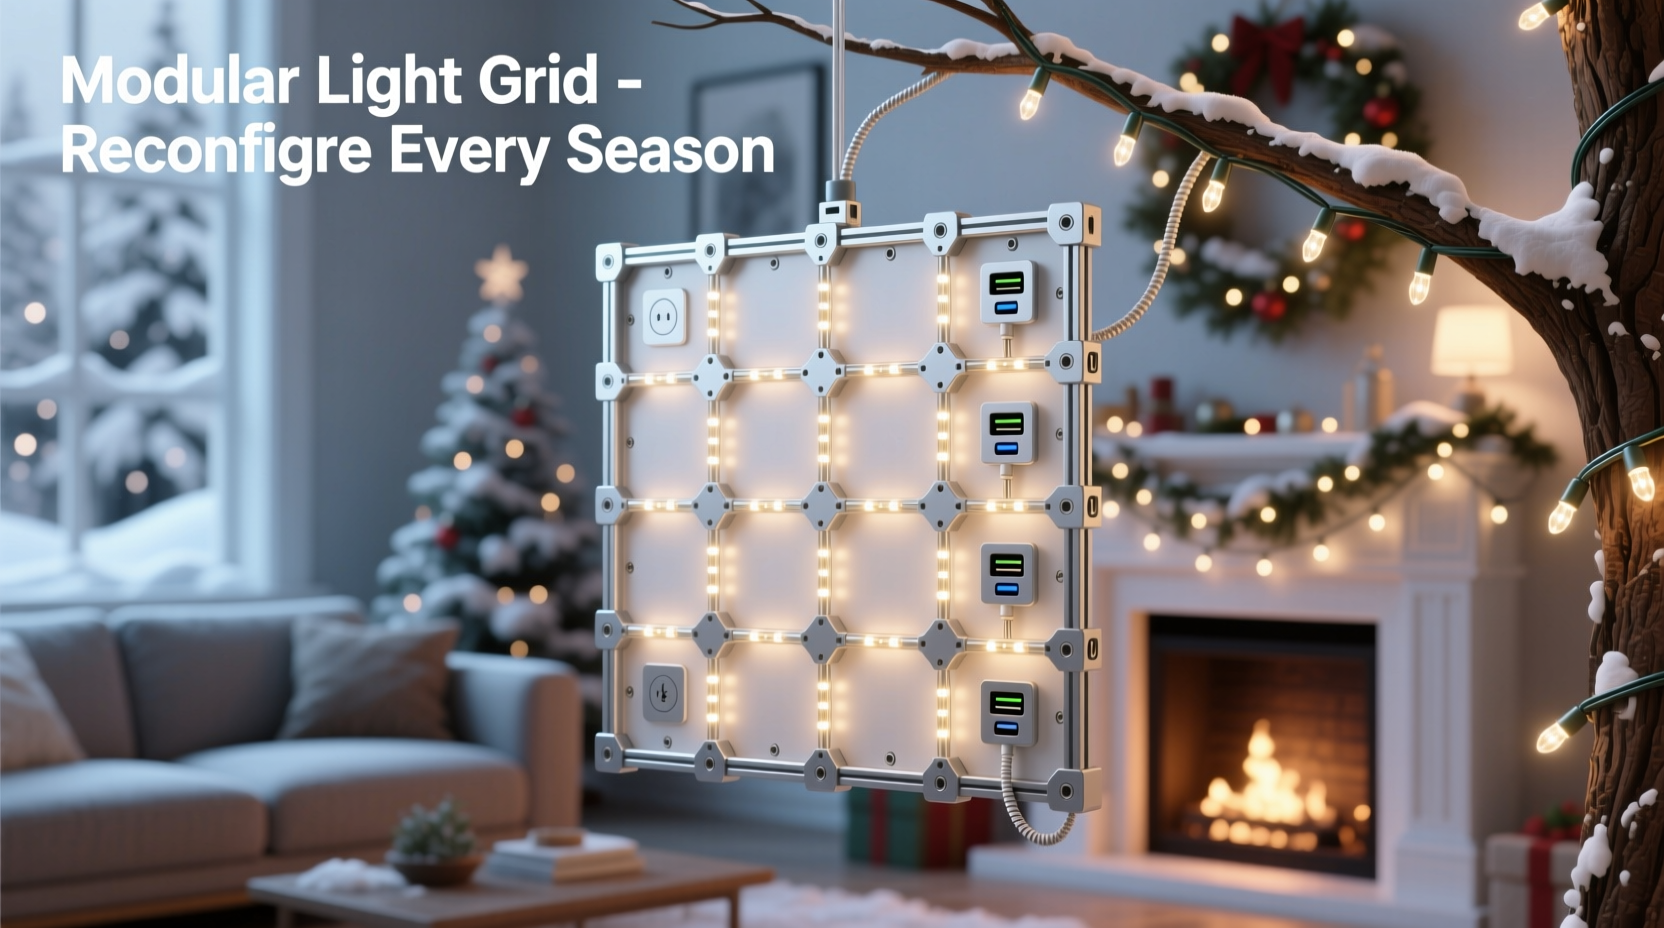
Core Components of a Modular Light Grid
To build a functional modular system, you need more than just LED strings. The key is selecting compatible, durable parts that work together seamlessly. Below are the essential elements:
- Standardized LED Panels or Grid Frames: Pre-built 1x1 ft or 2x2 ft wire grids where lights are mounted. These serve as the base units.
- Weatherproof Connectors: Use locking connectors like IP68-rated plugs instead of twist-on types to prevent disconnections during wind or rain.
- Uniform Power Supplies: Choose a single voltage (e.g., 12V DC) and amperage rating across all modules to ensure compatibility.
- Interchangeable Cables: Color-coded, labeled cables with consistent lengths (e.g., 3 ft, 6 ft) make reassembly intuitive.
- Mounting Hardware: Clips, hooks, or magnetic fasteners that allow quick attachment to gutters, fences, or frames.
- Control Hub (Optional): For synchronized effects, use a central controller that communicates via DMX or Wi-Fi with individual modules.
Step-by-Step Guide: Building Your First Module
Start by constructing a single prototype module. Once proven, replicate it across your display. Follow this sequence:
- Design the Frame: Cut a square or rectangular frame from PVC pipe or aluminum conduit. A 2’ x 2’ size is ideal for balance between coverage and portability.
- Plan Light Spacing: Decide on bulb density—typically 12 to 24 LEDs per panel for even glow. Mark positions evenly along the frame.
- Attach Lights: Use zip ties or silicone clips to secure string lights to the frame. Avoid sharp bends; maintain gentle curves to extend LED lifespan.
- Wire the Module: Connect the light strand to a junction box at one corner. Include a fuse (if using 12V systems) and terminate with a male/female waterproof connector.
- Test Independently: Power the module separately before integrating. Check for flickering, dim spots, or heat buildup.
- Weatherproof: Seal all connections with dielectric grease and heat-shrink tubing. Wrap exposed boxes in outdoor-rated tape or enclosures.
- Label & Store: Tag the module clearly and store flat in a labeled bin with other matching units.
Repeat this process to create additional modules. Over time, you’ll build a library of interchangeable panels that can be arranged in grids, zigzags, borders, or standalone accents.
Planning the Layout: Flexibility Through Design
The true power of modularity lies in layout versatility. Instead of committing to a fixed pattern, design multiple configurations in advance. Sketch three options: a full-front layout, a minimalist trim outline, and a tree-wrapping variation. Assign module numbers to each position so you know exactly which panel goes where.
Use a spreadsheet or simple diagram to map out annual themes. For example:
| Year | Theme | Modules Used | Configuration |
|---|---|---|---|
| 2023 | Classic White Border | A1–A6 | Gutter line + roof corners |
| 2024 | Color Wave Effect | A1–A4, B1–B4 | Zigzag across eaves with alternating colors |
| 2025 | Festive Tree Accents | B1–B6 | Wrapped around three front-yard trees |
This planning ensures you only build what you need and can adapt based on available modules. It also helps budget future purchases—knowing you’ll need two more blue-tinted modules for next year’s theme, for instance.
Power Distribution and Safety Considerations
One of the biggest challenges in modular lighting is managing power delivery across multiple units. Voltage drop can cause dimming in longer chains, especially with low-voltage DC systems. To avoid this:
- Limit daisy-chained modules to 3–4 units per circuit.
- Use heavier-gauge wiring (18 AWG or lower) for feeder cables.
- Deploy a central power distribution block with individual fused outputs.
- Calculate total load: Sum the wattage of all active modules and ensure your transformer or power supply exceeds that by at least 20%.
Ground-fault protection is non-negotiable. Plug all circuits into GFCI outlets or use GFCI-protected extension cords. Never bury connections in snow or let them sit in puddles—even waterproof isn’t foolproof under prolonged submersion.
Storage and Maintenance for Year-Round Readiness
The longevity of your modular grid depends heavily on off-season care. Poor storage leads to broken connectors, corroded contacts, and brittle wires. Follow these best practices:
- Disassemble carefully—don’t yank modules apart by the cables.
- Clean gently with a dry cloth; avoid water unless absolutely necessary.
- Inspect each unit for damage: cracked housings, loose bulbs, frayed wires.
- Store modules flat in stackable plastic bins. Avoid placing heavy items on top.
- Coil cables loosely (over-the-hand method) and secure with Velcro straps—not twist ties.
- Keep everything in a climate-controlled space. Attics and garages expose materials to extreme temperature swings.
Before next season, conduct a full diagnostic. Power up each module individually and document performance. Replace any failing units early so replacements can be ordered in time.
Mini Case Study: The Johnson Family’s Evolving Display
The Johnsons in Portland, Oregon, used to spend 12 hours every November untangling old lights and patching together mismatched strands. After two failed attempts at a “smart” Wi-Fi system that couldn’t handle outdoor conditions, they decided to build their own modular grid.
In year one, they constructed six 2’ x 2’ white-light panels using aluminum frames and commercial-grade LED strings. Each had a standard IP68 connector and was labeled clearly. They powered them through a single 12V 10A power supply with a splitter block.
The first layout outlined their roofline. The following year, they added four colored panels and rearranged the grid into a cascading wave across the front porch. In year three, they repurposed eight panels to wrap trees and accent walkways—something previously impossible due to cord length limitations.
Setup time dropped from 12 hours to under 3. Storage became organized, and repair needs were minimal. “We actually look forward to decorating now,” says Sarah Johnson. “It’s like putting together a puzzle we’ve done before—but better each time.”
Checklist: Building and Maintaining Your Modular Grid
- ☐ Choose a standard module size and voltage
- ☐ Source weatherproof connectors and uniform cables
- ☐ Construct first prototype and test reliability
- ☐ Create at least 4 identical modules for initial deployment
- ☐ Map out at least two seasonal configurations
- ☐ Inspect all modules before setup
- ☐ Verify power supply capacity
- ☐ Use labeled, color-coded cables
- ☐ Secure mounting points to avoid sagging
- ☐ Test entire grid before finalizing placement
- ☐ Clean and inspect each module
- ☐ Repair or replace faulty units immediately
- ☐ Store in labeled, protective containers
- ☐ Document configuration used and plan for next year
Frequently Asked Questions
Can I mix AC and DC modules in the same grid?
No. Mixing voltages creates safety hazards and can damage equipment. Stick to one system—preferably low-voltage DC for better control and safety. If you must use AC strings, keep them on separate circuits with dedicated timers.
How many modules can I connect to one power supply?
It depends on the wattage. Calculate: (Power Supply Wattage × 0.8) ÷ (Wattage per Module) = Maximum Modules. For example, a 120W supply running 15W modules supports up to six modules (120 × 0.8 = 96; 96 ÷ 15 ≈ 6).
What if I want animated effects later?
Design with expansion in mind. Use addressable LEDs (like WS2812B) from the start, even if you run them in static mode initially. This allows firmware upgrades later for chases, fades, or music sync without rebuilding hardware.
Conclusion: Turn Tradition Into Innovation
Building a modular Christmas light grid isn’t just a technical upgrade—it’s a shift in mindset. It replaces frustration with foresight, chaos with order, and repetition with creativity. Once established, your system will save dozens of hours over the years, reduce holiday stress, and elevate your home’s curb appeal with professional-grade precision.
Start small. Build one module this off-season. Test it. Refine it. Then scale. Within three years, you could have a fully adaptable lighting ecosystem that grows with your family’s traditions. The holidays are about joy, not logistics. Make yours easier, smarter, and more sustainable—one modular panel at a time.


 浙公网安备
33010002000092号
浙公网安备
33010002000092号 浙B2-20120091-4
Comments
No comments yet. Why don't you start the discussion?