
Traditional Christmas trees are beautiful but often messy, time-consuming to set up, and difficult to store. A modular Christmas tree offers a smarter alternative—customizable, reusable, and designed for hassle-free assembly and compact storage. Whether you're an experienced DIYer or new to home crafting, building your own modular tree combines practicality with creative expression. This guide walks you through the entire process, from planning and materials to final decoration, ensuring your holiday centerpiece is both festive and functional.
Why Choose a Modular Design?
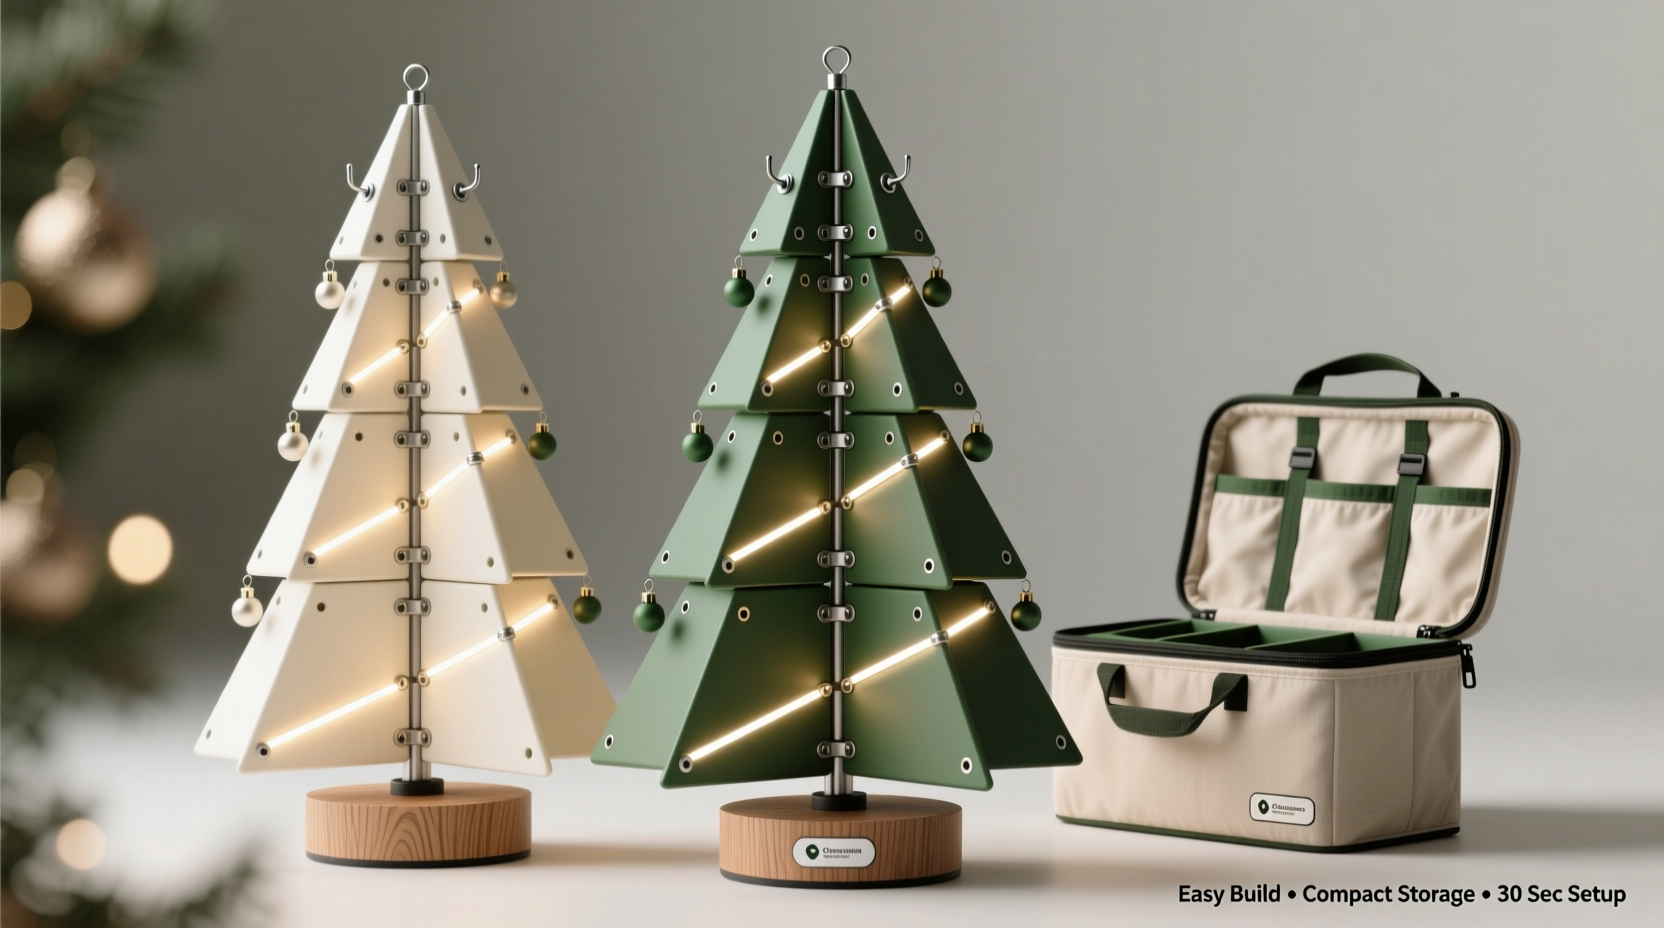
A modular Christmas tree is constructed in segments that can be independently assembled and stacked. Unlike a single-piece artificial tree or a real pine, each section stores flat or compactly and reassembles quickly. The benefits extend beyond convenience:
- Space efficiency: Ideal for small apartments, renters, or homes with limited storage.
- Durability: Built once, used for years with minimal wear.
- Customization: Adjust height, width, and shape to fit any room.
- Eco-friendliness: Reduces waste by eliminating annual tree purchases.
- Reusability: No more tangled lights or bent branches year after year.
Modular doesn’t mean generic. With thoughtful design, your tree can rival—or surpass—the look of traditional trees while offering unmatched flexibility.
Planning Your Tree: Size, Shape, and Structure
Before cutting any material, define your tree’s footprint. Consider room height, floor space, and desired aesthetic. Most modular trees use a tiered cone structure, but geometric, wall-mounted, or abstract designs are also possible.
Start by sketching a basic blueprint. Decide on:
- Total height (standard range: 5–8 feet)
- Number of modules (3–5 tiers typical)
- Diameter at base and top of each segment
- Connection method between sections
For a classic conical shape, taper each module so upper tiers are smaller than lower ones. A common ratio reduces diameter by 6–8 inches per tier. For example:
| Tier | Height (inches) | Base Diameter (inches) | Top Diameter (inches) |
|---|---|---|---|
| Bottom | 24 | 36 | 28 |
| Middle | 24 | 28 | 20 |
| Top | 24 | 20 | 12 |
| Finial | 12 | 12 | — |
This creates a balanced 7-foot tree with proportional tapering. Each tier forms a frustum (a cone with the top cut off), which can be built from wire frames, wooden rings, or folded panels.
“Modularity isn’t just about disassembly—it’s about designing for repetition, alignment, and long-term usability.” — Daniel Reyes, Industrial Designer & Sustainable Holiday Advocate
Step-by-Step Construction Guide
Follow this sequence to build a durable, stackable tree using common workshop tools and materials.
- Select Materials: Choose based on weight, cost, and finish. Options include:
- Plywood (¼” or ½”): Sturdy, paintable, ideal for laser-cut shapes.
- PVC pipe: Lightweight, weather-resistant, great for frame-only builds.
- Aluminum rods or conduit: Strong and slim, good for minimalist silhouettes.
- Foam board or corrugated plastic: Lightest option, best for indoor use only.
- Cut Tier Circles: For a conical design, cut two concentric circles per tier—one for the base, one for the top. Connect them with vertical spacers or angled side panels. Use a jigsaw for wood or a utility knife for foam.
- Create a Central Support: Insert a threaded rod, wooden dowel, or metal pole through the center of each tier. Secure with washers and wing nuts at each level. This ensures alignment and prevents wobbling.
- Attach Branch Supports: Install horizontal arms or spokes radiating from the center. These hold garlands, lights, or individual \"branches\" made from bundled twigs, fabric strips, or pre-lit wires.
- Add Connection Points: Use L-brackets, snap-fit joints, or interlocking tabs to secure tiers. Label each section (e.g., \"Tier 1 – Bottom\") to simplify reassembly.
- Finish Surfaces: Sand edges, apply primer, then spray-paint green (or another color). Matte finishes reduce glare; textured coatings mimic bark.
- Incorporate Lighting: String battery-operated fairy lights along armatures or embed LED strips into grooves. Pre-wire each tier so only one plug is needed at the base.
Assembly should take under 30 minutes once built. Disassembly is even faster—simply unscrew or unclip sections and stack flat.
Real-World Example: The Urban Apartment Solution
Sophie, a graphic designer in Brooklyn, lives in a 500-square-foot loft with no basement or garage. Every December, she struggled with her old 6-foot artificial tree—bulky to store, awkward to fluff, and always shedding plastic needles.
After researching alternatives, she built a three-tier modular tree from birch plywood. Each section was 22 inches tall with diameters decreasing from 32 to 16 inches. She used a ¾-inch steel rod as the spine and attached copper wire arms to drape eucalyptus garlands and mini string lights.
The result? A sleek, modern tree that assembles in 15 minutes and stores in a closet behind her door. The entire system fits in two flat boxes measuring 34x12x4 inches. “It looks like something from a boutique hotel,” she says. “And I don’t have to dread putting it away.”
Storage and Maintenance Tips
The true value of a modular tree lies in its longevity. Proper care ensures it remains stable and attractive for many seasons.
- Label all parts: Tag connectors, tiers, and hardware bags for quick identification.
- Use padded containers: Store components in fabric-wrapped bins or lined cardboard trays to prevent scratches.
- Inspect annually: Check for warping, loose fasteners, or frayed wiring before setup.
- Keep clean: Wipe down surfaces with a dry microfiber cloth; avoid moisture on wood or metal.
- Store vertically if possible: Prevents pressure on delicate edges and saves floor space.
If using natural elements like dried foliage or fabric boughs, replace them yearly while keeping the core structure intact.
Do’s and Don’ts of Modular Tree Building
| Do’s | Don’ts |
|---|---|
| Design for symmetry and balance | Overload upper tiers with heavy decorations |
| Use standardized connectors across tiers | Mix incompatible materials (e.g., rigid wood with flexible plastic joints) |
| Pre-drill holes to prevent splitting | Ignore ceiling height when choosing total tree size |
| Test stability before decorating | Leave exposed wiring or sharp edges |
| Include a finial or cap piece for polish | Forget to plan for power access if using lights |
Frequently Asked Questions
Can I make a modular tree without power tools?
Yes. Simple designs using cardboard, foam board, or pre-cut wooden rings can be assembled with glue, tape, and hand tools. Focus on lightweight materials and avoid large or load-bearing structures.
How do I decorate a modular tree differently each year?
Because the frame stays consistent, you can change the theme entirely by altering the covering. Try wrapping tiers in burlap, draping tinsel netting, hanging ornaments from hooks, or attaching removable fabric \"skirts.\" Swap out light colors or add seasonal banners for variety.
Is a modular tree safe around children and pets?
When properly secured, yes. Anchor the base to a wall stud if needed, cover sharp points, and use shatterproof ornaments. Avoid toxic paints or finishes if kids or pets may touch the tree.
Checklist: Build Your Modular Christmas Tree
- ☐ Measure available space and choose final dimensions
- ☐ Sketch a tiered design with labeled sections
- ☐ Select durable, lightweight materials
- ☐ Cut base and top rings for each tier
- ☐ Assemble side panels or spacers to form frustums
- ☐ Install central support rod with securing hardware
- ☐ Attach branch arms or decoration mounts
- ☐ Test stacking order and stability
- ☐ Paint or finish all surfaces
- ☐ Add lighting and test electrical connections
- ☐ Label each component for storage
- ☐ Pack in flat, protected containers
- ☐ Reassemble and decorate next season!
Conclusion: A Tradition That Grows Smarter Each Year
Building a modular Christmas tree isn’t just a DIY project—it’s an investment in future holidays. By designing for ease of assembly and compact storage, you eliminate the stress of seasonal decor while creating a personalized centerpiece that evolves with your taste. Whether you prefer rustic charm, modern minimalism, or whimsical flair, the modular approach gives you control, consistency, and lasting joy.


 浙公网安备
33010002000092号
浙公网安备
33010002000092号 浙B2-20120091-4
Comments
No comments yet. Why don't you start the discussion?