
For urban dwellers, renters, and anyone living in under-500-square-foot spaces—studio apartments, micro-lofts, dorm rooms, or compact condos—the traditional 6-foot Christmas tree isn’t just impractical; it’s often impossible. It blocks doorways, crowds narrow hallways, overwhelms minimalist furniture layouts, and becomes a logistical headache for assembly, decoration, and post-holiday storage. Yet the desire for seasonal warmth, ritual, and visual joy remains undiminished. That’s where modular design steps in—not as a compromise, but as an intentional upgrade. A modular Christmas tree is not a “smaller version” of a standard tree. It’s a thoughtfully segmented system: lightweight, scalable, customizable in height and fullness, and engineered for vertical efficiency and flat-pack storage. This approach transforms spatial constraints into creative opportunities—letting you celebrate with intention, elegance, and zero guilt about square footage.
Why Modular Beats Traditional in Tight Quarters
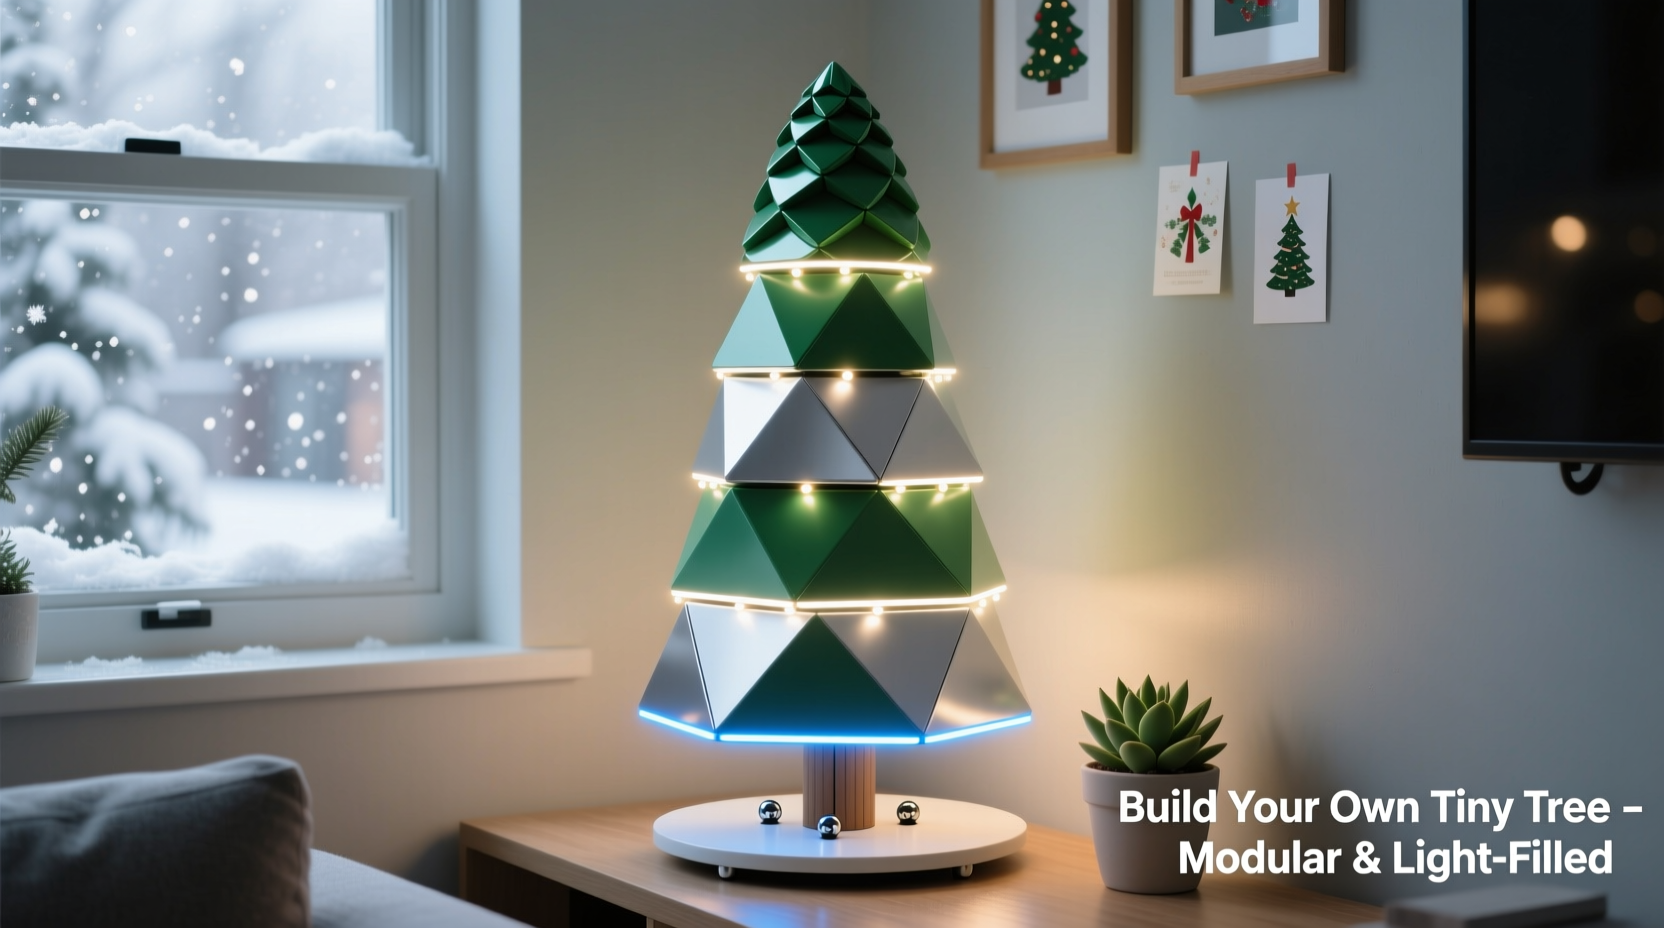
Conventional artificial trees rely on a single central pole, rigid branch hinges, and dense foam or PVC foliage that expands radially. In tight spaces, that radial expansion is the problem. A 4-foot tree may still require a 36-inch diameter footprint—more than half the width of many studio living areas. Modular trees eliminate this by decoupling structure from form. Each tier is an independent unit—often built around a lightweight aluminum or powder-coated steel ring or hub—that stacks vertically using threaded rods, friction-fit poles, or interlocking dowels. Branches attach per tier, not per trunk, allowing precise control over density, shape, and even color variation (e.g., white tips on lower tiers, frosted green on upper ones). Crucially, no single component exceeds 18 inches in any dimension when disassembled—making storage feasible in under-bed bins, closet shelves, or even behind a bathroom door.
Modularity also supports adaptability across seasons and life stages. You might start with a two-tier “mini-spruce” for your first year in a 320-square-foot apartment. Add a third tier when you move into a slightly larger loft. Swap out LED-lit tiers for battery-operated fairy-light rings during travel months. Replace worn-out branches without replacing the entire tree. This isn’t just space-saving—it’s future-proofing your holiday tradition.
Core Components & What to Source
Building a modular tree requires three functional layers: structural support, branch modules, and decorative integration. Unlike off-the-shelf options—which often sacrifice quality for low cost—building your own lets you curate each layer for durability, aesthetics, and spatial intelligence.
Structural Support begins with the spine: a central vertical rod. Use ¾-inch-diameter anodized aluminum tubing (not PVC or thin steel)—it’s rigid enough to resist wobble yet light enough to handle solo. Cut it to your desired maximum height (e.g., 54 inches), then drill evenly spaced ¼-inch threaded holes every 12 inches for tier attachment. At the base, embed a 6-inch-wide, 1-inch-thick circular plywood disc (sanded and sealed) with a centered ¾-inch hole. This serves as both stabilizer and aesthetic base—paint it matte black, walnut stain it, or wrap it in jute twine.
Branch Modules are the heart of modularity. Each tier consists of a circular hub (laser-cut ⅛-inch birch plywood or recycled ABS plastic) with 8–12 evenly spaced ¼-inch dowel sockets. From each socket extends a 12- to 18-inch flexible branch arm—preferably made from memory wire wrapped in PVC-coated copper or high-grade PE foliage. Why memory wire? It holds bends indefinitely, so you can sculpt outward angles to clear nearby furniture—or tuck branches inward to fit beside a bookshelf. Pre-wire each branch with micro-LEDs before wrapping (see wiring section below).
Decorative Integration goes beyond ornaments. Since modular trees have visible hubs and rods, treat them as design features. Use matte-finish brass or matte black hex nuts to secure tiers. Thread vintage-style Edison bulbs along the central rod between tiers. Attach removable fabric “skirt bands” (linen or velvet) around the base disc to conceal wiring and add texture. These details elevate function into intentionality.
Step-by-Step Assembly Timeline
Build your tree in four focused sessions—each taking under 90 minutes—spread across one weekend. This prevents fatigue-related errors and allows time for adhesive curing or paint drying.
- Day 1, Morning (60 min): Frame Fabrication
Drill and tap attachment holes in the central rod. Sand and seal the base disc. Assemble and test-fit all hub rings onto scrap dowels to confirm socket alignment. - Day 1, Afternoon (75 min): Branch Wiring & Wrapping
Solder micro-LEDs (3V coin-cell compatible) to 28-gauge stranded wire. Route wires through hollow memory wire arms before wrapping with foliage. Test each branch with a multimeter for continuity. - Day 2, Morning (45 min): Tier Construction
Insert pre-wired branches into hub sockets. Secure with UV-resistant epoxy. Let cure 2 hours. Attach a 6-inch length of braided nylon cord to each hub’s center for hanging or tensioning. - Day 2, Afternoon (30 min): Final Stack & Calibration
Insert rod into base disc. Stack tiers from bottom up, tightening locking nuts finger-tight only. Use a smartphone level app to verify vertical alignment. Adjust branch angles to achieve balanced silhouette—wider at base, gently tapering upward.
Once assembled, your tree will stand stable on just 14 inches of floor diameter—less than the footprint of a standard office chair. Its open structure allows airflow (reducing dust accumulation) and visibility (no “tree wall” blocking sightlines to windows or artwork).
Smart Space-Saving Design Principles
Modularity alone doesn’t guarantee spatial harmony. Success depends on applying interior-design logic to your tree’s physical presence. These principles—tested in real micro-dwellings—are non-negotiable.
| Principle | Implementation | Why It Works in Tiny Spaces |
|---|---|---|
| Vertical Emphasis | Use 5–7 inch taller tiers toward the top; limit lower-tier branch length to 12 inches | Draws the eye upward, enhancing perceived ceiling height—critical in low-ceiling studios |
| Transparency | Leave 40% of branch surface unfoliaged; use frosted or translucent LED diffusers | Prevents visual “bulk”—lets light pass through, maintaining openness |
| Multi-Function Anchoring | Mount base disc to a repurposed IKEA RÅSKOG cart or wall-mounted shelf bracket | Turns tree into mobile decor or integrated shelving—no dedicated floor space needed |
| Zero-Clutter Wiring | Run all wires internally through hollow rod; power via single USB-C adapter hidden in base disc | Eliminates tripping hazards and tangled cords—essential in high-traffic micro-kitchens |
One overlooked advantage: thermal efficiency. Traditional trees trap heat near ceilings, worsening stratification in small, poorly insulated units. A modular tree’s open lattice allows warm air to circulate freely—contributing subtly to energy savings during December heating cycles.
Mini Case Study: Maya’s 280-Square-Foot Loft
Maya Chen, a graphic designer in Portland’s Pearl District, moved into a converted warehouse loft with exposed brick, 9-foot ceilings, and exactly one usable corner: 22 inches wide and 36 inches deep. Her previous 4-foot flocked tree had toppled twice—once onto her record player, once into her espresso machine. She built her first modular tree using salvaged aluminum tubing from a broken bike rack, laser-cut hubs from a local maker space, and reclaimed copper wire from old electronics.
Her solution: a three-tier tree (36 inches tall) anchored to a wall-mounted oak shelf bracket. Each tier has six branches angled at 30 degrees outward—just enough to suggest fullness without encroaching on her dining nook. She embedded warm-white LEDs with a motion sensor: lights brighten only when she enters the living zone, dimming automatically after 90 seconds. The base disc doubles as a coaster tray for holiday mugs. Total build cost: $83. Total floor footprint: 0 square inches—every inch is wall- or shelf-integrated. “It doesn’t feel like I’m making do,” she says. “It feels like my space finally has a centerpiece that *belongs*.”
“Modular isn’t about downsizing joy—it’s about engineering resonance. When your tree fits your architecture, not the other way around, the season feels deeper, not smaller.” — Lena Torres, Architectural Designer & Founder of Compact Living Lab
Essential Tools & Materials Checklist
- Anodized aluminum tubing (¾-inch diameter, 60-inch length)
- ¼-inch hardwood dowels (12 pieces, 18-inch length)
- Laser-cut birch plywood hubs (3–5 units, 6-inch diameter)
- Memory wire (0.8mm diameter, 50 feet)
- Micro-LED string lights (USB-C powered, 100-lumen output)
- UV-resistant epoxy adhesive
- Matt-black locking nuts & washers (M8 x 1.25 thread)
- Sealed plywood base disc (6-inch diameter, 1-inch thick)
- Matte black spray paint (for rod and hardware)
- Digital caliper & smartphone level app
FAQ
Can I hang heavy ornaments on a modular tree?
Yes—but distribute weight strategically. Hang heavier items (wooden stars, ceramic baubles) directly on hub rings or the central rod’s lower third, where structural load is highest. Avoid attaching anything over 4 oz to individual memory wire branches. Use ornament hangers with silicone grips to prevent slippage on smooth rods.
How do I store it without losing parts?
Use labeled, stackable 12x12x4-inch archival boxes: one for rods/hardware, one for hubs, one for branches. Place a printed assembly diagram inside each box. Store boxes vertically—like books—in a closet. Never bag components loosely; vibration during storage causes nuts to loosen and wires to tangle.
Is it safe around pets and small children?
Far safer than traditional trees. No water reservoir (eliminating drowning/tipping risks), no sharp plastic branch tips (memory wire is blunt and flexible), and no loose electrical cords (all wiring is internal). The base disc’s low profile prevents tripping, and its weight (2.3 lbs) makes it stable against curious nudges. Still, avoid placing near unstable furniture pets might climb.
Conclusion
A modular Christmas tree isn’t a concession to small space living—it’s a declaration of design literacy, seasonal intention, and spatial respect. It acknowledges that joy doesn’t scale with volume, and celebration needn’t demand real estate. By building your own, you’re not just assembling metal and wire; you’re curating an object that reflects how you inhabit your world—with precision, care, and quiet confidence. Every tier you stack, every branch you angle, every light you program is a small act of belonging. Your space is not too small for tradition. It’s ready for reinvention.
Start simple: order the tubing and base disc this week. Sketch your ideal silhouette on scrap paper—tall and slender? Short and sculptural? Let your walls, your light, your daily rhythm inform the shape. Then build—not to fill space, but to honor it.


 浙公网安备
33010002000092号
浙公网安备
33010002000092号 浙B2-20120091-4
Comments
No comments yet. Why don't you start the discussion?