
Accurate color representation is often associated with photo editing or video production, but it’s just as critical for gamers who demand visual fidelity, depth, and realism. A poorly calibrated gaming monitor can distort hues, wash out shadows, or exaggerate brightness, leading to missed details in dark corners of a game or misjudged environmental cues. True color accuracy ensures that what you see on screen matches the developer’s intent—rich blacks, natural skin tones, and vibrant yet realistic environments. Achieving this requires more than adjusting brightness and contrast; it demands a deliberate calibration process that balances hardware settings, ambient lighting, and sometimes specialized tools.
Why Color Accuracy Matters in Gaming
While competitive gamers may prioritize refresh rates and response times, immersive and narrative-driven experiences rely heavily on visual storytelling. Games like The Last of Us Part II, Red Dead Redemption 2, or Cyberpunk 2077 use color grading and dynamic lighting to convey mood, time of day, and emotional tone. When your monitor isn’t calibrated correctly, these artistic choices are lost. Oversaturated reds might make blood appear cartoonish, while crushed blacks could hide enemies lurking in shadows.
Moreover, consistent color improves eye comfort during long sessions. A monitor emitting overly warm or cool tones forces your eyes to compensate, increasing fatigue. Proper calibration reduces strain and enhances immersion by presenting a balanced, neutral image.
“Color accuracy isn’t just for creatives—it’s about seeing the game as it was meant to be seen.” — David Lin, Display Calibration Specialist at ProVisual Labs
Essential Tools for Monitor Calibration
You don’t need a six-figure setup to achieve accurate colors, but some tools significantly improve precision over manual adjustments. Here’s what’s available:
- On-Screen Display (OSD) Menus: Built into every monitor, these allow access to brightness, contrast, gamma, and color temperature settings.
- Calibration Software (Free): Tools like DisplayCAL (open-source) or Windows’ built-in Color Calibration utility guide users through basic adjustments using visual test patterns.
- Hardware Calibrators: Devices such as the X-Rite i1Display Pro or Datacolor SpyderX measure actual output from your screen and create custom ICC profiles for precise correction.
- Test Images and Gradients: Downloadable PNGs or online tools showing grayscale ramps, color bars, and shadow detail help identify issues visually.
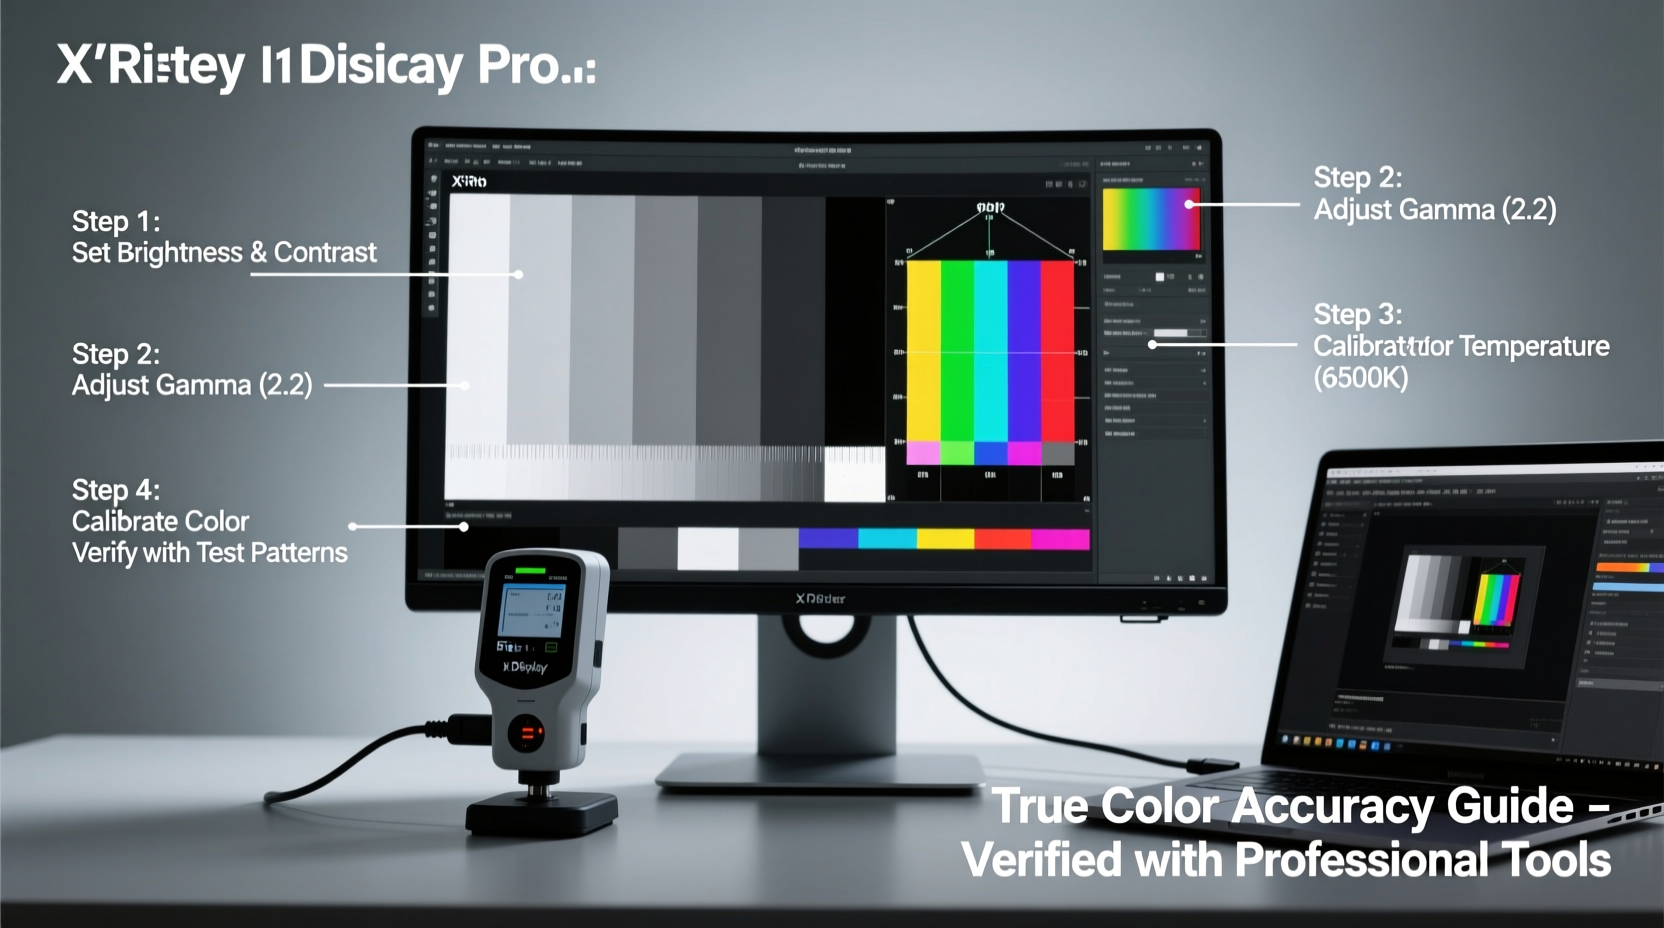
Step-by-Step Guide to Calibrating Your Gaming Monitor
Follow this structured process to bring your monitor’s colors as close to factory accuracy as possible. This method works whether you're using built-in tools or preparing for hardware calibration.
- Prepare Your Environment
Turn off bright overhead lights and avoid direct sunlight hitting the screen. Use neutral gray or white walls if possible. Let your monitor warm up for at least 30 minutes before starting—colors shift slightly during initial operation. - Reset to Factory Defaults
Navigate to your monitor’s OSD menu and select “Reset” or “Restore Default Settings.” This clears any previous user modifications and gives you a clean baseline. - Select the Right Picture Mode
Choose “Standard,” “sRGB,” or “Game (Low Input Lag)” mode depending on your priority. Avoid “Vivid,” “Dynamic,” or “Cinema” modes—they often oversaturate or artificially boost contrast. - Adjust Brightness and Contrast
Use a black-and-white gradient test image. Set contrast to around 80–85% to preserve highlight detail. Adjust brightness so pure black (#000000) is visible but not glowing, and near-black grays remain distinguishable. - Set Color Temperature
Aim for 6500K, which represents standard daylight white balance. If your monitor lacks Kelvin controls, choose “Warm” or “Normal” instead of “Cool.” Verify neutrality using a grayscale ramp—no tint should be visible across shades. - Tune RGB Gain and Offset (Advanced)
Some monitors allow individual adjustment of red, green, and blue channels. Use a color checker pattern to ensure each primary color appears clean and balanced. Misaligned gains cause color casts in whites and grays. - Enable Gamma Correction
Set gamma to 2.2, the standard for most content. Test with a gamma chart: all steps should be perceptibly distinct, especially in midtones. Lower gamma (<2.0) brightens shadows excessively; higher (>2.4) crushes them. - Verify with Real-World Content
Load a well-known scene from a cinematic game or stream a high-bitrate video. Skin tones should look natural, not orange or pink. Sky blues shouldn’t lean toward purple or cyan.
Using Hardware Calibration for Maximum Precision
If you own a colorimeter, attach it to the screen and run calibration software like DisplayCAL. The tool will display a series of colored patches and measure how your monitor reproduces them. It then generates an ICC profile tailored to your specific panel’s behavior.
This profile is loaded into your operating system and automatically adjusts GPU output to correct inaccuracies. Unlike OSD settings, which apply broad changes, ICC profiles offer per-channel correction at the driver level, resulting in superior accuracy.
Common Pitfalls and How to Avoid Them
Even experienced users make mistakes when trying to fine-tune their displays. Recognizing these errors can save hours of frustration.
| Mistake | Why It’s Problematic | Solution |
|---|---|---|
| Calibrating in a brightly lit room | Ambient light skews perception of contrast and color | Use dim, consistent lighting with no glare on screen |
| Using “Vivid” or “Enhanced” picture modes | These modes boost saturation and sharpness unnaturally | Stick to sRGB or Standard mode for accuracy |
| Ignoring gamma settings | Poor gamma hides shadow detail or blows out highlights | Always verify gamma with a dedicated test chart |
| Assuming all monitors can reach 100% sRGB | Budget TN panels often cover only 70–80% of sRGB | Check manufacturer specs; consider upgrading if wide gamut matters |
| Not updating graphics drivers | Old drivers may lack proper color management support | Keep GPU drivers current via NVIDIA, AMD, or Intel updates |
Real Example: Calibrating a High-End Gaming Monitor
Consider Mark, a PC gamer using an ASUS ROG Swift PG279Q, a 1440p IPS monitor with G-Sync. He noticed that night-time missions in Call of Duty: Modern Warfare were difficult—he kept missing enemies hiding in shadows. His first instinct was to crank up brightness, but that made explosions and headlights painfully bright.
Instead, he followed a calibration routine. After resetting the monitor, he used a free grayscale test image from Lagom.nl and adjusted brightness until the darkest bar was just visible. He set contrast to 80%, selected the “sRGB” mode to limit gamut emulation, and manually tuned the RGB sliders so no tint appeared in neutral grays.
He then ran DisplayCAL with a SpyderX Nano, creating a custom profile. Post-calibration, shadow detail improved dramatically without sacrificing highlight integrity. Enemies in dim alleys became visible, and explosions retained their impact without blinding him. The entire process took less than an hour and transformed his gameplay experience.
Checklist: Monitor Calibration Best Practices
Use this checklist before and after calibration to ensure consistency and accuracy:
- ☑ Warm up the monitor for 30+ minutes
- ☑ Calibrate in typical lighting conditions (not pitch black or sunlit)
- ☑ Reset monitor to factory defaults first
- ☑ Use sRGB or Standard picture mode
- ☑ Adjust brightness using black-level test patterns
- ☑ Set contrast to 80–85% unless content demands otherwise
- ☑ Target 6500K color temperature or “Warm” preset
- ☑ Confirm gamma is set to 2.2
- ☑ Verify grayscale neutrality across all shades
- ☑ Create and install an ICC profile if using a hardware calibrator
- ☑ Test with real games and videos for final validation
- ☑ Recheck calibration every 60–90 days
Frequently Asked Questions
Do I need a hardware calibrator for accurate colors?
No, you can achieve good results manually using test images and careful adjustments. However, hardware calibrators provide scientific precision and are recommended if you value consistency across devices or work in creative fields alongside gaming.
Can overclocking my monitor affect color accuracy?
Directly, no—overclocking refers to increasing refresh rate via timing control. But pushing a panel beyond stable limits can introduce visual artifacts like flickering or banding, which indirectly disrupt perceived color uniformity. Always ensure stability before calibrating.
Why does my monitor look different after calibration?
Most factory presets are designed to stand out in store displays—oversaturated and overly bright. Calibration returns the image to a natural, balanced state. Initially, it may seem dull, but your eyes adapt within 10–15 minutes, revealing greater detail and realism.
Conclusion: See Your Games the Way They Were Meant to Be Seen
Calibrating your gaming monitor isn’t a one-time tweak—it’s an investment in visual integrity and long-term enjoyment. True color accuracy reveals nuances developers spent thousands of hours perfecting, from the subtle glow of dawn to the grimy textures of post-apocalyptic cities. Whether you’re relying on free tools or investing in a colorimeter, the goal remains the same: a faithful, comfortable, and immersive viewing experience.
Take the time today to walk through the calibration steps. Adjust your environment, reset your settings, and tune brightness, contrast, and gamma with intention. You’ll likely discover details in your favorite games you never noticed before. And once you’ve experienced true-to-life visuals, there’s no going back.


 浙公网安备
33010002000092号
浙公网安备
33010002000092号 浙B2-20120091-4
Comments
No comments yet. Why don't you start the discussion?