
Recovering from injury or managing chronic pain often requires consistent physical therapy. While clinics offer professional guidance, many exercises can—and should—be performed at home to maintain progress. Resistance bands are among the most effective tools for rehabilitation due to their portability, versatility, and ability to provide progressive resistance. However, not all bands are created equal, especially when used in a therapeutic context. Choosing the wrong type can lead to ineffective workouts, improper muscle activation, or even re-injury. Understanding what to look for in a resistance band ensures you get safe, targeted support during recovery.
Understand the Types of Resistance Bands
Resistance bands come in several forms, each suited to different therapeutic goals. Knowing the differences helps match the band to your specific rehab needs.
- Loop Bands (Flat or Tubular): These circular bands are ideal for lower-body exercises like glute bridges, clamshells, and leg abductions. They’re commonly used in post-hip surgery rehab and for strengthening stabilizing muscles.
- Therapy Tubes with Handles: These long elastic tubes with padded handles allow for upper-body movements such as rows, shoulder rotations, and chest presses. They’re excellent for rotator cuff rehab or improving arm mobility after stroke or surgery.
- Figure-8 Bands: Shaped like an “8,” these are gripped with both hands and feet, enabling seated or standing pulling motions. Useful for core engagement and posture correction.
- Assistive Bands (Door Anchor Bands): Longer bands that attach to a door anchor, allowing for functional movements like resisted walking or standing rows. Often used in gait training or balance therapy.
Select the Correct Resistance Level
One of the most common mistakes is choosing a band that’s too strong. In physical therapy, the goal isn’t maximal strength but controlled, pain-free movement with gradual progression.
Bands are typically color-coded by resistance level, though standards vary between brands. A general guide is:
| Color | Resistance Level | Approximate Force (lbs) | Best For |
|---|---|---|---|
| Tan / Yellow | Extra Light | 1–5 | Post-surgical rehab, elderly patients, fine motor control |
| Red / Green | Light | 5–10 | Shoulder rotator cuff, ankle stabilization, early-stage recovery |
| Blue / Black | Medium | 10–15 | Glute activation, scapular stability, moderate strength building |
| Purple / Silver | Heavy | 15–20 | Advanced rehab, gait training, pre-athletic return |
| Gold / Copper | X-Heavy | 20+ | Late-stage rehab, power development (use under supervision) |
Start with the lightest resistance that allows you to complete prescribed repetitions with good form and no pain. Progress only when your therapist confirms it’s appropriate.
“Patients often push too hard too soon. The key is consistency with proper mechanics, not intensity.” — Dr. Lena Patel, Physical Therapist and Rehabilitation Specialist
Evaluate Material Quality and Safety Features
The material of a resistance band affects durability, skin sensitivity, and safety. Latex is common, but not suitable for everyone.
- Latex Bands: Offer excellent elasticity and responsiveness. Ideal for most users unless allergic. Look for medical-grade latex if using daily.
- Non-Latex (TPE or Fabric-Coated): Hypoallergenic and safer for sensitive skin. Fabric-covered bands resist snapping and fraying, making them ideal for long-term use.
Safety is critical, especially during solo home sessions. Always inspect bands before use. Discard any with:
- Small nicks, tears, or thinning spots
- Frayed edges or discoloration
- Loss of elasticity or stickiness
Avoid using bands near sharp objects, rough surfaces, or direct sunlight, which degrades rubber over time.
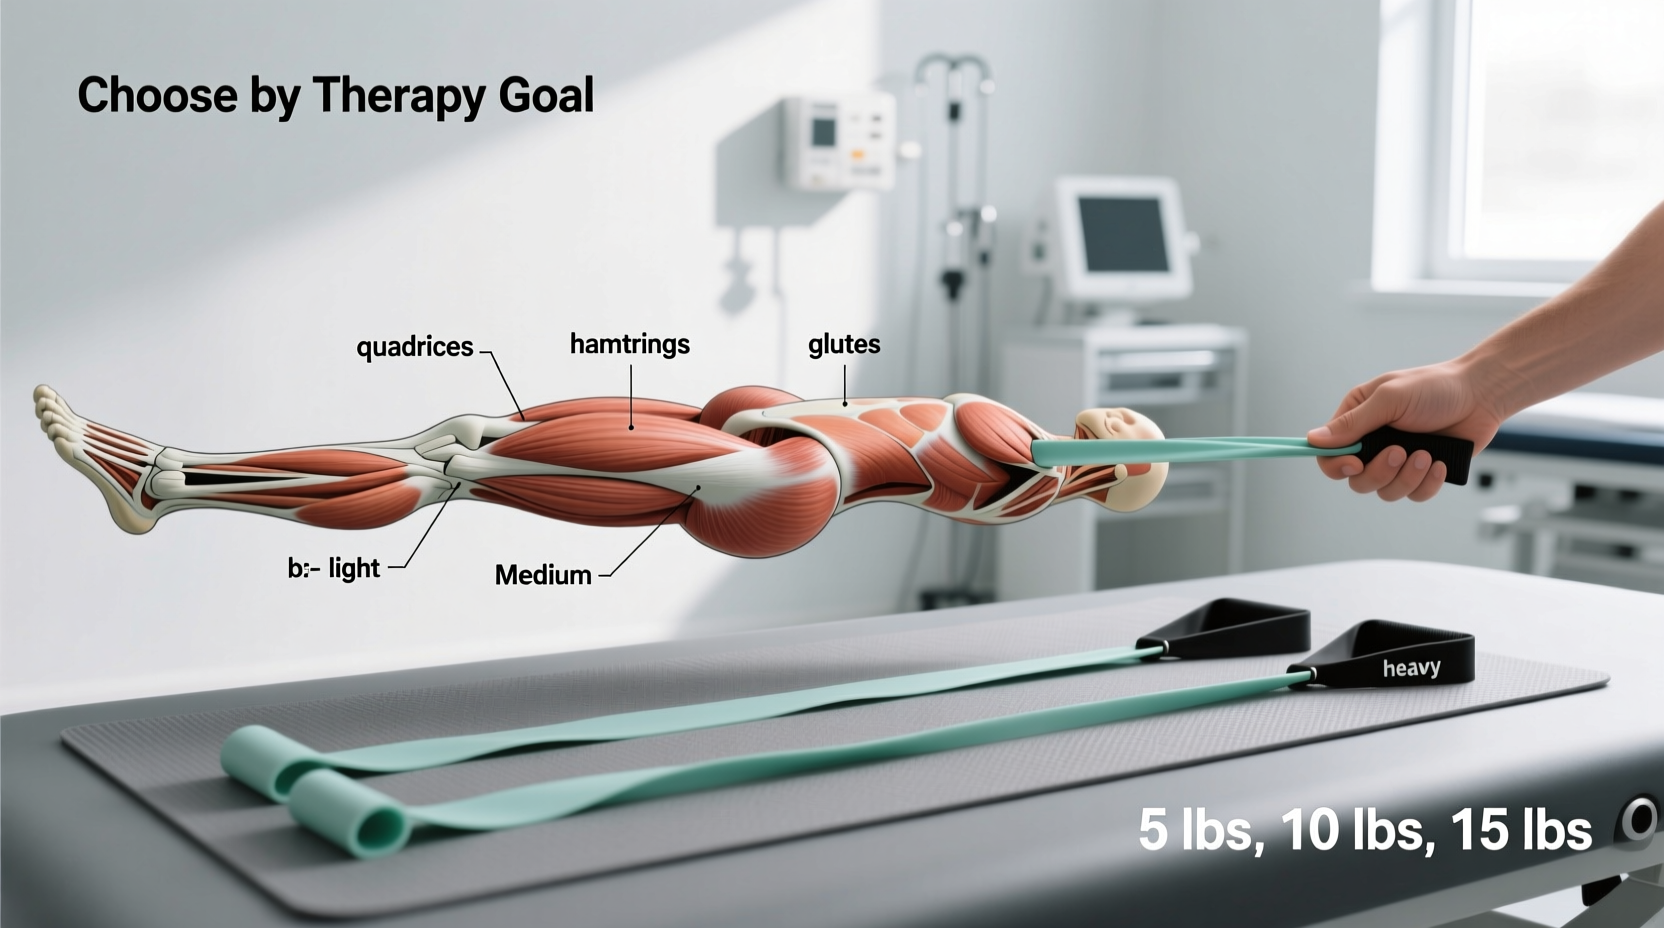
Match Bands to Your Therapy Goals
Physical therapy is highly individualized. The right band supports your specific condition and stage of healing. Below is a practical guide based on common rehab scenarios.
Post-Knee Surgery (e.g., ACL Repair)
Focus: Quad activation, hamstring control, range of motion.
- Use a light loop band around the thighs during mini-squats or step-ups.
- Perform terminal knee extensions with a tube band anchored behind the knee.
- Begin with tan/yellow, progress to red/green as strength improves.
Rotator Cuff Rehabilitation
Focus: External rotation, scapular stabilization, shoulder mobility.
- Use a therapy tube with handles for internal/external rotation at 90° abduction.
- Perform prone T, Y, and I raises with a light loop band overhead.
- Always keep resistance low to avoid impingement.
Lower Back Pain & Core Stability
Focus: Glute engagement, pelvic control, anti-rotation.
- Use a medium loop band above the knees during bridges and bird-dogs.
- Try standing marches with resistance to activate transverse abdominis.
Stroke Recovery or Neurological Conditions
Focus: Motor re-education, symmetry, balance.
- Use assistive bands with door anchors to practice sit-to-stand or stepping motions.
- Incorporate bilateral movements to encourage coordination.
“A well-chosen band can be the difference between frustrating plateaus and meaningful gains in neuromuscular control.” — Dr. Marcus Tran, Neurological Rehab Therapist
Step-by-Step Guide to Selecting and Using Your Band
Follow this process to ensure you pick and use the right resistance band safely and effectively.
- Consult Your Therapist: Obtain a clear understanding of your current phase of rehab and which muscles need targeting.
- Determine Exercise Type: Identify whether you need loops, tubes, or assistive bands based on recommended movements.
- Choose Initial Resistance: Start with extra-light or light bands—even if you feel strong. Form and control matter more than load.
- Inspect Before Every Use: Run fingers along the entire length to detect micro-tears or weak spots.
- Anchor Securely: If using a door anchor, ensure the door is closed and the strap is positioned high on the hinge side.
- Move Slowly and Mindfully: Perform each repetition with full control. Avoid snapping or jerking motions.
- Track Progress Weekly: Note improvements in reps, reduced discomfort, or increased ease of movement.
- Upgrade Only When Ready: Move to the next resistance level only when you can complete all sets with perfect form and no compensations.
Common Mistakes to Avoid
Even with the right equipment, improper use can hinder recovery. Watch out for these pitfalls:
- Using Too Much Tension: Over-resisting limits range of motion and increases joint stress.
- Skipping Warm-Up: Cold muscles are more prone to strain. Begin with gentle mobility drills.
- Ignoring Pain Signals: Discomfort is normal, but sharp or radiating pain means stop immediately.
- Improper Anchoring: A loose door anchor can slip, causing loss of balance or sudden release.
- Not Replacing Worn Bands: Old bands lose elasticity and are more likely to snap.
Checklist: Choosing the Right Resistance Band
- ✅ Confirmed exercise plan with my physical therapist
- ✅ Selected band type (loop, tube, assistive) based on rehab goals
- ✅ Started with light or extra-light resistance
- ✅ Chose non-latex if allergic or sensitive
- ✅ Verified secure anchoring method (door anchor, foot grip, etc.)
- ✅ Inspected band for damage before first use
- ✅ Stored in a cool, dry place away from sunlight
- ✅ Committed to tracking progress weekly
Real Example: Recovering After Shoulder Surgery
Sarah, 58, underwent arthroscopic rotator cuff repair and was advised to continue therapy at home. Her physical therapist prescribed external rotation exercises to rebuild strength without stressing the surgical site. Initially, she bought a heavy blue band online, thinking “stronger is better.” After two days, she experienced increased shoulder pain and stiffness.
She consulted her therapist, who switched her to a light red tube band with soft handles. Sarah began with 10 reps per side, focusing on slow, controlled motion. She recorded her sessions and noted improvement within three weeks—less pain, greater reach when dressing. After six weeks, her therapist approved a move to medium resistance. By week ten, Sarah regained 90% of her pre-injury mobility.
Her success came not from aggressive training, but from using the correct resistance at the right time.
Frequently Asked Questions
Can I use resistance bands every day?
It depends on your rehab phase. Early recovery may require rest days between sessions to allow tissue healing. Most therapists recommend 3–5 days per week with proper warm-up and cooldown. Always follow your clinician’s schedule.
How long do resistance bands last?
With daily use, high-quality bands last 3–6 months. Signs of wear—such as cracking, fading, or reduced elasticity—mean it’s time to replace them. Non-latex fabric bands tend to last longer than standard latex.
Are resistance bands safe for seniors or people with arthritis?
Yes, and they’re often preferred because they’re low-impact and joint-friendly. Use extra-light bands and focus on smooth, controlled movements. Consult a therapist to tailor exercises to your condition.
Conclusion
Choosing the right resistance band for physical therapy at home isn’t about strength—it’s about precision, safety, and alignment with your recovery goals. The best band supports your body’s natural healing process without pushing it too far. From selecting the appropriate resistance level to ensuring material quality and using proper technique, every detail matters. With the right tools and mindful practice, you can make meaningful progress between therapy sessions and take ownership of your rehabilitation journey.


 浙公网安备
33010002000092号
浙公网安备
33010002000092号 浙B2-20120091-4
Comments
No comments yet. Why don't you start the discussion?