
Cleaning a blender is often seen as a chore, especially when food residue clings stubbornly to the blades or crevices. Many people assume that thorough cleaning requires removing the blade assembly from the base—a process that can be intimidating, risky, and time-consuming. However, with the right method, you can keep your blender sparkling clean without ever touching a screwdriver or exposing yourself to sharp components.
The good news? You don’t need special tools or expensive cleaners. Most blenders are designed for quick maintenance, and manufacturers generally advise against frequent disassembly unless absolutely necessary. Regular, effective cleaning not only ensures hygiene but also prolongs the life of your appliance and maintains optimal performance. This guide walks you through safe, fast, and efficient ways to clean your blender—no disassembly required.
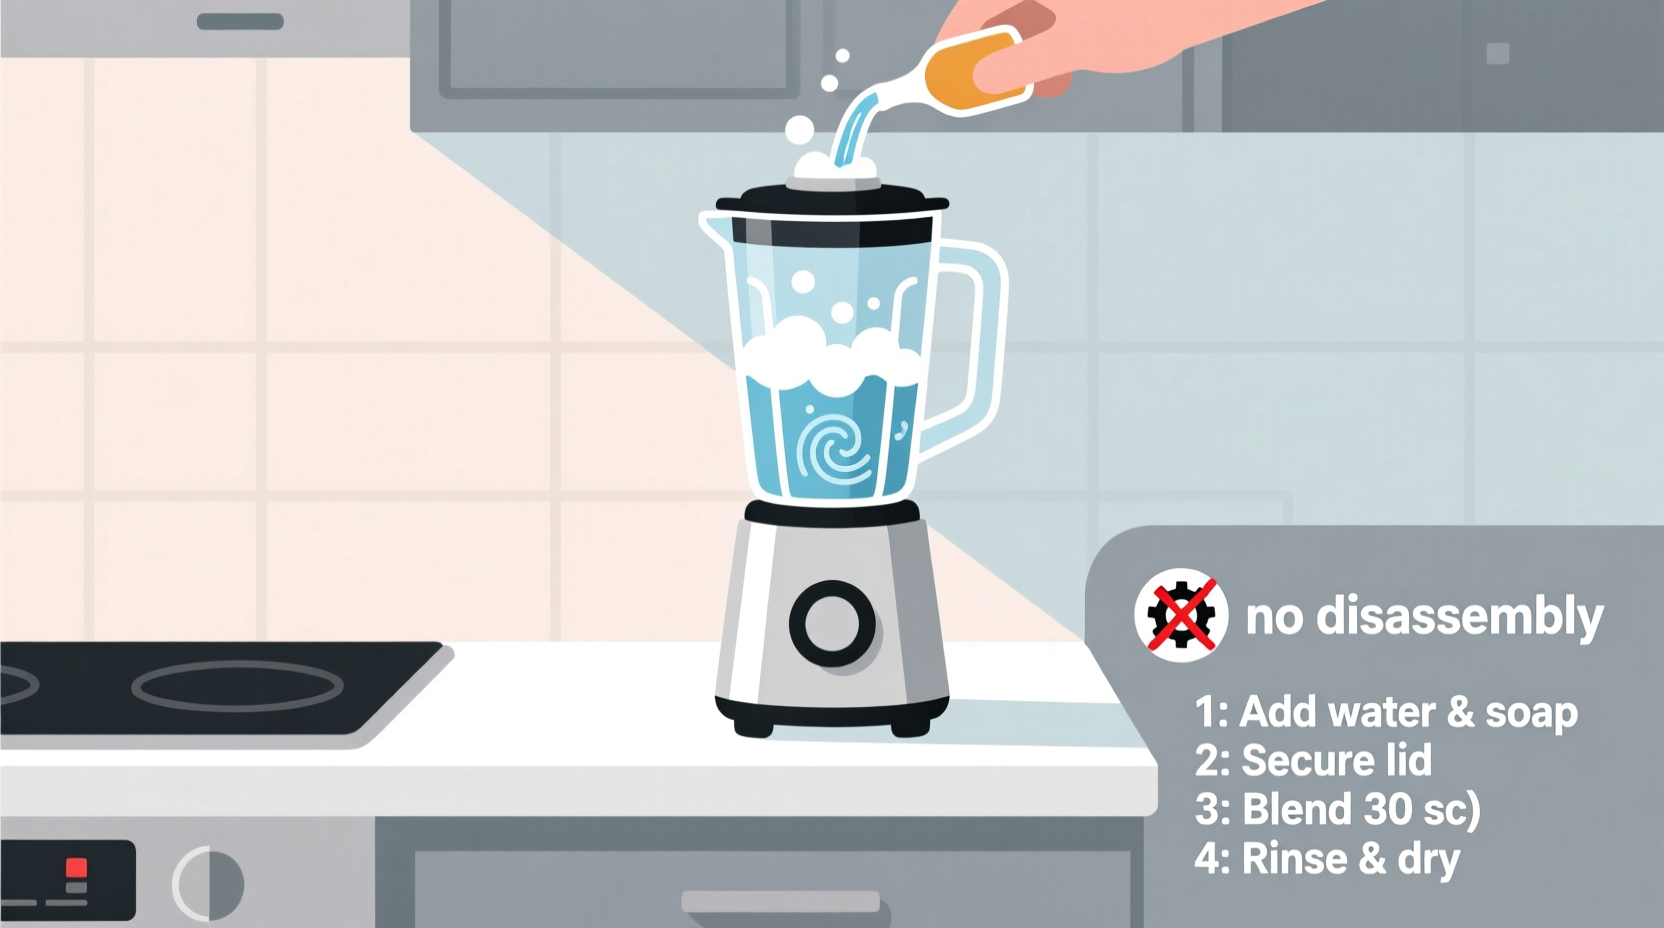
Why You Should Avoid Disassembling the Blender Base
While some older or high-performance models may require occasional deep cleaning of the blade unit, most modern blenders are sealed units designed to prevent leaks and protect internal motor components. Disassembling the base introduces several risks:
- Water damage: Moisture entering the motor housing can short-circuit the electronics.
- Voided warranty: Tampering with sealed parts often invalidates manufacturer warranties.
- Safety hazards: Blades are extremely sharp, and improper reassembly can lead to leaks or detachment during use.
- Difficulty resealing: Gaskets and O-rings must be perfectly aligned; otherwise, the jar will leak.
“Most blenders never need to be disassembled for routine cleaning. The design allows for effective cleaning in place.” — David Lin, Appliance Engineer at HomeTech Labs
Instead of taking apart the base, focus on methods that clean the interior thoroughly while preserving the integrity of the appliance.
Step-by-Step: Fast & Safe Cleaning Method
This five-minute cleaning technique uses common kitchen ingredients and requires no tools. It’s ideal after making smoothies, sauces, or soups.
- Add warm water: Fill the blender jar halfway with warm (not boiling) water. Warm water helps loosen stuck-on food without stressing the glass or plastic.
- Add dish soap: Squeeze in 1–2 drops of liquid dish detergent. Avoid heavy foaming soaps, which can overflow. <3> Add a natural abrasive (optional): For tougher residues, add one tablespoon of uncooked rice, baking soda, or coarse salt. These act as gentle scrubbers. <4> Blend for 30–60 seconds: Secure the lid tightly and run the blender on medium speed. The swirling motion combined with abrasives lifts grime from the sides and around the blade area. <5> Rinse thoroughly: Pour out the soapy mixture and rinse the jar under running water. Use a soft sponge or bottle brush to wipe any remaining spots near the rim.
This method effectively cleans over 95% of daily messes. For green smoothie stains or oily residues, repeat once or use vinegar instead of soap.
Alternative Cleaning Solutions and When to Use Them
Different types of residue call for tailored approaches. Below is a comparison of cleaning agents based on effectiveness, safety, and speed.
| Cleaning Agent | Best For | Time Required | Notes |
|---|---|---|---|
| Dish soap + warm water | Daily cleaning, light residue | 2–3 minutes | Safe for all blender types; most recommended |
| Baking soda + water | Stains, odors, sticky residue | 3–5 minutes | Mild abrasive; deodorizes naturally |
| White vinegar + water (1:1) | Mineral deposits, hard water stains, bacteria | 5 minutes (soak optional) | Natural disinfectant; avoid prolonged exposure to rubber seals |
| Uncooked rice + soap | Crusted food, thick sauces | 2–4 minutes | Rice grains scrub interior mechanically |
| Lemon juice + water | Freshening, mild stains | 2 minutes | Citrus cuts grease and leaves a fresh scent |
For example, if you’ve just blended frozen berries, a mix of warm water and a teaspoon of baking soda will lift the pigments without scratching the container. If your blender has developed an off smell from dairy or garlic, a blend of vinegar and water followed by a rinse neutralizes odors effectively.
Mini Case Study: Sarah’s Morning Smoothie Routine
Sarah, a busy marketing manager and mother of two, uses her blender every morning for protein smoothies. She used to dread cleaning it because spinach and banana would stick to the bottom, and she once damaged the seal trying to unscrew the blade. After learning the rice-and-soap trick from a cooking blog, she now adds a handful of uncooked rice, a drop of dish soap, and warm water to her blender after each use. She blends for 45 seconds, rinses, and dries it upside down on a rack. “It takes less time than washing a coffee mug,” she says. “And I haven’t touched the screws in over a year.”
Do’s and Don’ts of Blender Maintenance
To ensure long-term reliability and hygiene, follow these best practices:
| Do’s | Don’ts |
|---|---|
| Wipe the base exterior with a damp cloth after each use | Immerse the motor base in water or run it under the tap |
| Clean immediately after use to prevent drying and staining | Use steel wool or abrasive pads on plastic jars (can scratch) |
| Check and clean the rubber gasket weekly | Leave liquid sitting in the blender for hours |
| Air-dry the jar upside down to prevent moisture trapping | Use bleach or strong solvents unless specified by the manufacturer |
| Run a vinegar cycle monthly to descale and disinfect | Overfill with hot liquids—pressure can cause leaks or eruptions |
Monthly Deep Clean Without Disassembly
Even with daily cleaning, mineral buildup, oils, and biofilm can accumulate over time. Perform this deeper clean once a month to maintain peak hygiene and performance.
- Vinegar soak: Fill the jar halfway with equal parts white vinegar and warm water. Let sit for 10 minutes to dissolve residues.
- Blitz with abrasives: Add one tablespoon of baking soda and blend for 1 minute. The effervescence helps lift stubborn films.
- Scrub accessible areas: Use a long-handled bottle brush to gently clean around the blade cover and neck of the jar.
- Rinse and air dry: Empty the mixture, rinse thoroughly, and let the jar dry completely before reattaching.
- Wipe the base: Dampen a microfiber cloth with vinegar solution and wipe the motor unit. Never spray liquid directly onto it.
This routine removes hidden buildup and keeps your blender smelling fresh. It’s particularly useful for households that blend oily nut butters, dairy-based soups, or citrus juices regularly.
FAQ: Common Questions About Blender Cleaning
Can I put my blender jar in the dishwasher?
Most modern blender jars and lids are dishwasher-safe, but always check the manufacturer’s manual. Place the jar on the top rack and remove the rubber gasket if possible. Note: Dishwashing may degrade plastic over time and dull stainless steel blades. Hand washing with the soap-and-blend method is gentler and equally effective.
Why does my blender still smell bad after cleaning?
Odors usually come from trapped food particles under the blade seal or within the gasket. Even if you don’t disassemble the base, remove the gasket weekly and soak it in vinegar water for 10 minutes. Also, run a blend of lemon juice and water monthly to freshen the interior. Persistent smells may indicate mold growth—replace the gasket if cracked or discolored.
Is it safe to use baking soda or vinegar on plastic jars?
Yes, both are safe for short-term use. Baking soda is non-abrasive enough not to scratch, and vinegar is mild. However, avoid leaving vinegar solutions in contact with rubber or silicone parts for extended periods, as they can degrade over time. Rinse thoroughly after use.
Final Checklist: Your No-Disassembly Cleaning Routine
Keep this checklist handy for consistent care:
- ✅ Clean immediately after each use
- ✅ Use warm water, soap, and optional abrasives (rice, baking soda)
- ✅ Blend for 30–60 seconds, then rinse
- ✅ Remove and clean the lid gasket weekly
- ✅ Wipe the motor base with a damp cloth
- ✅ Perform a vinegar-baking soda deep clean monthly
- ✅ Air-dry the jar upside down
- ❌ Never submerge the motor base in water
- ❌ Avoid harsh chemicals or metal scrubbers
Conclusion: A Cleaner Blender in Minutes, Not Hours
You don’t need to dismantle your blender to keep it spotless. With a few simple ingredients and a smart technique, you can maintain a hygienic, high-performing appliance in under five minutes. The key is consistency—cleaning right after use prevents buildup and eliminates the need for risky disassembly. Whether you’re whipping up a post-workout shake or pureeing soup, your blender should work effortlessly and look great doing it.


 浙公网安备
33010002000092号
浙公网安备
33010002000092号 浙B2-20120091-4
Comments
No comments yet. Why don't you start the discussion?