
Mechanical keyboards are prized for their tactile feedback, durability, and customization options. But over time, dust, crumbs, oils from fingers, and pet hair accumulate beneath the keys, affecting both performance and hygiene. Cleaning your keyboard properly is essential—but doing it incorrectly can damage delicate switches or discolor keycaps. The good news? With the right tools and techniques, you can deep-clean your mechanical keyboard safely and effectively, extending its lifespan and maintaining optimal typing feel.
Why Regular Cleaning Matters
A dirty keyboard isn’t just unsightly—it can degrade your typing experience and even lead to malfunctioning keys. Dust particles and debris can interfere with switch actuation, while oils from your skin can build up on stabilizers and stems, causing inconsistent keystrokes or sticky keys. In extreme cases, moisture or food residue may corrode internal components.
Regular maintenance ensures consistent performance and preserves the investment you've made in your hardware. Most enthusiasts recommend cleaning every 3–6 months, depending on usage and environment. Those who eat near their desks or have pets may need to clean more frequently.
Essential Tools and Materials
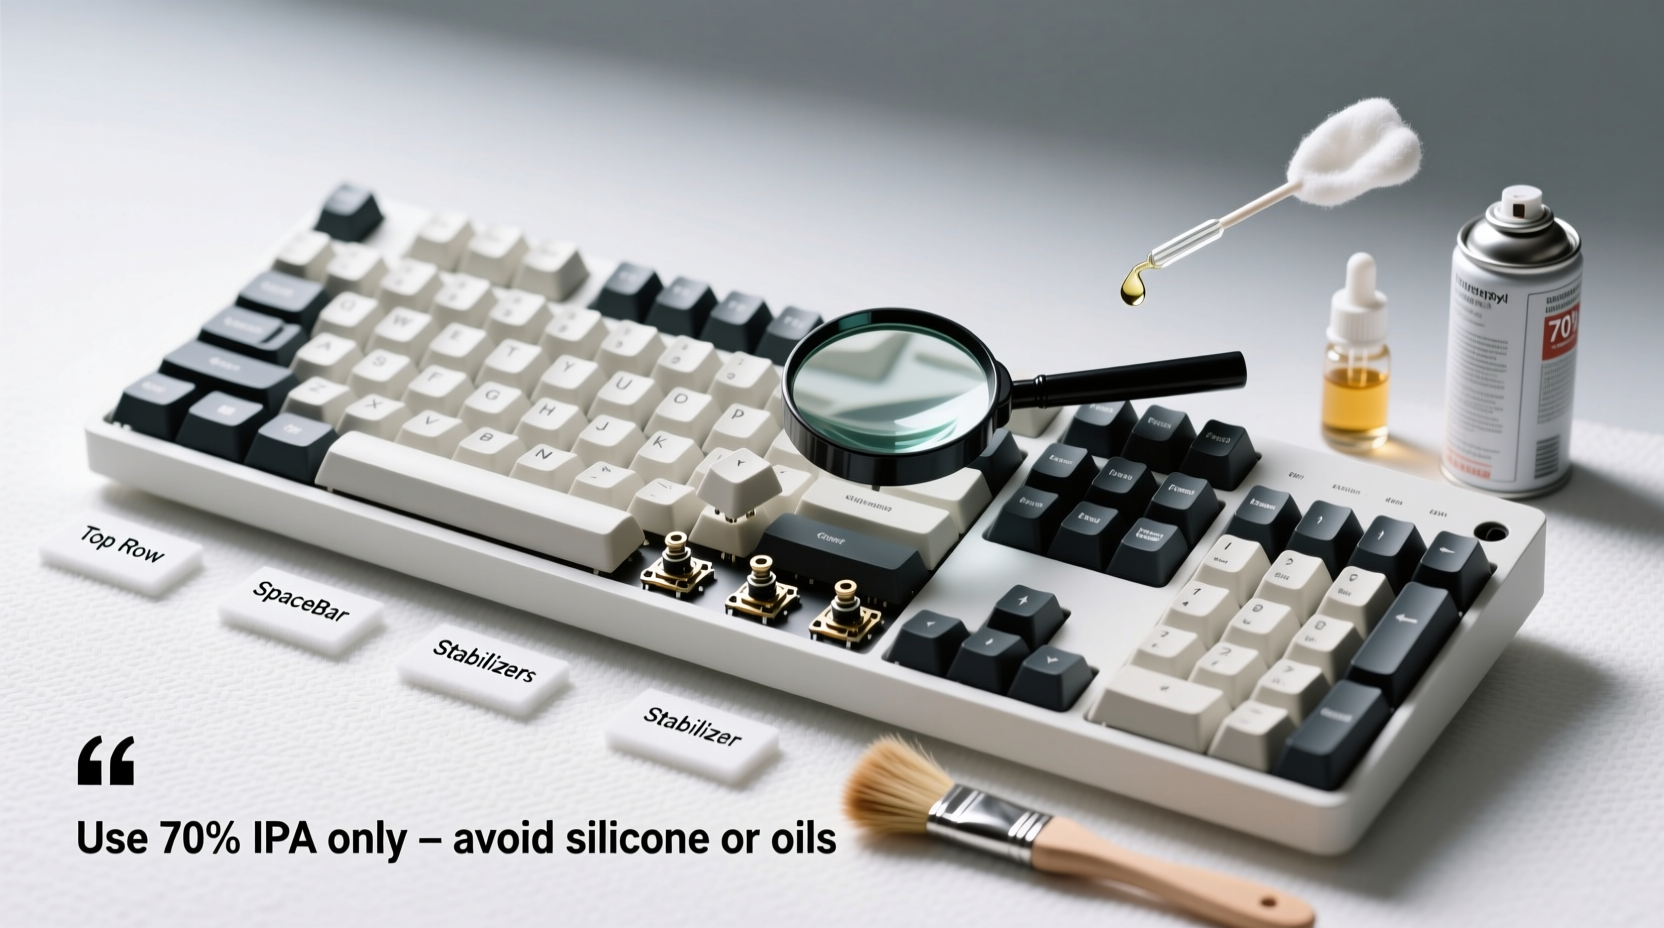
Before beginning, gather the right supplies. Using improper tools (like wet cloths or compressed air cans held too close) can do more harm than good. Here’s what you’ll need:
- Keycap puller – Safely removes keycaps without scratching or breaking them.
- Soft-bristle brush or clean toothbrush – For dislodging debris from between switches.
- Compressed air canister – Blows out loose particles; avoid excessive pressure.
- Isopropyl alcohol (70% minimum, 90% preferred) – Effective at cutting grease without leaving residue.
- Lint-free microfiber cloths – Prevent lint buildup when wiping surfaces.
- Damp sponge or cloth (for keycaps only) – Never apply liquid directly to the PCB.
- Bowl of soapy water (optional) – Only for removable keycaps, not the keyboard body.
- Towel or drying rack – To lay out keycaps after washing.
Avoid using household cleaners like Windex or bleach-based wipes—they can damage plastic finishes and degrade legends on keycaps.
Step-by-Step Cleaning Process
Cleaning a mechanical keyboard involves three phases: preparation, deep cleaning, and reassembly. Follow this timeline carefully to prevent damage.
- Power down and disconnect – Unplug the keyboard or turn off wireless connection. Never clean a powered device.
- Flip and shake gently – Turn the keyboard upside down over a trash can and tap lightly to remove loose debris.
- Use compressed air – Hold the can upright and spray at a 45-degree angle across the switches. Do not tilt the can, as propellant can leak and damage components.
- Remove keycaps with a puller – Start from the top row and work downward. Place removed caps in order if desired, or use a labeled tray.
- Brush between switches – Use a dry soft-bristled brush to sweep away remaining dust around stems and PCB.
- Wipe the case and plate – Dampen a microfiber cloth slightly with isopropyl alcohol and wipe non-electronic surfaces.
- Soak keycaps (optional) – Submerge in warm, soapy water (a few drops of dish soap) for 30 minutes. For stained caps, add a denture tablet or baking soda paste.
- Rinse and dry thoroughly – Rinse under cool water and lay flat on a towel overnight. Ensure no moisture remains before reattaching.
- Reattach keycaps – Align each cap correctly and press down evenly until it clicks into place.
- Final wipe-down – Give the entire surface one last pass with a dry microfiber cloth.
Allow at least 24 hours before reconnecting if any moisture was used near the board, though typically only keycaps are washed.
Do’s and Don’ts: Protecting Switches and Keycaps
To avoid irreversible damage, follow these guidelines based on community best practices and manufacturer recommendations.
| Do’s | Don’ts |
|---|---|
| Use a keycap puller designed for mechanical keyboards | Use tweezers or metal tools to remove keycaps |
| Clean keycaps separately in water (if PBT or ABS plastic) | Submerge the entire keyboard in water unless it's explicitly waterproof |
| Use 70–90% isopropyl alcohol on a cloth for spot cleaning | Apply liquids directly onto switches or circuitry |
| Let keycaps dry completely before reinstallation | Reassemble and use a damp keyboard |
| Store removed keycaps in a labeled container | Leave keycaps scattered where they can be lost or stepped on |
Real Example: Reviving a Neglected Keyboard
Mark, a freelance writer, had been using his mechanical keyboard daily for two years without cleaning it. He noticed increasing double-taps and missed keystrokes, particularly on the spacebar and Enter key. After inspecting the board, he found thick layers of dust and grime lodged beneath the stabilizers.
Following a careful cleaning process—removing all keycaps, brushing out debris, soaking caps overnight, and lubricating stabilizers with switch lube—he restored full functionality. His typing felt smoother than it had in months. “I didn’t realize how much performance I’d lost,” Mark said. “Now it feels like a brand-new board.”
This example highlights how neglect impacts function—and how proper cleaning can breathe new life into aging hardware.
Expert Insight: What Manufacturers Recommend
When asked about maintenance protocols, Cherry MX, a leading switch manufacturer, emphasizes caution around moisture and force:
“While our switches are built to endure tens of millions of keystrokes, exposure to liquids or aggressive cleaning methods can compromise internal mechanisms. Always remove keycaps before deep cleaning and never immerse the switch housing in fluid.” — Technical Support Team, Cherry Corporation
Similarly, keyboard builders like Drop and Keychron advise against ultrasonic cleaners unless specifically rated for electronics, due to potential solder joint damage from high-frequency vibrations.
Special Considerations for Different Keycap Types
Not all keycaps react the same way to cleaning. Understanding material differences helps prevent fading, warping, or texture loss.
- ABS (Acrylonitrile Butadiene Styrene): Common but prone to shine over time. Avoid hot water and prolonged sun drying, which can warp or yellow caps.
- PBT (Polybutylene Terephthalate): More durable and resistant to wear. Can withstand hotter water and scrubbing better than ABS.
- Dye-sublimated or doubleshot legends: Resistant to fading. Safe for gentle soaking and wiping.
- Printed legends: May fade or smudge with alcohol or abrasive scrubbing. Use minimal rubbing and avoid soaking.
If unsure of your keycap material, assume it’s ABS and proceed conservatively.
Frequently Asked Questions
Can I use hand sanitizer to clean my keycaps?
No. Hand sanitizers often contain additives like glycerin or fragrances that leave sticky residues. Stick to pure isopropyl alcohol diluted on a cloth for spot cleaning—never pour directly onto the keyboard.
Is it safe to clean a keyboard with the switches exposed?
Yes, as long as no liquid comes into contact with the PCB or switch internals. Dry methods like brushing and compressed air are safest. If using alcohol, apply only to a cloth, not sprayed near open switches.
How often should I clean my mechanical keyboard?
For average users, every 3–6 months is sufficient. Heavy typists, gamers, or those eating at their desk should consider monthly light cleaning (air + wipe) and bi-monthly deep cleans.
Checklist: Your Mechanical Keyboard Cleaning Routine
Follow this concise checklist to ensure nothing is missed during your cleaning session:
- ✅ Power off and unplug the keyboard
- ✅ Shake out loose debris
- ✅ Blow out dust with compressed air
- ✅ Remove keycaps with a proper puller
- ✅ Brush between switches gently
- ✅ Wash keycaps in warm soapy water (if needed)
- ✅ Rinse and fully dry keycaps (minimum 8–12 hours)
- ✅ Wipe case and plate with alcohol-dampened cloth
- ✅ Reinstall keycaps securely
- ✅ Test all keys post-reassembly
Conclusion: Maintain Performance and Longevity
Cleaning your mechanical keyboard doesn’t require advanced skills—just attention to detail and respect for its intricate design. By following safe practices, you preserve both aesthetics and functionality, ensuring crisp actuation and reliable performance for years. Whether you're a casual typist or a competitive gamer, a clean keyboard enhances comfort, accuracy, and overall user satisfaction.


 浙公网安备
33010002000092号
浙公网安备
33010002000092号 浙B2-20120091-4
Comments
No comments yet. Why don't you start the discussion?