
Bringing out the artificial Christmas tree each holiday season is a cherished tradition in millions of homes. Unlike real trees, artificial ones are designed for reuse—sometimes for decades. But that convenience comes with a hidden cost: dust, pet dander, mold spores, and other allergens accumulate during storage. When you unpack and assemble your tree, those particles disperse into the air, potentially triggering allergies, asthma, or respiratory discomfort.
Cleaning your artificial tree before setup isn’t just about aesthetics—it’s a health precaution. A well-maintained tree enhances indoor air quality, reduces allergy symptoms, and preserves the tree’s appearance year after year. Yet, most people overlook this critical step, opting instead to fluff branches and plug in lights without a second thought.
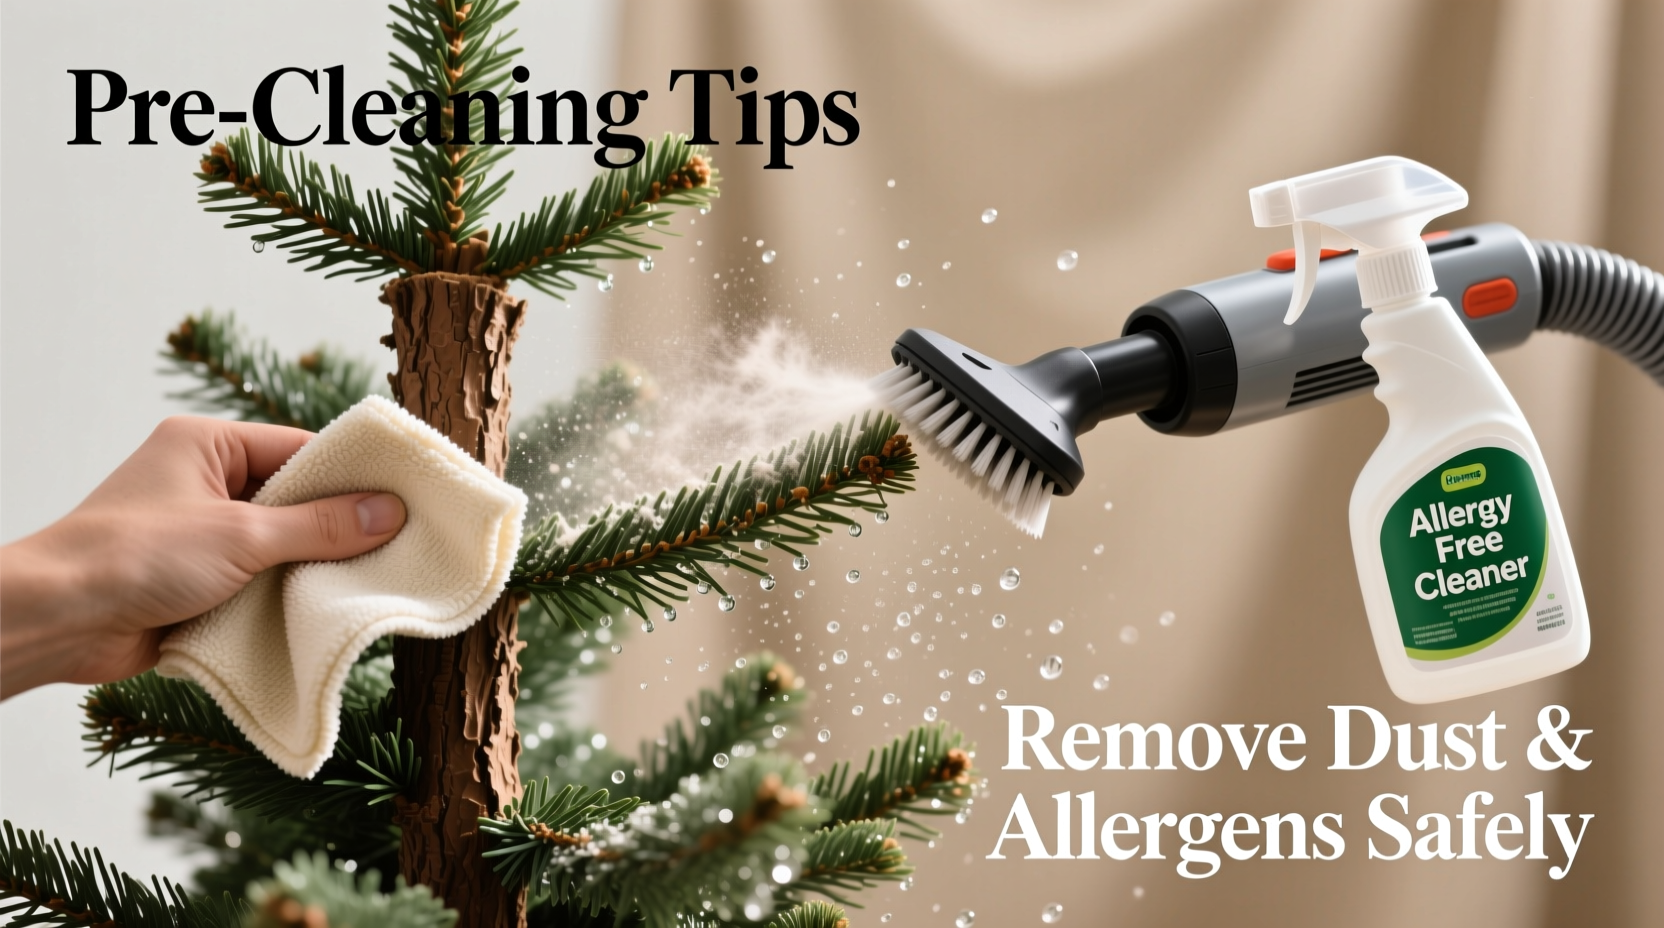
The good news? With the right tools, techniques, and timing, cleaning an artificial Christmas tree is manageable—even if it’s large or tightly packed with needles. This guide walks through every stage of pre-season cleaning, from unboxing to final inspection, ensuring your tree looks vibrant and your home stays healthy.
Why Pre-Setup Cleaning Matters
Artificial trees spend 11 months in storage—often in garages, basements, or attics. These environments are prone to temperature fluctuations, humidity, and airborne debris. Over time, dust settles deep within the branches, while mold can form in damp conditions. Even sealed plastic bags aren’t foolproof; microscopic particles still infiltrate over time.
A study by the American College of Allergy, Asthma & Immunology found that stored holiday decorations contribute significantly to seasonal indoor allergen loads. Dust mites, fungal spores, and particulate matter released during decoration handling can worsen symptoms in sensitive individuals.
“Holiday asthma and allergy flare-ups are often linked to poor cleaning practices of stored decor. A simple pre-use wipe-down can reduce airborne irritants by up to 70%.” — Dr. Lena Patel, Environmental Health Specialist
Beyond health benefits, cleaning extends your tree’s lifespan. Residue buildup can degrade PVC needles and wire frames over time. Removing grime early prevents brittleness, fading, and premature wear.
Step-by-Step Guide to Cleaning Your Artificial Tree
Effective cleaning requires patience and attention to detail. Rushing the process risks damaging delicate branches or missing hidden dust pockets. Follow this comprehensive sequence for best results.
- Choose the Right Location
Set up in a garage, driveway, or outdoor space with good ventilation. Avoid carpeted or hardwood floors indoors unless absolutely necessary—dust will scatter widely. Lay down a tarp or old bedsheet to catch debris and simplify cleanup. - Unbox and Inspect Section by Section
Remove one tree section at a time. Check for visible damage like broken tips, bent poles, or frayed wires. Label each section (e.g., “Top,” “Middle,” “Base”) to streamline reassembly later. - Dry Dust Thoroughly
Use a microfiber cloth, soft brush, or handheld vacuum with a brush attachment. Work from top to bottom, gently wiping each branch outward to avoid snagging. Pay special attention to inner core areas where dust accumulates heavily. - Vacuum with Care
Attach a crevice tool or upholstery nozzle to reach dense clusters. Keep suction low to prevent pulling off needles. For stubborn debris, hold sections upside down and vacuum upward—gravity helps dislodge trapped particles. - Spot-Clean Stains or Discoloration
Mix a solution of mild dish soap and warm water. Dip a cotton swab or soft cloth into the mixture and lightly dab affected areas. Never soak the tree—excess moisture can warp materials or promote mold. Immediately dry with a lint-free towel. - Sanitize for Allergen Reduction (Optional)
In high-allergen households, lightly mist branches with a 3:1 water-to-white-vinegar solution using a spray bottle. Vinegar naturally kills mold spores and neutralizes odors. Allow to air-dry completely before bringing indoors. - Final Fluff and Inspection
Once cleaned, reshape each branch to restore fullness. Rotate the section and inspect all angles under natural light to ensure no dust remains.
Do’s and Don’ts: Best Practices Table
| Do | Don’t |
|---|---|
| Use a microfiber cloth or soft brush for dusting | Use abrasive sponges or steel wool |
| Vacuum on low suction with a brush attachment | Use high-powered shop vacs directly on branches |
| Clean in sections to avoid confusion | Mix up tree segments during cleaning |
| Allow vinegar solutions to fully dry before assembly | Bring a damp tree indoors or near electrical lights |
| Wear gloves to protect hands from sharp wires | Handle metal frames barehanded if edges are jagged |
Real Example: The Johnson Family’s Allergy Relief
The Johnsons in Minneapolis had struggled for years with unexplained headaches and nasal congestion every December. Their two children experienced increased asthma symptoms shortly after decorating. At first, they blamed cold weather or holiday stress. But when symptoms persisted even after medical evaluation, they consulted an environmental hygienist.
The specialist tested their home’s air quality during tree setup and found elevated levels of endotoxins and fungal spores—primarily from the artificial tree stored in a damp basement. After following a thorough cleaning protocol—including vacuuming, vinegar misting, and improved storage—their indoor air quality improved dramatically. Within two seasons, both children reduced inhaler use by half, and the parents reported fewer sinus issues.
This case highlights how invisible contaminants on holiday decor can have measurable health impacts—and how proper cleaning makes a tangible difference.
Essential Cleaning Checklist
- ☐ Choose a ventilated workspace (garage or outdoors)
- ☐ Gather supplies: microfiber cloths, soft brush, handheld vacuum, mild soap, spray bottle
- ☐ Unpack tree one section at a time
- ☐ Dry dust all branches with a cloth or brush
- ☐ Vacuum densely packed areas using low suction
- ☐ Spot-clean stains with soapy water and dry immediately
- ☐ Optional: Mist with vinegar solution for sanitization
- ☐ Allow all sections to air-dry completely
- ☐ Re-fluff branches and inspect for missed spots
- ☐ Store cleaning tools and prepare for indoor assembly
Storage Tips to Minimize Future Cleaning
The effort you invest now pays dividends next year—if you store the tree correctly. Poor storage leads to faster dust accumulation and greater allergen retention. Follow these guidelines to keep your tree cleaner longer.
Always use a dedicated tree storage bag with a zipper closure. These cylindrical bags protect against dust, pests, and compression damage. Avoid cardboard boxes—they absorb moisture and attract insects. If possible, choose a bag with internal support rods to prevent branch flattening.
Store the tree in a climate-controlled environment. Attics and garages experience extreme temperature swings and humidity spikes, which encourage mold growth. A closet or under-bed container in a living area is preferable. Elevate the bag off concrete floors using wooden pallets or shelves to reduce moisture exposure.
Before storing, ensure the tree is completely dry and free of debris. Any residual dust or moisture will multiply over time. Consider placing silica gel packets inside the bag to absorb ambient humidity.
Frequently Asked Questions
Can I wash my artificial tree in the washing machine?
No. Submerging or agitating an artificial tree in water damages the wiring, fades color coatings, and warps plastic components. The force can also strip needles from stems. Stick to dry or spot-cleaning methods only.
How often should I deep clean my artificial tree?
Every year before setup. Even if the tree appears clean, microscopic allergens are likely present. Annual cleaning maintains air quality and prevents long-term buildup that becomes harder to remove over time.
Is it safe to use disinfectant sprays on artificial trees?
Not recommended. Many commercial disinfectants contain harsh chemicals like bleach or ammonia that degrade PVC and leave strong fumes. If sanitizing is needed, use a diluted white vinegar solution (3 parts water, 1 part vinegar), which is effective yet non-toxic when dried.
Conclusion: Start the Season Safely and Sustainably
Cleaning your artificial Christmas tree before setup is more than a chore—it’s an act of care for your household’s health and comfort. By removing dust and allergens early, you create a safer indoor environment, especially for children, seniors, and those with respiratory sensitivities. You also preserve the beauty and structural integrity of a decoration meant to be enjoyed for years.
The process takes time, but the payoff is immediate: a fresher home, fewer allergy triggers, and a tree that looks as good as new. Make cleaning part of your annual holiday ritual, just like trimming the tree or baking cookies. With consistent attention, your artificial tree can remain a centerpiece of joy—not a source of sneezes.


 浙公网安备
33010002000092号
浙公网安备
33010002000092号 浙B2-20120091-4
Comments
No comments yet. Why don't you start the discussion?