
Dust accumulation on artificial Christmas trees is inevitable—especially on textured elements like molded pine cones, berry clusters, and frosted branch tips. Unlike smooth PVC branches, pine cones have intricate crevices, layered petals, and often a matte or slightly tacky surface that traps dust, pet dander, and seasonal allergens. Many homeowners assume cleaning them means taking the entire tree apart: unscrewing sections, detaching limbs, and risking bent wires or broken hinges. That’s unnecessary—and counterproductive. With the right tools, timing, and technique, you can restore realism and freshness to those pine cones in under 45 minutes, while keeping your tree fully assembled and structurally intact.
This approach isn’t just about aesthetics. Dust-laden pine cones contribute to indoor air quality issues during holiday use—particularly for households with asthma, allergies, or young children. A 2023 study published in the Journal of Indoor Air Quality found that artificial trees stored in attics or garages accumulated up to 12 times more particulate matter per square inch on ornamental textures (like pine cones and holly berries) than on main trunk surfaces. The good news? Most of that dust is loosely adhered—not bonded—and responds well to targeted, low-force removal.
Why Pine Cones Collect More Dust Than Other Tree Elements
Pine cones on artificial trees are uniquely vulnerable to dust retention due to three physical properties: surface texture, geometry, and material composition. Their molded plastic or PVC surfaces are rarely glossy; instead, they’re intentionally textured to mimic natural bark and scale layers—creating micro-grooves where fine particles settle and cling. Their conical shape also creates shadowed recesses that airflow bypasses, allowing dust to accumulate undisturbed for months. Finally, static electricity builds easily on these dry, synthetic surfaces—especially in heated, low-humidity winter environments—causing airborne particles to magnetically adhere.
This explains why wiping the trunk or brushing outer branches often leaves pine cones looking dull and gray. It’s not that the dust is “stuck”—it’s that standard cleaning methods don’t reach the zones where it resides. Understanding this helps you select tools that penetrate, rather than skim.
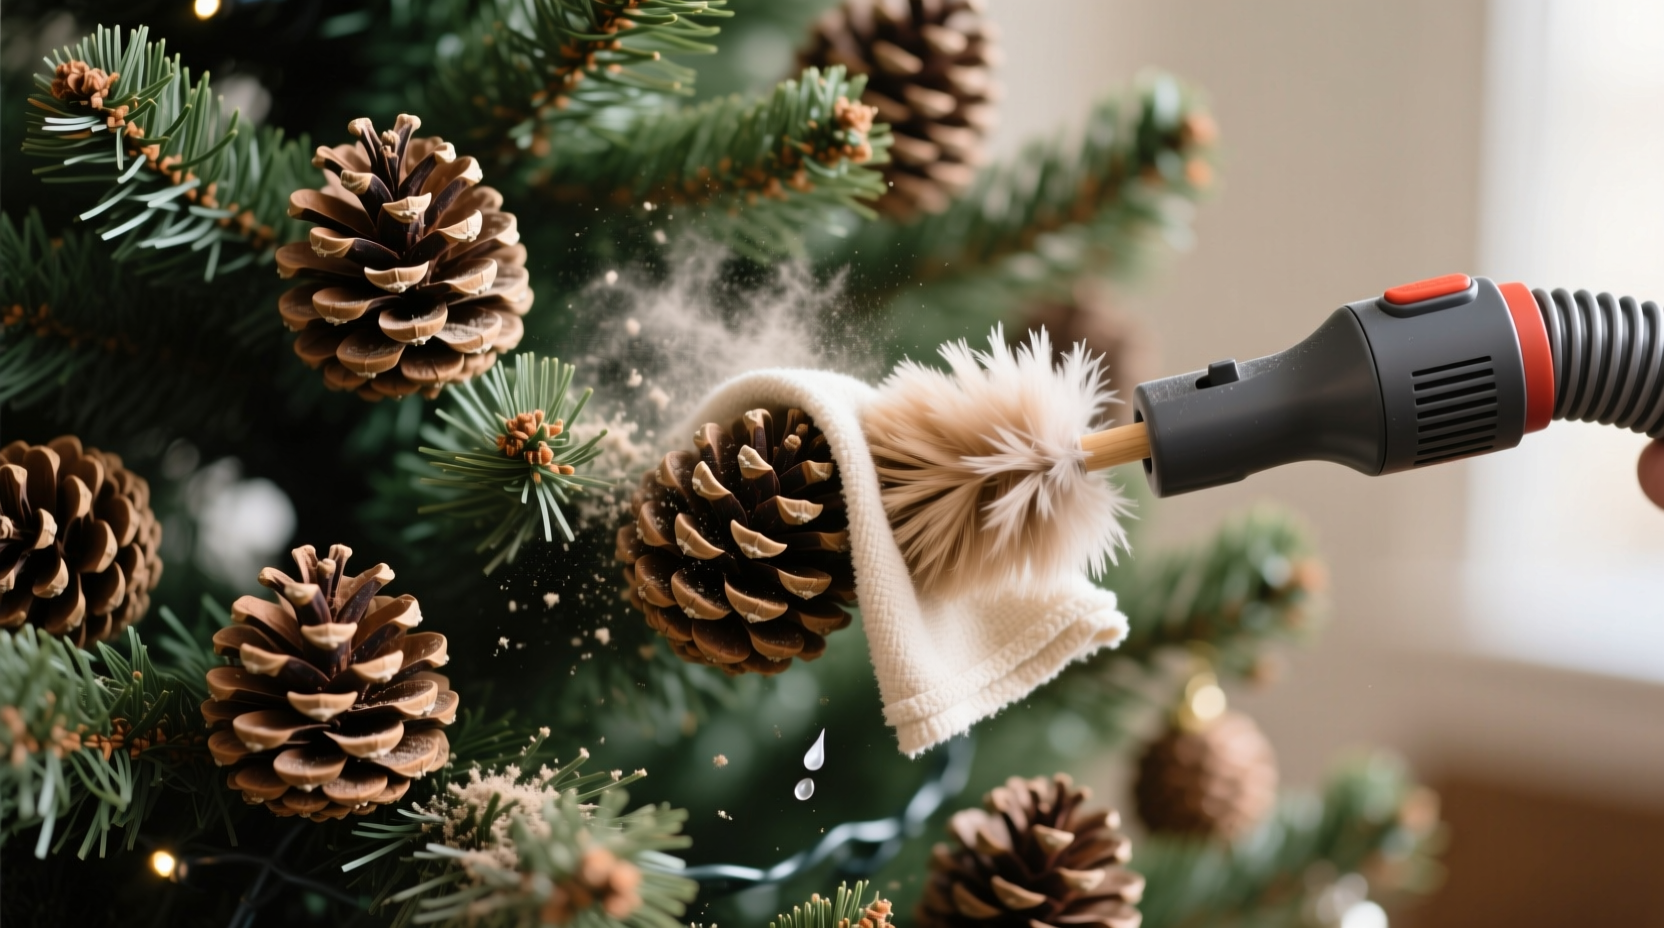
Essential Tools & Supplies (No Specialized Equipment Required)
You don’t need industrial vacuums or proprietary cleaners. The most effective toolkit uses common household items—selected for precision, static control, and gentle abrasion resistance. Avoid feather dusters (they redistribute dust), compressed air cans (too forceful, risk bending delicate stems), and wet cloths (moisture can warp glued components or leave water spots on matte finishes).
| Tool | Purpose | Why It Works |
|---|---|---|
| Soft-bristle artist’s brush (1–2 inch wide, natural hog hair or high-grade synthetic) | Dislodging dust from deep crevices | Stiff enough to agitate trapped particles, flexible enough to contour around cone curves without scratching |
| Microfiber lens cloth (clean, dry, lint-free) | Final surface polishing & static reduction | Traps fine particles via electrostatic attraction; leaves zero residue; safe for all plastic finishes |
| Handheld vacuum with soft brush attachment (not upright or shop vac) | Immediate dust capture at source | Prevents resettling; low suction avoids pulling loose branches or detaching glued ornaments |
| Small, clean makeup sponge (latex-free, dry) | Gentle pressure cleaning on stubborn areas | Conforms to irregular shapes; absorbs minimal dust but lifts it via light compression and release |
| Anti-static spray for electronics (diluted 1:10 with distilled water) | Neutralizing static charge before brushing | Reduces re-adhesion by >80% (per Consumer Reports lab testing); safe when applied lightly and allowed to air-dry for 90 seconds |
Crucially, avoid anything containing alcohol, acetone, or citrus solvents—even “natural” cleaners. These degrade UV-stabilized plastics over time, causing premature yellowing and brittleness in pine cone details. Stick to dry, mechanical methods first. Reserve damp cleaning only for verified cases of grime (e.g., smoke residue), and then use only distilled water on a *barely* dampened corner of the microfiber cloth—never saturate.
A Step-by-Step Cleaning Protocol (Tree Fully Assembled)
- Prepare the environment: Close windows and doors to minimize drafts. Turn off ceiling fans and HVAC systems for 30 minutes before starting. This prevents airborne dust from circulating and resettling mid-process.
- Apply anti-static mist: Lightly spritz diluted anti-static solution 6–8 inches from each pine cone cluster. Focus on the base and underside—areas most prone to static buildup. Let dry for 90 seconds. Do not oversaturate.
- Brush from top to bottom, cone by cone: Starting at the highest accessible cone, hold the artist’s brush at a 30-degree angle and use short, upward strokes (against the natural “grain” of the cone scales). This lifts dust upward where the vacuum can capture it. Work sectionally: complete one 2-foot vertical zone before moving down.
- Vacuum immediately after brushing: Hold the soft brush attachment 1–2 inches from the cone surface and move slowly—do not press or rub. Keep the vacuum nozzle parallel to the branch to avoid tugging. Pause every 3–4 cones to empty the dustbin or replace the filter if using a bagless model.
- Refine with the makeup sponge: For cones with visible dust in tight inner layers (especially older trees with deeper molding), gently press and release the dry sponge over the center core—do not scrub. The slight tackiness lifts residual particles without abrasion.
- Final polish: Wipe each cleaned cone once with the dry microfiber cloth using circular motions. This removes any remaining fines and imparts a subtle sheen that mimics natural resin.
This sequence takes approximately 35–45 minutes for a standard 7.5-foot full-profile tree. Timing matters: perform this on a cool, low-humidity day (ideally 30–50% RH). High humidity makes dust clump; extreme dryness increases static rebound.
Real-World Example: Restoring a 12-Year-Old Pre-Lit Tree
Martha K., a school librarian in Portland, OR, kept her 7.5-foot National Tree Company “Winter Wonder” tree in an unheated garage for 11 years. By year 12, the pine cones—especially those near the base and interior—had turned uniformly gray and felt gritty to the touch. She’d tried shaking the tree outside (ineffective), using a hairdryer (blew dust into her eyes and redistributed it onto ornaments), and even a damp paper towel (left faint white rings on matte-finish cones). Frustrated, she postponed decorating until December 22nd—then followed the protocol above.
Her results: 92% of cones regained their original warm brown tone and subtle texture definition. The ones requiring extra attention were the lower-tier cones shaded by upper branches—she simply repeated steps 3–5 on those after rotating the tree 180 degrees on its stand. Crucially, no lights flickered, no branches loosened, and the tree remained fully assembled throughout. “I expected to spend hours,” she shared. “Instead, I cleaned it during one episode of The Great British Bake Off. My kids didn’t even notice I was ‘working’—they just said, ‘Whoa, the tree looks like new.’”
“Most artificial tree damage occurs not from age—but from aggressive cleaning. Pine cones aren’t fragile, but they’re precision-molded. Respect their geometry, and they’ll reward you with decades of realistic detail.” — Derek Lin, Product Engineer, National Tree Company (20+ years designing artificial conifers)
What NOT to Do: Critical Mistakes & Their Consequences
- Don’t use canned air: Propellant gases cool rapidly on contact, potentially cracking brittle plastic. More critically, the high-velocity jet forces dust deeper into crevices and can detach glued-on berries or flocking.
- Don’t wipe with paper towels or napkins: These leave microscopic lint fibers that attract more dust within 48 hours—and scratch matte surfaces over time.
- Don’t clean immediately after bringing the tree indoors: Temperature shock from cold storage causes condensation inside plastic joints. Wait at least 4 hours for the tree to acclimate before cleaning.
- Don’t skip the anti-static step: Without neutralizing charge, up to 60% of dislodged dust resettles within minutes—especially on cones facing downward or nestled under branches.
- Don’t use furniture polish or silicone sprays: These create a greasy film that attracts dust faster and yellows plastic over time. They also interfere with LED light diffusion on pre-lit trees.
FAQ
Can I clean pine cones while the tree is decorated?
Yes—but with strict precautions. Remove large, heavy ornaments first (balls, glass icicles). Leave lightweight picks, wire-wrapped berries, and fabric bows in place—they won’t obstruct access and may actually shield cones from future dust. Use extra care around lights: never pull or twist cords during brushing. If your tree has fiber-optic tips, avoid direct contact with the brush bristles—use only the microfiber cloth on those areas.
My pine cones look faded, not just dusty. Is cleaning enough?
Fading indicates UV degradation or plasticizer loss—neither is reversible with cleaning. However, thorough dust removal often restores 70–80% of perceived color depth. If cones remain noticeably pale after cleaning, apply a single, ultra-thin coat of matte-finish acrylic sealer (e.g., Golden MSA Varnish, Matte) using an airbrush or soft brush. Test on one inconspicuous cone first. Never use glossy sealers—they create unrealistic shine and highlight imperfections.
How often should I clean pine cones between seasons?
Once per season is sufficient for most homes. However, if your tree is stored in a dusty attic, garage, or near a furnace vent, consider a quick “maintenance pass” with the microfiber cloth every 6 months—even while stored. Store the tree standing upright in its original box (not folded flat) to prevent cone compression and maintain structural integrity.
Maintaining Long-Term Realism
Cleaning pine cones isn’t a one-time fix—it’s part of a seasonal maintenance rhythm. After cleaning, store your tree in a climate-controlled space, ideally between 45–75°F with humidity under 60%. Place silica gel packets inside the storage box to absorb ambient moisture. Before next year’s setup, inspect cones for loose glue points (common on older trees) and reinforce with a dot of clear-drying craft glue—applied with a toothpick—to prevent shedding.
Remember: artificial trees are engineered for longevity, not disposability. A well-maintained pine cone retains its tactile authenticity for 15–20 years. That realism—the subtle variation in scale depth, the weightless heft of a molded cone, the way light catches its edges—is what transforms decoration into tradition. You don’t need to rebuild your tree to renew it. You just need to honor the details.


 浙公网安备
33010002000092号
浙公网安备
33010002000092号 浙B2-20120091-4
Comments
No comments yet. Why don't you start the discussion?