
Grout lines between tiles are essential for structural stability, but they’re also notorious for trapping dirt, mold, and discoloration. Most people dread cleaning them because traditional methods demand on-your-knees scrubbing that leaves wrists sore and results underwhelming. What if you could restore your grout to a near-new condition—without spending hours elbow-deep in bleach or commercial cleaners? The answer lies not in expensive products, but in items already sitting in your kitchen pantry.
Baking soda, white vinegar, lemon juice, salt, and even dish soap aren’t just for cooking—they’re powerful cleaning agents with natural degreasing, deodorizing, and disinfecting properties. When used correctly, these pantry staples can lift years of buildup from grout with minimal physical effort. This guide reveals science-backed combinations, time-saving techniques, and real-world strategies that eliminate the need for aggressive scrubbing while delivering deep, lasting cleanliness.
The Science Behind Pantry Power: Why These Ingredients Work
Understanding why household staples clean effectively is key to using them efficiently. Each ingredient interacts chemically with grime, breaking down organic matter, mineral deposits, and microbial growth without harsh fumes or synthetic chemicals.
- Baking soda (sodium bicarbonate): A mild abrasive that gently lifts surface stains. It also neutralizes odors and creates an alkaline environment that inhibits mold growth.
- White vinegar (acetic acid): Breaks down alkaline deposits like soap scum and hard water stains. Its acidity dissolves mineral buildups and kills many types of bacteria and mold spores.
- Lemon juice: Contains citric acid, which acts similarly to vinegar but with added grease-cutting power. It’s especially effective against yellowed grout and has a fresh scent.
- Dish soap: Designed to emulsify oils, it pulls grease and body soils from porous grout surfaces when combined with water and agitation—even passive soaking.
- Salt: Acts as a fine abrasive booster when mixed into pastes, helping dislodge stubborn particles without scratching tile.
“Natural acids and alkalis work synergistically to break molecular bonds in dirt. You don’t always need mechanical force—sometimes chemistry does the work for you.” — Dr. Lena Patel, Environmental Chemist & Cleaning Science Researcher
Step-by-Step: Deep Clean Grout Without Scrubbing
This method leverages dwell time—the period during which cleaning agents penetrate and react with grime—so you’re not relying on muscle. With proper application, most of the cleaning happens passively.
- Prep the Surface: Remove loose debris by sweeping or vacuuming the tiled area. Wipe down tiles with warm water and a microfiber cloth to remove surface dust and oils.
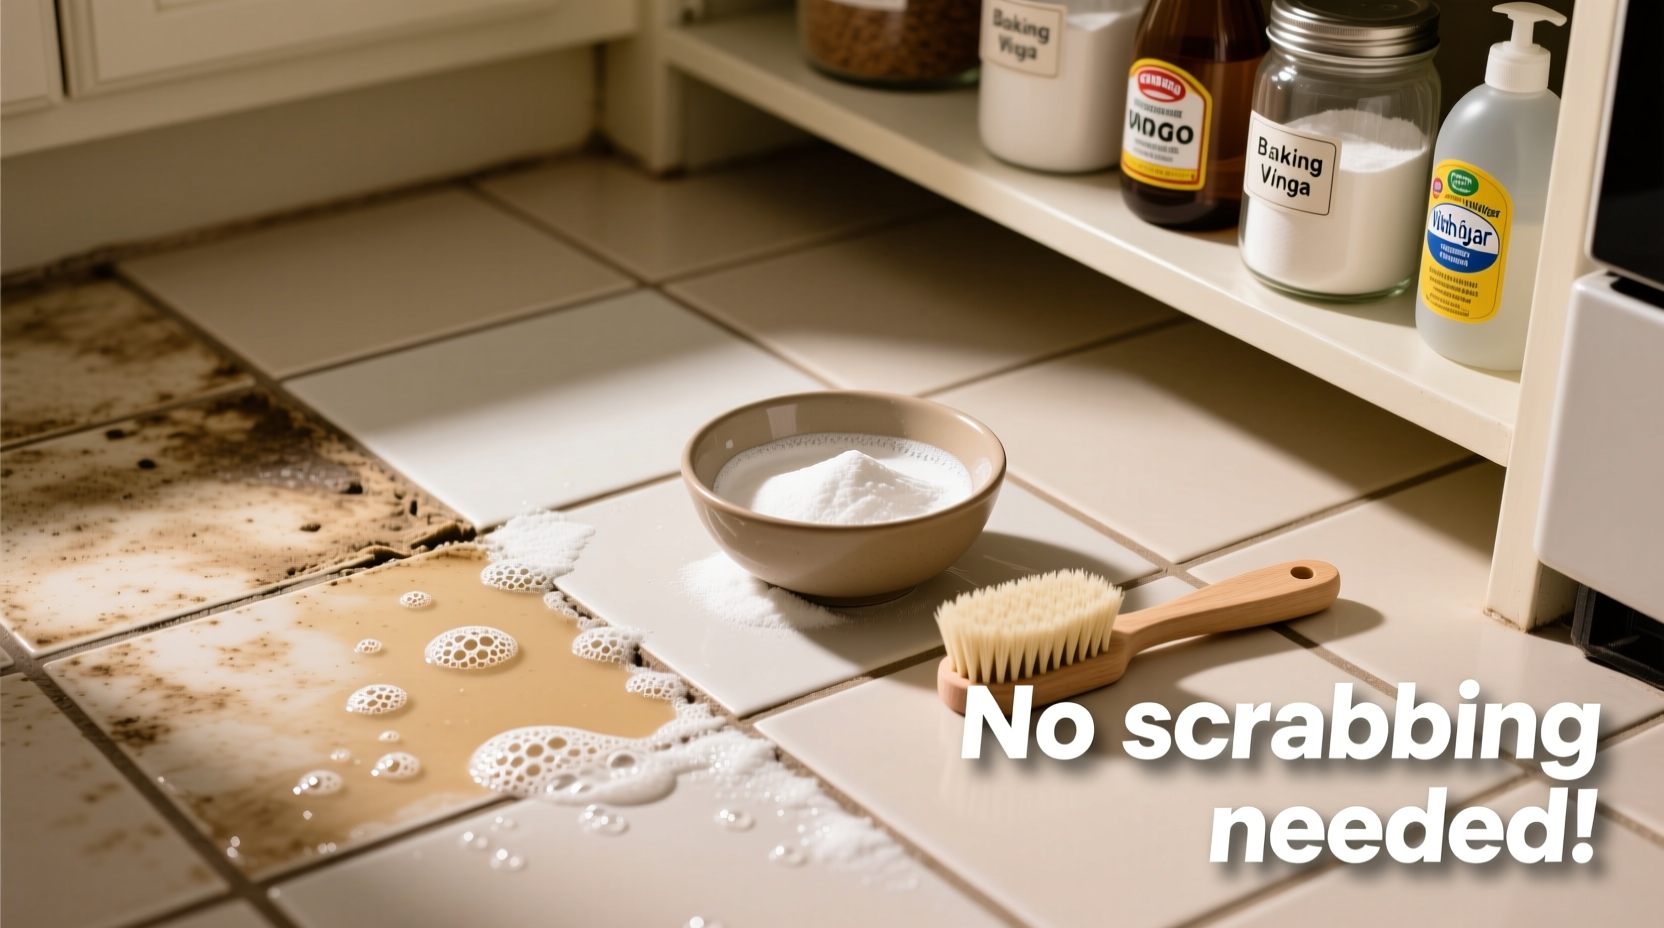
- Apply a Baking Soda Paste: Mix ½ cup baking soda with 2–3 tablespoons of water to form a thick paste. Use a spoon or small spatula to spread the paste directly onto grout lines. Focus on stained or darkened areas.
- Add Vinegar Spray: Fill a spray bottle with undiluted white vinegar. Lightly mist the baking soda-coated grout. You’ll see fizzing—this reaction helps loosen embedded soils.
- Cover with Damp Cloths: Lay damp microfiber cloths or paper towels over the treated grout. This keeps the mixture moist and prevents rapid drying, allowing deeper penetration.
- Let It Sit for 1–2 Hours: Allow the chemical action to work. For heavily soiled grout, leave it up to 3 hours (but no longer than 4 to avoid potential residue).
- Wipe Away Residue: Remove the cloths and use a soft sponge or cloth to wipe away the paste. Rinse thoroughly with clean water. In most cases, the grout will appear significantly lighter without any vigorous brushing.
- Optional Boost with Lemon Juice: For remaining yellow stains, apply fresh lemon juice directly to grout lines and let sit for 15 minutes before rinsing. Avoid prolonged exposure on light-colored grout to prevent bleaching.
- Rinse and Dry: Flush the area with clean water and dry completely with a towel. Proper drying prevents moisture retention, which leads to future mold growth.
When to Use Heat for Enhanced Results
Adding gentle heat increases molecular activity, accelerating the breakdown of grime. After applying the baking soda-vinegar mix, place a warm (not hot) towel over the area or briefly hover a hairdryer at low heat 6–8 inches above the surface. This boosts effectiveness without damaging tile or grout.
Alternative Methods Using Only One Pantry Ingredient
If you're short on time or supplies, single-ingredient approaches can still yield impressive results when applied strategically.
| Ingredient | How to Use | Best For | Limitations |
|---|---|---|---|
| Vinegar (undiluted) | Spray directly on grout; cover and wait 30–60 min before wiping | Soap scum, hard water stains | May etch natural stone; avoid on marble or limestone |
| Baking Soda + Water Paste | Apply thick paste; cover and wait 1 hour before gentle wipe | Surface-level dirt, odor removal | Less effective on deep-set stains alone |
| Lemon Juice | Soak cotton swabs and press into grout lines for 20–30 min | Yellowing, mildew stains | Can lighten colored grout over time |
| Dish Soap (concentrated) | Apply full-strength to grout; cover and wait 30 min | Grease, body oils, kitchen backsplashes | Requires thorough rinsing to avoid film |
Real Example: Kitchen Backsplash Revival in Under 90 Minutes
Sarah, a busy parent in Portland, had a beige ceramic backsplash behind her stove that had turned nearly black from years of cooking splatter and steam. She tried weekly wipes with all-purpose cleaner, but the grout stayed grimy. Skeptical but desperate, she followed the baking soda-vinegar method one Saturday morning.
She applied the paste along the worst sections, sprayed vinegar, and covered the area with damp paper towels. While the mixture worked, she prepared lunch and helped her kids with homework—no scrubbing involved. After 75 minutes, she wiped the area with a damp sponge. “I couldn’t believe it,” she said. “The grout wasn’t pure white, but it was 80% cleaner. I repeated it once more after a week, and now it looks like we redid the whole thing.”
Her total hands-on time? Less than 15 minutes across two days.
Checklist: No-Scrub Grout Cleaning Routine
Follow this simple checklist to ensure consistent, effective results every time:
- ☐ Sweep or vacuum the tiled area to remove loose debris
- ☐ Wipe tile surfaces with warm water to remove surface oil
- ☐ Mix baking soda into a thick paste with water
- ☐ Spread paste evenly over grout lines using a spoon or brush
- ☐ Mist with white vinegar until light fizzing occurs
- ☐ Cover treated grout with damp cloths or paper towels
- ☐ Wait 1–2 hours (longer for heavy buildup)
- ☐ Wipe away residue with a soft sponge and rinse well
- ☐ For yellow stains, apply lemon juice and wait 15 minutes before rinsing
- ☐ Dry thoroughly with a clean towel
- ☐ Seal grout after cleaning (if unsealed) to prevent future staining
What Not to Do: Common Mistakes That Waste Time
Even with natural ingredients, improper use can lead to disappointment or damage. Avoid these pitfalls:
- Mixing vinegar with bleach: This produces toxic chlorine gas. Never combine acidic cleaners with chlorine-based products.
- Leaving residues too long: Baking soda can leave a powdery film if not rinsed properly. Always follow up with a clean water wipe-down.
- Using steel wool or harsh brushes: Even when trying to “help” the process, abrasive tools scratch tile glaze and widen grout pores, making future staining worse.
- Ignoring ventilation: While natural, vinegar fumes can be strong in enclosed spaces like bathrooms. Open a window or run an exhaust fan.
- Skipping the sealant: Unsealed grout reabsorbs stains quickly. After deep cleaning, consider applying a water-based grout sealer for long-term protection.
Frequently Asked Questions
Can I use apple cider vinegar instead of white vinegar?
Yes, but white vinegar is more effective due to its higher acetic acid concentration (typically 5–6%). Apple cider vinegar may leave a slight color or scent residue, so it’s best reserved for less visible areas.
How often should I deep-clean grout using this method?
Every 3–6 months is sufficient for most homes. High-moisture areas like showers benefit from monthly maintenance applications (shorter dwell times) to prevent mold regrowth.
Will these methods work on colored grout?
Generally yes, but proceed with caution. Test on a small section first. Lemon juice and vinegar may lighten darker grouts over repeated use. Baking soda is safe for all colors.
Final Thoughts: Clean Smarter, Not Harder
Cleaning grout doesn’t have to mean back strain and wasted weekends. By harnessing the natural chemical reactions between pantry staples, you shift the workload from your arms to the science happening beneath the surface. The key isn’t aggression—it’s patience, consistency, and smart formulation.
Once you experience the ease of passive cleaning, you’ll rethink every other chore in your home. And the best part? You’re avoiding plastic bottles, toxic fumes, and inflated prices—all while achieving genuinely impressive results.


 浙公网安备
33010002000092号
浙公网安备
33010002000092号 浙B2-20120091-4
Comments
No comments yet. Why don't you start the discussion?