
Cleaning grout is one of those household chores many people dread. The narrow lines between tiles trap dirt, mold, and soap scum over time, turning once-bright floors and walls into a dingy mess. Traditional methods often involve aggressive scrubbing, harsh chemicals, and hours on your hands and knees. But what if you could achieve the same — or even better — results without lifting a brush?
Baking soda and vinegar, two staples found in nearly every kitchen, form a powerful cleaning duo when combined. Their chemical reaction produces carbon dioxide gas, which creates a bubbling action capable of loosening built-up grime deep within porous grout lines. When used correctly, this dynamic pair can lift stains, eliminate odors, and restore grout to near-original condition — all with minimal physical effort.
This guide reveals proven techniques that leverage baking soda and vinegar to clean grout without scrubbing. You’ll learn how to prepare surfaces, apply effective paste and spray solutions, let chemistry do the work, and maintain results long-term — all using non-toxic, affordable ingredients.
The Science Behind Baking Soda and Vinegar for Grout Cleaning
Baking soda (sodium bicarbonate) is a mild alkali that acts as a natural abrasive and deodorizer. It gently lifts surface stains without damaging tile or grout. White vinegar (acetic acid) is a weak acid known for dissolving mineral deposits, grease, and organic buildup like mildew. When mixed, they undergo an acid-base reaction:
NaHCO₃ + CH₃COOH → CO₂↑ + H₂O + CH₃COONa (Baking Soda + Acetic Acid → Carbon Dioxide + Water + Sodium Acetate)
The fizzing action helps break apart stubborn residues lodged in grout pores. While the reaction dissipates quickly, the resulting solution remains effective at neutralizing odors and softening grime. Importantly, the mixture leaves behind only water, salt, and trace acetate — making it safe for homes with children and pets.
Step-by-Step: Deep Clean Grout Without Scrubbing
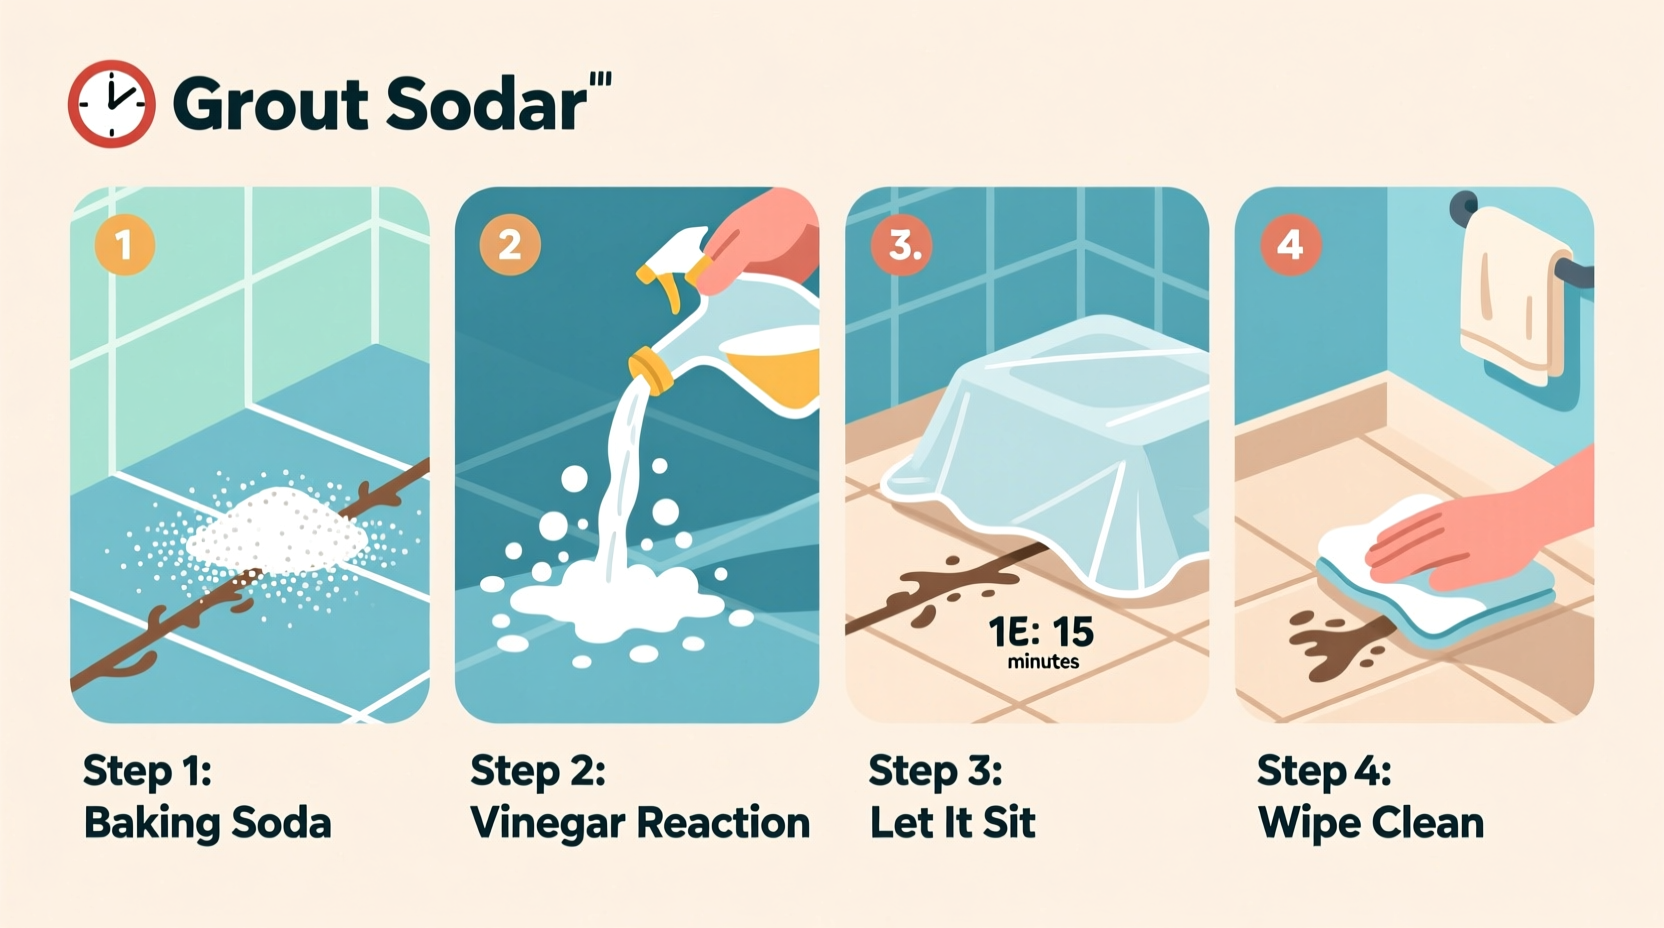
The key to no-scrub grout cleaning lies in maximizing contact time and allowing the chemical reaction to penetrate deeply. Follow this detailed process for best results:
- Clear and dry the area: Remove rugs, mats, or bathroom accessories. Wipe tiles dry with a microfiber cloth to ensure the cleaning solution adheres directly to grout.
- Pre-treat with vinegar spray: Fill a spray bottle with undiluted white vinegar. Spray generously along grout lines, focusing on visibly stained or discolored areas. Let sit for 5–10 minutes to begin breaking down grease and soap scum.
- Apply baking soda paste: In a small bowl, mix ½ cup baking soda with 2–3 tablespoons of water to form a thick paste. Use a spoon or spatula to spread the paste directly onto grout lines. For extra-stubborn stains, add a few drops of hydrogen peroxide to boost whitening power.
- Spray vinegar over the paste: Reapply vinegar by spraying it over the baking soda layer. Instant fizzing will occur — this is the cleaning reaction in action. The foam helps push debris out of grout pores.
- Cover with plastic wrap: Lay sheets of plastic wrap over treated areas to prevent rapid drying. This traps moisture and extends dwell time, allowing deeper penetration. Leave for 30 to 60 minutes (or up to 2 hours for neglected grout).
- Rinse thoroughly: Remove plastic and wipe away residue with a damp sponge or cloth. Rinse frequently to avoid redepositing dirt. For showers or floors, follow with a clean water flush using a spray bottle or handheld showerhead.
- Dry completely: Buff dry with a clean towel or allow air-drying. Proper drying inhibits mold regrowth.
Alternative No-Scrub Methods Using Baking Soda and Vinegar
Not all spaces allow for paste application or extended dwell times. These alternative hacks adapt the same principles for convenience and speed.
Vinegar Soak Pads for Floor Grout
Ideal for large floor areas, this method uses absorbent pads soaked in vinegar to soften grime before minimal wiping.
- Cut pieces of cotton fabric or old t-shirts to fit grout joints.
- Saturate them with white vinegar and lay them directly over dirty grout lines.
- Sprinkle baking soda lightly over the wet cloths.
- Cover with plastic wrap and wait 45 minutes.
- Remove pads and wipe clean with a damp mop or sponge.
Baking Soda Steam Boost (For Showers)
Combine heat and chemistry for enhanced cleaning. After applying baking soda paste and spraying vinegar, turn on a hot shower for 10–15 minutes. The steam opens grout pores, helping the solution penetrate deeper. Finish by rinsing with cool water.
Preventive Spray Solution
Mix equal parts water and vinegar in a spray bottle. After each shower, mist grout lines lightly. The acidity prevents mildew formation and keeps soap scum from hardening. Add 1 tablespoon of baking soda per cup if odor is a concern.
| Method | Best For | Dwell Time | Effort Required | Effectiveness Level |
|---|---|---|---|---|
| Paste + Plastic Wrap | Heavy staining, neglected grout | 30–120 min | Low (after setup) | ★★★★★ |
| Vinegar Pad Soak | Floor grout, wide joints | 45 min | Low | ★★★★☆ |
| Steam-Enhanced | Shower enclosures, mold-prone zones | 15–20 min active + 30 min passive | Medium | ★★★★☆ |
| Preventive Spray | Ongoing maintenance | N/A | Very Low | ★★★☆☆ (preventative) |
Expert Insight: Why Less Scrubbing Can Mean Better Results
Dr. Linda Ruiz, environmental chemist and home hygiene researcher at the National Institute of Sustainable Living, explains why passive cleaning often outperforms aggressive scrubbing:
“People assume more elbow grease equals cleaner surfaces, but with porous materials like grout, excessive scrubbing can actually worsen the problem. It pushes contaminants deeper and wears down the grout matrix, making it more prone to future staining. Allowing chemical reactions time to work reduces mechanical stress and delivers longer-lasting cleanliness.” — Dr. Linda Ruiz, Ph.D., Environmental Chemistry
This insight underscores the importance of patience in no-scrub methods. Letting solutions dwell protects both tile integrity and user health by minimizing repetitive strain injuries associated with scrubbing.
Real Example: Reviving a 10-Year-Old Bathroom Floor
Sarah M., a homeowner in Portland, OR, had given up on her bathroom floor. After a decade of use, the off-white ceramic tiles were overshadowed by gray-black grout lines that resisted regular mopping and bleach wipes. “I tried everything — magic erasers, commercial cleaners, even a steam mop,” she recalls. “It looked worse after scrubbing because the grout was crumbling.”
She decided to try the baking soda paste method with plastic wrap coverage. She applied the mixture on a Friday evening and left it overnight. The next morning, she wiped the floor with a damp rag — no scrubbing. “The difference was shocking. The grout wasn’t pure white, but it was light gray again, and the whole room felt brighter. I couldn’t believe I didn’t have to kneel down once.”
She now repeats the treatment every three months and uses a vinegar-water spray weekly. Her grout has remained stable, with no further deterioration.
Common Mistakes to Avoid
Even natural cleaners require proper handling. Here are frequent errors that reduce effectiveness or damage surfaces:
- Mixing baking soda and vinegar too early: Combining them in a container causes most of the reaction to finish before application. Apply separately — paste first, then spray vinegar on top.
- Using on unsealed grout immediately: While the method works well on unsealed grout, repeated exposure to vinegar can degrade cement-based grout over time. Always seal after deep cleaning.
- Leaving residue too long: More than 2 hours may lead to dried paste that’s harder to remove. Stick to recommended dwell times.
- Ignoring ventilation: Vinegar fumes can be strong, especially in enclosed bathrooms. Open windows or run exhaust fans during and after treatment.
- Applying on marble or stone tiles: Vinegar’s acidity can etch natural stone. This method should only be used on ceramic, porcelain, or sealed stone tiles with resistant grout.
Do’s and Don’ts Summary Table
| Action | Recommended? | Reason |
|---|---|---|
| Apply baking soda paste then spray vinegar | ✅ Yes | Maximizes foaming reaction on grout surface |
| Leave solution under plastic for 1 hour | ✅ Yes | Extends penetration time without drying |
| Use on sealed tile floors with cement grout | ✅ Yes | Safe and effective when done quarterly |
| Mix baking soda and vinegar in a bucket first | ❌ No | Reaction completes before reaching grout |
| Use on marble, limestone, or travertine | ❌ No | Vinegar damages calcium-based stones |
| Scrub aggressively after treatment | ❌ No | Wears down grout; defeats purpose of no-scrub method |
FAQ: Your Top Questions Answered
Can I use apple cider vinegar instead of white vinegar?
No. Apple cider vinegar contains pigments and additional organic compounds that may stain grout or leave behind sticky residues. White distilled vinegar is clear, highly acidic, and specifically suited for cleaning.
How often can I clean grout with baking soda and vinegar?
For deep cleaning, once every 3 to 6 months is sufficient for most households. High-moisture areas like showers may benefit from monthly preventive sprays (water + vinegar), but full treatments should be spaced out to avoid pH imbalance in grout.
Will this method whiten yellowed grout completely?
It significantly improves appearance by removing surface stains and mildew, but it cannot reverse deep discoloration caused by aging, poor sealing, or iron oxidation. For severely yellowed grout, consider professional restoration or regrouting after cleaning.
Final Checklist: No-Scrub Grout Cleaning Success Plan
- Clear the cleaning area and dry the surface.
- Pre-spray grout lines with white vinegar.
- Apply baking soda paste directly to grout.
- Spray vinegar again to activate bubbling.
- Cover with plastic wrap to lock in moisture.
- Wait 30–60 minutes (no scrubbing needed).
- Wipe clean with a damp cloth or sponge.
- Rinse thoroughly and dry completely.
- Seal grout after cleaning to protect results.
- Use a vinegar-water spray weekly for maintenance.
Conclusion: Transform Your Cleaning Routine with Smarter Chemistry
Cleaning grout doesn’t have to mean back-breaking labor. By harnessing the natural power of baking soda and vinegar — and giving the reaction time to work — you can achieve impressive results without ever picking up a scrub brush. This method is not only easier on your body but also gentler on your home’s surfaces and the environment.
Whether you’re refreshing a bathroom wall, restoring a kitchen backsplash, or reclaiming a neglected tile floor, these hacks offer a sustainable, cost-effective solution. Start small, follow the steps carefully, and witness the transformation. Once you see what passive cleaning can do, you may never go back to scrubbing again.


 浙公网安备
33010002000092号
浙公网安备
33010002000092号 浙B2-20120091-4
Comments
No comments yet. Why don't you start the discussion?