
A laptop’s keyboard is one of the most frequently used—and often least maintained—components of any computing device. Over time, dust, crumbs, oils from fingers, and environmental debris accumulate between and under the keys, leading to sluggish responsiveness, sticky keys, and even long-term mechanical failure. While cleaning seems straightforward, improper techniques can damage sensitive key mechanisms, especially on modern slim-profile keyboards. The goal isn’t just cleanliness—it’s preserving functionality while eliminating grime. With the right tools, timing, and method, you can maintain your keyboard’s performance without risking internal harm.
Why Keyboard Maintenance Matters
Laptops are designed for portability, which means they’re often used in environments far from ideal: coffee shops, beds, laps, and kitchen tables. These settings expose the keyboard to more than just typing—they collect skin cells, food particles, and airborne dust. According to a 2023 study by the University of Arizona, the average keyboard hosts more bacteria per square inch than a toilet seat. Beyond hygiene, buildup beneath keys interferes with their ability to depress and rebound properly, increasing the risk of misregistration or permanent sticking.
Manufacturers use delicate scissor-switch or butterfly mechanisms in many modern laptops (especially ultrabooks), which are not only compact but also highly susceptible to debris intrusion. Once foreign material wedges into the hinge mechanism, it can cause uneven wear or even breakage when force is applied during typing. Regular, gentle cleaning prevents these issues and extends the lifespan of your device.
Essential Tools and Supplies
Using inappropriate materials—like wet wipes, paper towels, or household cleaners—can lead to moisture seepage, residue buildup, or abrasion of printed key labels. Instead, gather tools specifically suited for electronics care:
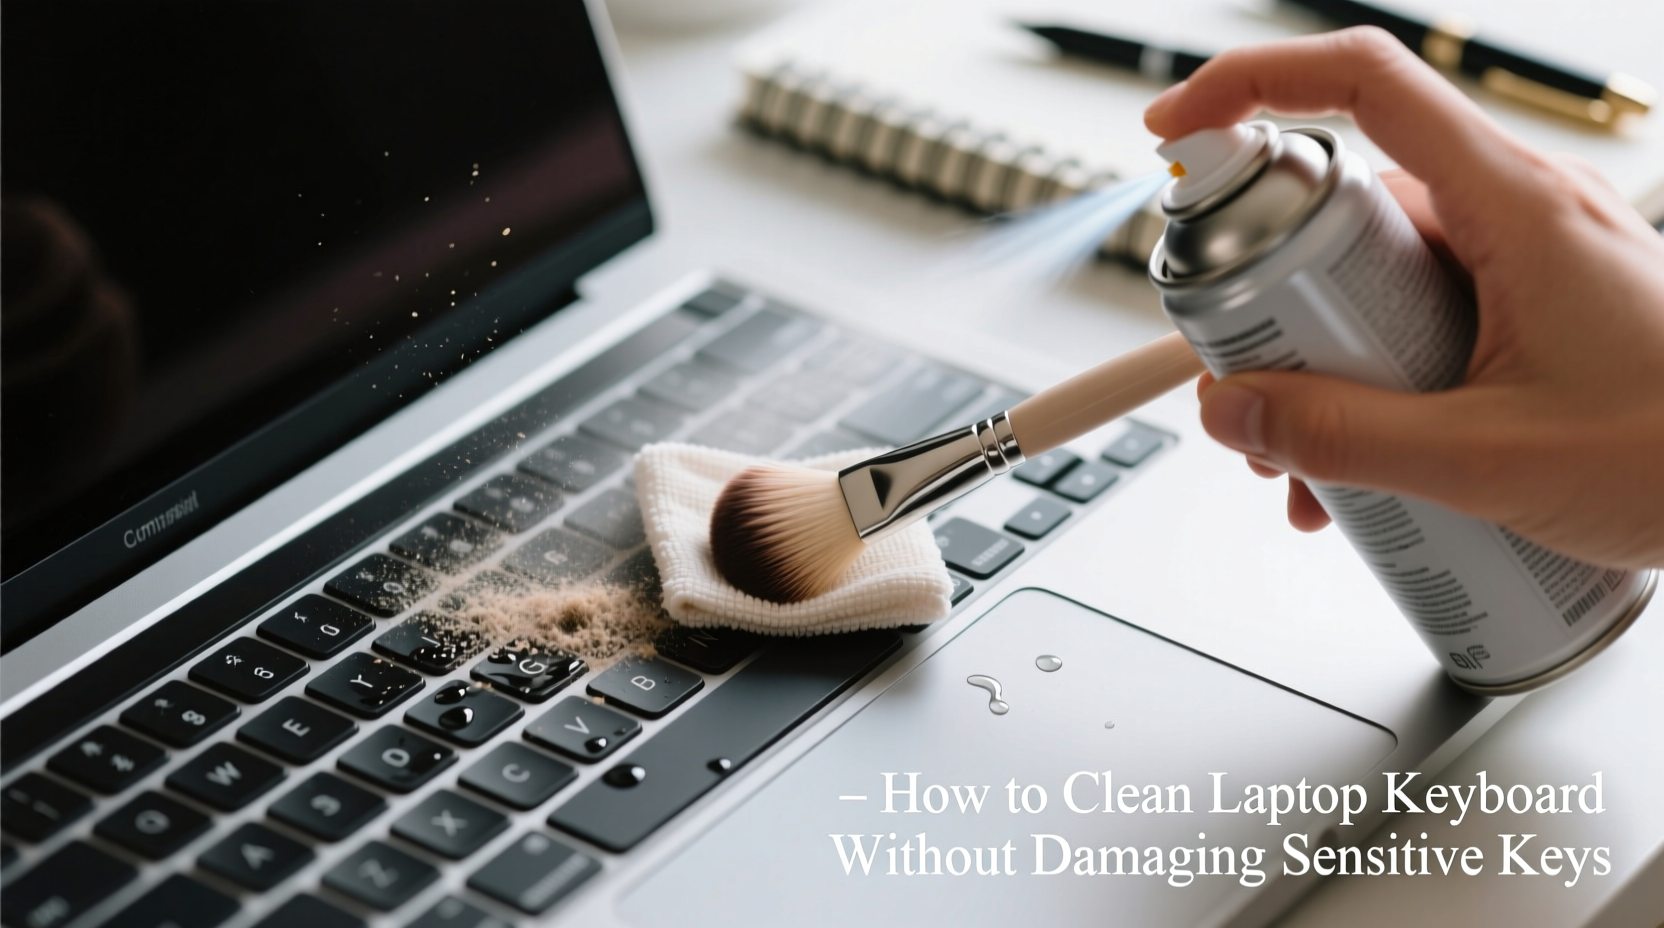
- Compressed air canister: Removes loose debris from between keys. Use short bursts to avoid condensation.
- Soft-bristled brush: A clean makeup brush or small paintbrush helps dislodge particles before blowing them away.
- Isopropyl alcohol (70% concentration): Effective at disinfecting without leaving residue. Never pour directly onto the keyboard.
- Microfiber cloth: Lint-free and gentle on surfaces. Dampen slightly only when necessary.
- Cotton swabs: Ideal for precise cleaning around stubborn grime near key stems.
- Plastic pry tool (optional): For gently lifting keys on removable-key models—never metal.
Avoid using water, window cleaners, acetone, or bleach-based products. These can corrode circuits, degrade plastic components, or cloud keycaps.
Step-by-Step Cleaning Procedure
Follow this detailed sequence to ensure thorough yet safe cleaning:
- Power down and disconnect: Shut your laptop completely and unplug it from power. If possible, remove the battery (on older models). This eliminates electrical risks during cleaning.
- Tilt and shake gently: Hold the laptop at a 75-degree angle over a trash can and tap the back lightly to dislodge loose crumbs.
- Brush surface debris: Use the soft-bristled brush in sweeping motions across the keyboard to loosen dust and fibers caught between keys.
- Blast with compressed air: Hold the can upright and spray in short bursts at a 45-degree angle between keys. Move systematically row by row. Do not shake the can, as this can release liquid propellant.
- Clean key surfaces: Lightly dampen a corner of the microfiber cloth with isopropyl alcohol. Wipe each keycap top in circular motions, avoiding excess moisture. Focus on high-contact areas like spacebar, Enter, Shift, and letter keys.
- Target crevices: Dip a cotton swab in alcohol, squeeze out excess, and carefully clean around the base of each key. Replace swabs as they pick up dirt.
- Dry thoroughly: Allow the keyboard to air-dry for at least 10–15 minutes before powering on. Ensure no dampness remains.
If your model allows for keycap removal (common on some business laptops), proceed cautiously. Use a plastic tool to lift the key from two opposite corners simultaneously, following manufacturer guides. Clean the exposed mechanism with a dry swab, then reattach the keycap by snapping it back evenly. Never force a keycap off consumer ultrabooks—many are not designed for removal.
Do’s and Don’ts of Laptop Keyboard Care
| Do’s | Don’ts |
|---|---|
| Use 70% isopropyl alcohol for disinfection | Never pour liquids directly onto the keyboard |
| Clean regularly to prevent deep buildup | Avoid abrasive cloths like paper towels or tissues |
| Use compressed air in short bursts | Don’t use household cleaners containing ammonia or bleach |
| Wipe hands before typing to reduce oil transfer | Never submerge any part of the laptop |
| Store laptop in a dust-free case when traveling | Don’t press hard on stuck keys—clean first |
Real-World Scenario: Preventing Permanent Damage
Consider the case of Daniel, a freelance writer who worked from cafes daily. After six months of heavy use, his laptop’s ‘E’ and ‘R’ keys began registering double inputs. He tried pressing harder, then tapping repeatedly, worsening the issue. Upon inspection, he found fine coffee grounds lodged beneath the keys. Using a toothpick (a common but risky choice), he pried at the mechanism, accidentally cracking the scissor switch. The repair cost $120 at a service center—more than five times the price of proper cleaning supplies.
Had Daniel followed a routine maintenance schedule using compressed air and a soft brush, the debris could have been removed before causing functional damage. His experience underscores the importance of preventive care and using correct tools. Minor inconvenience today prevents costly repairs tomorrow.
“Most keyboard failures we see stem from avoidable neglect or aggressive cleaning attempts. A few minutes every month saves hundreds in repairs.” — Lena Park, Senior Technician at TechCare Repair Labs
When to Seek Professional Help
While most cleaning can be done safely at home, certain situations warrant professional intervention:
- Keys remain sticky after cleaning: Internal rubber domes or switches may be compromised.
- Unresponsive keys with no visible debris: Could indicate circuit board issues or solder joint failure.
- Spills involving sugary liquids (soda, juice): Residue can corrode contacts over time, requiring disassembly and deep cleaning.
- Visible damage to key mechanisms: Bent stabilizers or broken hinges need replacement parts and expertise.
In such cases, authorized service centers have specialized tools and diagnostic equipment to open the chassis safely, clean internal layers, and test functionality post-repair. Attempting deep disassembly without experience risks voiding warranties or damaging ribbon cables.
Frequently Asked Questions
Can I use baby wipes to clean my laptop keyboard?
No. Most baby wipes contain moisturizers, fragrances, and mild soaps that leave behind sticky residues. Worse, they often include alcohol or citric acid, which can degrade plastic keycaps and seep into the keyboard matrix. Stick to dry brushing and alcohol-dampened microfiber for safe results.
How do I clean a backlit keyboard without damaging the lighting?
Backlit keyboards require extra caution due to transparent or semi-transparent keycaps and underlying LED arrays. Avoid excessive moisture. Instead, use a nearly dry microfiber cloth lightly misted with alcohol. Never spray liquid near the edges where LEDs sit. Compressed air is especially useful here, as it removes dust without contact.
Is it safe to remove laptop keys for cleaning?
Only if your model supports it. Many consumer laptops, especially Apple MacBooks and Dell XPS series, use non-removable keys. Forcing them off causes irreversible damage. Check your user manual or manufacturer support site first. If removable, use a dedicated keycap puller or flat plastic tool and document the orientation before removal.
Expert-Recommended Maintenance Checklist
To keep your keyboard in optimal condition, follow this actionable checklist:
- ✅ Power down laptop before cleaning
- ✅ Remove large debris with tilt-and-tap method
- ✅ Brush between keys with soft-bristle tool
- ✅ Blow out dust with compressed air (short bursts)
- ✅ Wipe keycaps with alcohol-dampened microfiber
- ✅ Clean crevices with dry or slightly damp cotton swabs
- ✅ Allow 10–15 minutes drying time before use
- ✅ Repeat every 4–6 weeks based on usage
- ✅ Store laptop in protective sleeve when not in use
- ✅ Wash hands before extended typing sessions
Conclusion: Small Efforts, Long-Term Gains
Your laptop keyboard endures constant use and environmental exposure, yet it demands minimal attention to stay functional and hygienic. By adopting a simple, regular cleaning routine with the right tools, you protect both performance and longevity. Avoid shortcuts like wiping with wet tissues or poking with sharp objects—these may seem effective temporarily but often lead to costly consequences. Respect the sensitivity of modern key mechanisms, and treat cleaning as preventive maintenance rather than emergency response.


 浙公网安备
33010002000092号
浙公网安备
33010002000092号 浙B2-20120091-4
Comments
No comments yet. Why don't you start the discussion?