
White grout is a popular choice in bathrooms and kitchens because it creates a clean, modern aesthetic. However, its light color makes it highly susceptible to staining, discoloration, and mildew buildup. Over time, soap scum, hard water deposits, and everyday dirt can dull the appearance of even the most meticulously maintained tiles. While commercial cleaners promise quick fixes, many contain harsh chemicals that can degrade grout or irritate sensitive skin and lungs. A safer, more sustainable alternative lies in two common household items: baking soda and lemon.
Baking soda is a gentle abrasive that lifts dirt without scratching surfaces, while lemon juice contains citric acid, a natural disinfectant and bleaching agent. Together, they form a powerful, non-toxic cleaning solution capable of restoring grout to its original brightness. This guide walks you through the science, application, and long-term care strategies for revitalizing your tiled spaces using only natural ingredients.
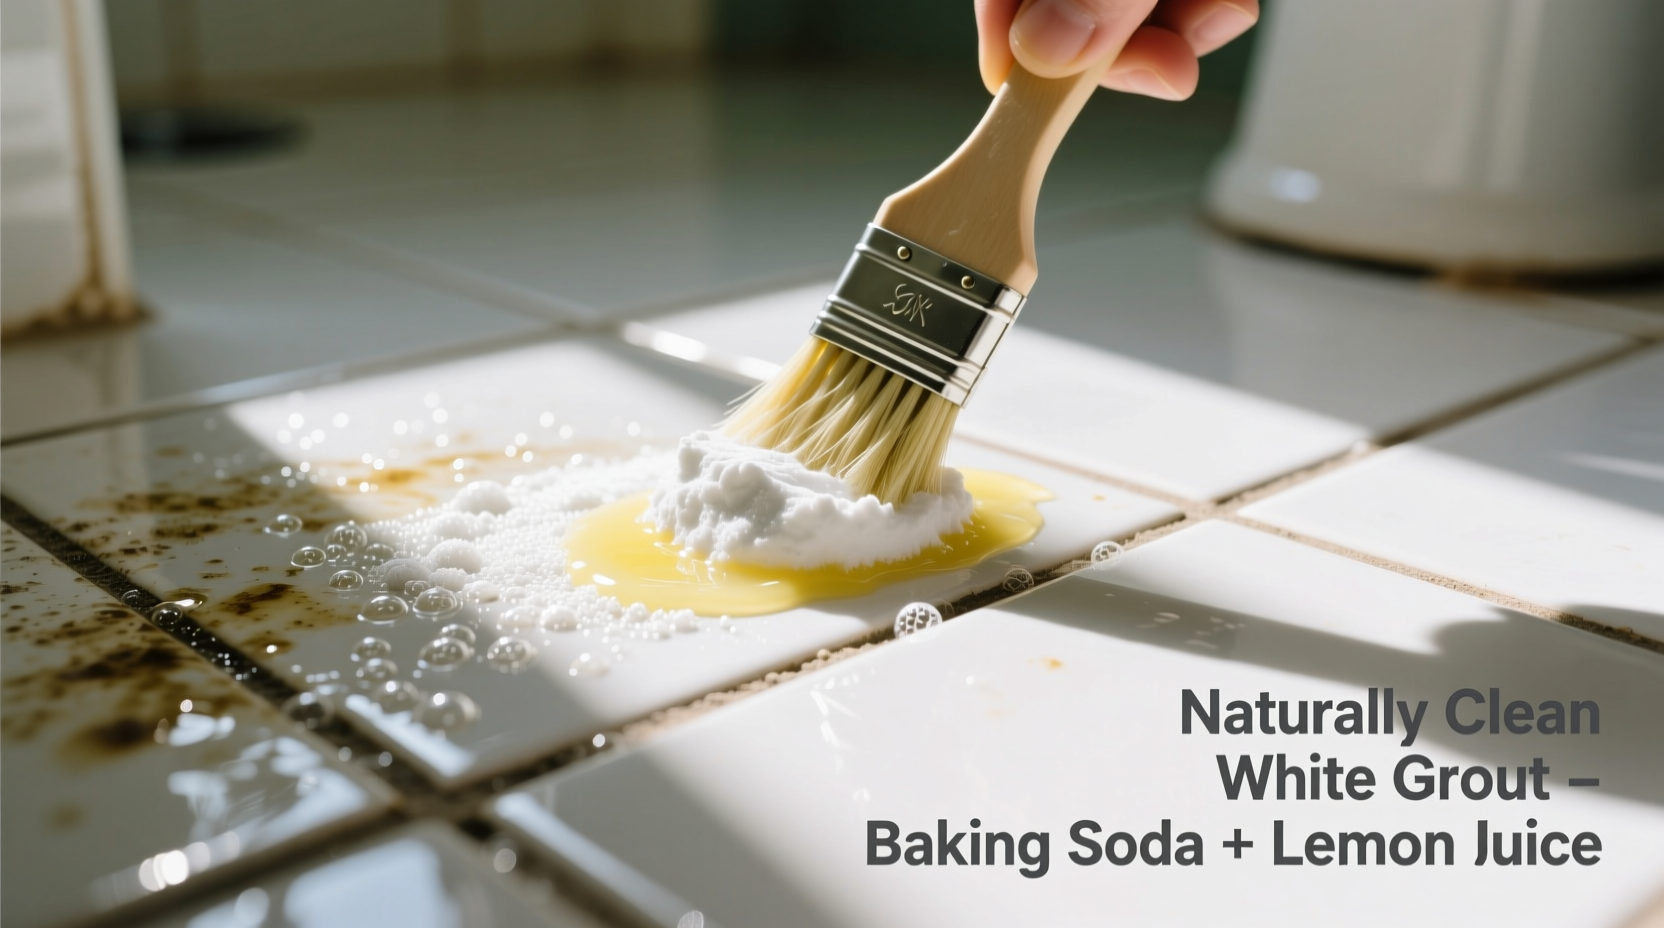
The Science Behind Baking Soda and Lemon for Grout Cleaning
Baking soda, or sodium bicarbonate, works by creating a mildly alkaline solution when mixed with water. This helps break down acidic residues like soap scum and grease. Its fine granular texture provides mechanical scrubbing action without damaging tile or grout lines. Unlike chlorine-based cleaners, it doesn’t emit toxic fumes and is safe for homes with children and pets.
Lemon juice, rich in citric acid (typically 5–6% concentration), acts as a natural antimicrobial and stain remover. It effectively dissolves mineral deposits from hard water and helps lift organic stains caused by mold and mildew. The mild bleaching effect of citric acid also brightens discolored grout without the risks associated with chlorine bleach.
When combined, these two ingredients create a fizzy reaction due to the acid-base interaction. While visually impressive, this effervescence isn't essential for cleaning—it’s more about immediate visual feedback than performance. What matters most is the sustained contact time and physical scrubbing.
“Natural cleaning agents like baking soda and lemon are excellent for routine maintenance. They reduce chemical exposure and preserve grout integrity better than frequent use of bleach.” — Dr. Lena Patel, Environmental Health Scientist
Step-by-Step Guide: Deep Cleaning White Grout Naturally
Cleaning grout with baking soda and lemon is simple, but effectiveness depends on proper technique and patience. Follow this detailed process for optimal results:
- Sweep and rinse the surface: Remove loose dust and debris with a dry brush or vacuum attachment. Rinse tiles with warm water to loosen surface grime.
- Prepare the paste: In a small bowl, mix ½ cup of baking soda with ¼ cup of fresh lemon juice. Stir until it forms a thick, spreadable paste. If too runny, add more baking soda; if too dry, add a few drops of lemon juice.
- Apply the paste directly to grout lines: Use an old toothbrush or grout brush to work the mixture into the joints. Focus on areas with visible staining or darkening. Ensure full coverage along all seams.
- Let it sit for 10–15 minutes: Allow the solution to penetrate. Do not let it dry completely. For heavily soiled grout, extend the dwell time up to 30 minutes, reapplying moisture if needed.
- Scrub thoroughly: Reapply pressure with the brush, using circular motions. Pay extra attention to corners and edges where mildew tends to accumulate.
- Rinse with clean water: Wipe away residue with a damp microfiber cloth or sponge. Rinse multiple times to remove all traces of the paste.
- Dry the area completely: Use a dry towel to wipe down tiles and grout. Proper drying prevents moisture retention, which encourages mold regrowth.
Do’s and Don’ts When Using Baking Soda and Lemon on Grout
To maximize results and avoid damage, follow best practices based on material compatibility and cleaning chemistry.
| Do’s | Don’ts |
|---|---|
| Use fresh lemon juice instead of bottled when possible—higher acidity and no preservatives. | Don’t leave lemon juice on unsealed grout for extended periods; prolonged exposure to acid can erode cement-based materials. |
| Test the paste on a small, inconspicuous area first to check for discoloration or reaction. | Don’t use metal brushes or steel wool—they can scratch tiles and embed particles that promote rust staining. |
| Wear gloves to protect skin from citric acid, especially if you have sensitivities. | Don’t mix lemon juice with vinegar or other acids in an attempt to boost power—it increases corrosiveness unnecessarily. |
| Reapply the treatment weekly for high-traffic or moisture-prone areas like showers. | Don’t expect instant perfection on decade-old grout; multiple sessions may be required for deep-set stains. |
Real Example: Reviving a 10-Year-Old Bathroom Floor
Sarah, a homeowner in Portland, Oregon, had struggled for years with dingy bathroom floor grout. Despite monthly mopping, the joints between her white ceramic tiles had turned gray-green due to humidity and lack of ventilation. She avoided bleach out of concern for her toddler and opted to try natural methods.
She began by mixing baking soda and lemon juice into a paste and applied it across a 4x4 foot section of flooring. After letting it sit for 20 minutes, she scrubbed with an angled grout brush. Initial rinsing revealed noticeable improvement—grout appeared lighter and streaks of black mildew were gone. She repeated the process every three days over a two-week period, focusing each time on slightly larger areas.
By the third week, the entire floor looked dramatically cleaner. To maintain results, Sarah now applies a diluted lemon spray (1 part lemon juice to 3 parts water) after showers and dries the floor with a squeegee. Her experience demonstrates that consistency, not intensity, delivers lasting transformation.
Maintenance Checklist for Long-Term Grout Care
Prevention is key to minimizing future buildup. Incorporate these habits into your cleaning routine:
- ✔️ Wipe down tiled surfaces after each shower or bath to reduce moisture accumulation.
- ✔️ Ventilate bathrooms properly—run exhaust fans for at least 20 minutes post-shower.
- ✔️ Seal grout annually with a natural penetrating sealer (e.g., silane-based) to resist staining.
- ✔️ Clean grout lines monthly with a baking soda-lemon mist or paste.
- ✔️ Address spills and soap scum promptly—don’t let residues dry and harden.
- ✔️ Use pH-neutral soaps and shampoos to minimize alkaline film buildup.
Frequently Asked Questions
Can I use this method on colored grout?
Proceed with caution. While baking soda is generally safe, lemon juice may lighten pigmented grout over time due to its mild bleaching properties. Always test in a hidden spot first. For colored grout, consider using hydrogen peroxide instead of lemon juice for a gentler whitening effect.
How often should I deep clean grout with baking soda and lemon?
For most households, a deep clean every 4–6 weeks is sufficient. High-moisture areas like showers may benefit from biweekly treatments. Light surface cleaning can be done weekly with a spray made from equal parts water and lemon juice.
Will lemon juice damage my tiles?
Most glazed ceramic and porcelain tiles are resistant to citric acid. However, natural stone tiles like marble, travertine, or limestone are highly vulnerable to acid etching and should never be exposed to lemon juice. Stick to stone-safe cleaners for those surfaces.
Enhancing Results: Optional Additions to the Basic Paste
While baking soda and lemon alone are effective, minor adjustments can improve performance depending on your specific needs:
- Hydrogen peroxide (3%): Replace lemon juice with hydrogen peroxide for a non-acidic alternative that still brightens and kills mold. Ideal for sensitive grout or around natural stone.
- Dish soap (a few drops): Adds degreasing power and improves paste adherence. Useful for kitchen backsplashes with grease buildup.
- Tea tree oil (5–10 drops): A potent natural antifungal. Mix into the paste to inhibit future mildew growth, especially in humid climates.
Note: Adding liquids may thin the paste. Adjust baking soda quantity accordingly to maintain a spreadable consistency.
Conclusion: Sustainable Cleanliness Starts at Home
Cleaning white grout doesn’t require toxic sprays or expensive equipment. With just baking soda and lemon—two pantry staples—you can achieve visibly cleaner, healthier tile joints while reducing your environmental footprint. The method is accessible, affordable, and safe for daily household use. More importantly, it empowers you to take control of your indoor air quality and surface hygiene without compromising on results.
Natural cleaning isn’t a shortcut—it’s a mindset shift toward long-term wellness and sustainability. By adopting regular, gentle maintenance routines, you extend the life of your tiles, reduce reliance on plastic-packaged products, and create a safer living space. Whether you’re tackling a single bathroom corner or planning a whole-house refresh, start today. Your grout, your health, and your planet will thank you.


 浙公网安备
33010002000092号
浙公网安备
33010002000092号 浙B2-20120091-4
Comments
No comments yet. Why don't you start the discussion?