
Gaming controllers are precision instruments, yet they're subjected to constant handling, sweat, dust, and environmental debris. Over time, this buildup can interfere with the internal components of analog joysticks, leading to a frustrating issue known as \"drift\"—where the joystick registers movement even when untouched. While full replacement may seem inevitable, most early-stage drift issues stem from grime accumulation rather than hardware failure. With careful cleaning and preventive maintenance, you can restore smooth performance and avoid premature wear.
The key is not just cleaning, but doing so in a way that preserves sensitive potentiometers and avoids introducing moisture or residue. This guide walks through safe, effective methods backed by technician insights and real-world testing, ensuring you maintain peak control without risking damage.
Understanding Joystick Drift and Its Causes
Analog joysticks rely on small potentiometers (pots) to translate physical movement into digital input. These components contain resistive tracks and wiper contacts that degrade over time. However, before permanent wear sets in, contamination—dust, skin oils, food particles—is often the primary culprit behind erratic behavior.
Drift manifests as unintended character movement, camera jitter, or calibration errors. It’s commonly misdiagnosed as irreversible hardware failure, prompting users to replace controllers unnecessarily. In reality, many cases resolve with thorough cleaning, especially if addressed early.
“Over 60% of ‘drifting’ controllers we see in repair shops could have been saved with timely cleaning. The issue isn’t always worn-out parts—it’s clogged mechanisms.” — Rafael Nguyen, Senior Technician at GameFix Labs
Factors contributing to contamination include:
- Frequent use without hand washing
- Gaming while eating or in dusty environments
- High humidity accelerating oxidation inside components
- Lack of regular maintenance
Cleaning isn’t a guaranteed fix for advanced mechanical wear, but it significantly delays deterioration and restores responsiveness in most mid-life controllers.
Essential Supplies for Safe Cleaning
Using improper tools or liquids can do more harm than good. Alcohol-based cleaners, excessive moisture, or abrasive cloths risk damaging circuitry or degrading plastic housings. To clean effectively without causing sticky drift due to residue or corrosion, gather the following supplies:
| Item | Purpose | Recommended Type |
|---|---|---|
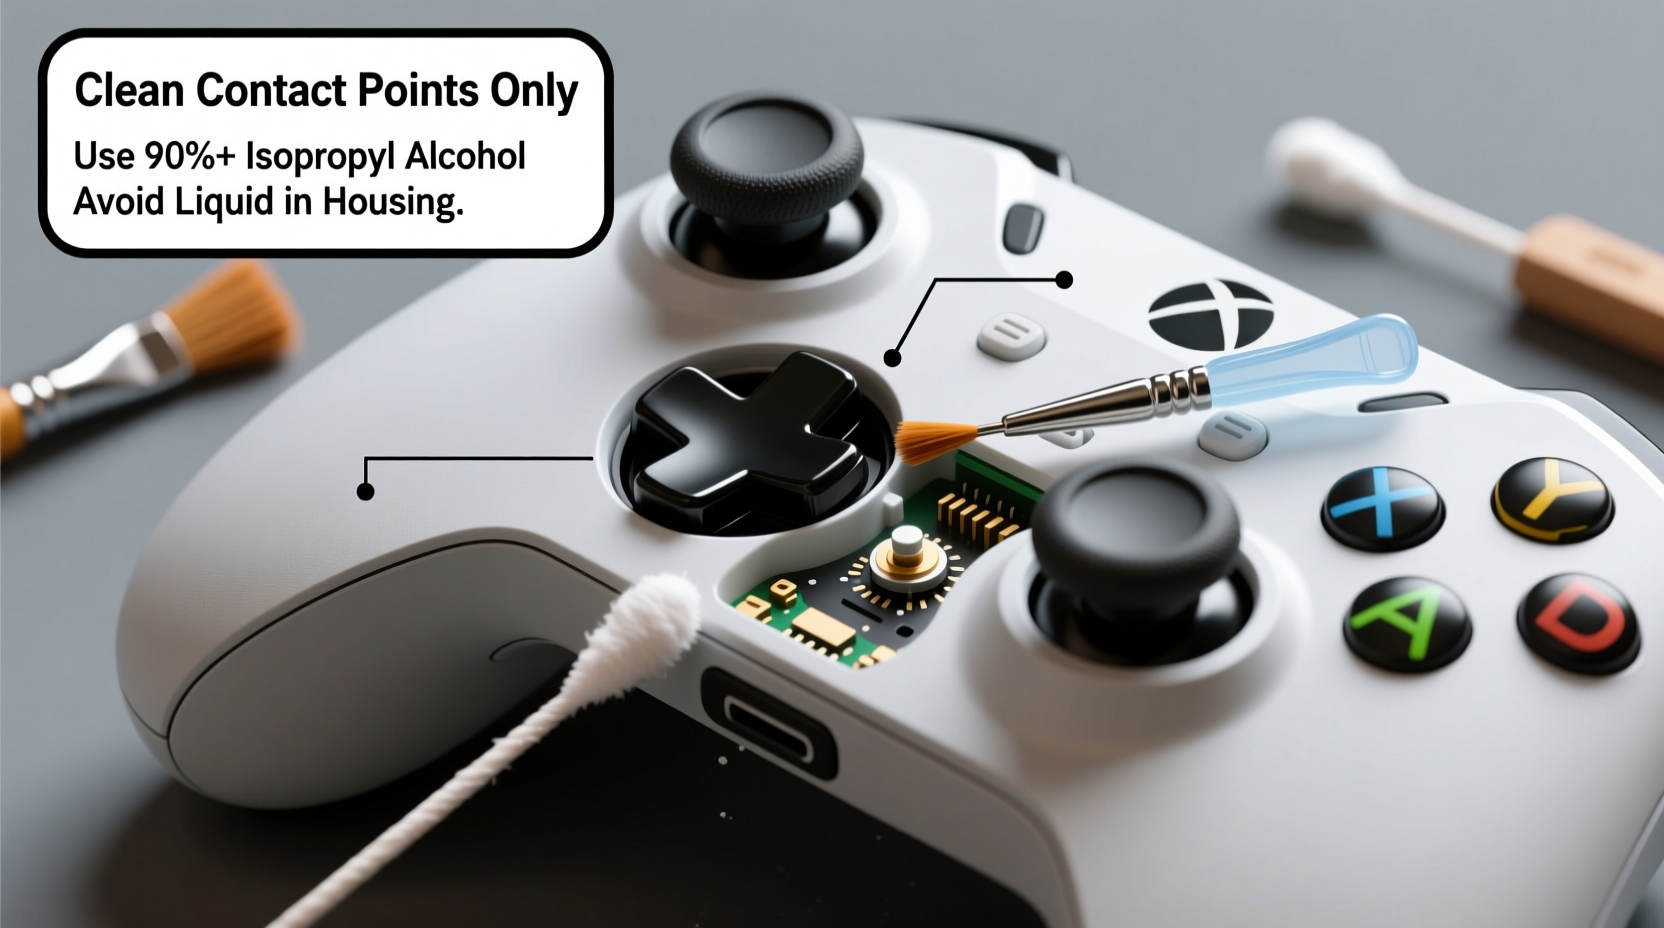
| Isopropyl Alcohol (IPA) | Dissolves oils and evaporates cleanly | 90% or higher concentration |
| Microfiber Cloth | Wipe surfaces without scratching | Lens-grade, lint-free |
| Compressed Air | Dislodge dust and debris | Canned air with precision nozzle |
| Cotton Swabs (Fine Tip) | Apply cleaner to tight spaces | Wooden stick, non-abrasive tip |
| Tweezers or Precision Pick | Remove visible debris | Anti-static, fine-point |
| Silicone Lubricant (Optional) | Re-lubricate only if disassembling | Plastic-safe, non-conductive |
Step-by-Step Cleaning Process Without Disassembly
For most users, non-invasive cleaning is sufficient and safest. Follow this timeline to deep-clean joysticks without opening the controller:
- Power Off & Unplug: Disconnect the controller from all devices. If wireless, ensure it’s powered down completely.
- Blow Out Debris: Hold the controller upright and use short bursts of compressed air around the base of each joystick. Tilt slightly to allow particles to escape. Repeat from multiple angles.
- Dampen Swab (Not Soak): Lightly moisten a cotton swab with 90%+ isopropyl alcohol. Squeeze excess liquid—swab should be damp, not dripping.
- Clean Joystick Base: Gently rotate the swab around the perimeter where the stick meets the housing. Focus on crevices where grime accumulates. Use tweezers to pick out visible fibers or crumbs first.
- Movement Simulation: While cleaning, slowly move the joystick in circular motions to expose inner edges to the swab. This helps dislodge trapped material.
- Repeat & Dry: Use fresh swabs until no discoloration appears. Allow 10–15 minutes for complete evaporation before use.
- Test Responsiveness: Reconnect and test in a game or system calibration menu. Check for reduced drift or improved centering.
This method removes surface-level contaminants and is ideal for monthly maintenance. If drift persists after two rounds, consider deeper intervention—or evaluate whether internal wear has progressed beyond cleaning.
When and How to Disassemble Safely
Full disassembly allows access to potentiometer modules and rubber caps, enabling deeper cleaning. However, it voids warranties and risks static damage or broken clips. Only proceed if comfortable with precision work and if non-invasive methods failed.
Tools Needed Beyond Basics:
- Security screwdriver set (e.g., TR6, Y0)
- Plastic pry tools
- Small container for screws
- ESD-safe workspace (anti-static mat optional)
Controlled Disassembly Steps:
- Remove all screws using correct bits. Keep them separated by location.
- Use plastic tools to gently separate casing halves along seam lines.
- Locate joystick assemblies and disconnect ribbon cables (if applicable).
- Lift out joystick modules carefully. Avoid bending circuit boards.
- Inspect rubber gaskets and metal springs for deformation or corrosion.
- Apply IPA directly to potentiometer contacts using a fine brush or swab.
- If re-lubricating: apply a rice-grain-sized drop of silicone grease to pivot ball.
- Reassemble in reverse order, ensuring all connectors click into place.
After reassembly, run a full calibration through your console settings. Some systems (like PlayStation and Xbox) offer built-in joystick diagnostics to verify centering accuracy.
Prevention Checklist: Stop Drift Before It Starts
Cleaning is reactive. True longevity comes from consistent habits that minimize contamination. Follow this checklist monthly to extend joystick life:
- ✅ Wash hands before extended gaming sessions
- ✅ Use compressed air every 2–4 weeks
- ✅ Avoid eating near the controller
- ✅ Store in a closed case or drawer when not in use
- ✅ Clean outer casing with dry microfiber cloth weekly
- ✅ Limit exposure to direct sunlight and high humidity
- ✅ Perform deep clean (non-invasive) every 3 months
- ✅ Calibrate joysticks monthly via system settings
“The best way to avoid drift? Treat your controller like a keyboard—clean, dry hands and routine care make a massive difference.” — Lena Choi, Peripheral Design Engineer at Input Dynamics
Real Example: Reviving a Year-Old Controller
Mark, a competitive *Fortnite* player, noticed his Xbox Elite Series 2 drifting during sniping matches. After failing software recalibration, he assumed the controller was doomed. Instead of replacing it ($180), he tried a controlled cleaning.
Using canned air and 91% IPA, he cleaned both thumbsticks thoroughly without disassembly. He followed up with 10 minutes of slow circular motion to work the cleaner into the base. After drying, drift improved by 70%. One week later, minor drift returned, so he repeated the process with slightly more pressure on the swab—this time removing a tiny fiber jammed beneath the left stick.
The controller now performs like new. Mark estimates he saved $150 and extended its life by at least six months. His routine: biweekly air blasts and quarterly IPA swabs.
Do’s and Don’ts of Joystick Maintenance
| Action | Do | Don't |
|---|---|---|
| Cleaning Liquid | Use 90%+ isopropyl alcohol | Use water, window cleaner, or hand sanitizer |
| Application Method | Damp swab, never pour directly | Soak the joystick or drench the housing |
| Drying Time | Wait 10–15 minutes before use | Resume play immediately after wetting |
| Frequency | Deep clean every 3–6 months | Ignore symptoms until full drift occurs |
| Disassembly | Only if experienced and necessary | Force open with metal tools or rush the process |
FAQ: Common Questions About Joystick Cleaning
Can I use Q-tips instead of micro swabs?
Yes, but choose high-quality ones with tightly wound cotton to avoid fiber shedding. Cheap Q-tips may leave lint behind, which traps oil and creates gunk over time. Fine-tip foam swabs are preferable for precision work.
Will cleaning fix all types of drift?
No. Cleaning addresses contamination-related drift. If the potentiometer’s resistive layer is physically worn (common after 1–2 years of heavy use), cleaning won’t restore functionality. In such cases, replacement modules or professional repair are better options.
How do I know if my controller needs more than cleaning?
If drift returns within hours of a thorough clean, or if the joystick feels gritty or loose, internal wear is likely. Also, if one axis drifts consistently (e.g., upward on left stick), it suggests a failing sensor. At that point, consider repair kits or upgrading.
Conclusion: Maintain Control, Extend Longevity
Sticky drift doesn’t have to signal the end of your controller’s life. With proper technique and routine care, most early-stage issues are reversible. The secret lies in proactive maintenance—using the right tools, avoiding harmful substances, and understanding the mechanics beneath your fingertips.
Every minute spent cleaning today saves money and frustration tomorrow. Whether you’re a casual player or a competitive gamer, your controller deserves attention. Apply these steps regularly, share what works, and keep your gear performing at its best.


 浙公网安备
33010002000092号
浙公网安备
33010002000092号 浙B2-20120091-4
Comments
No comments yet. Why don't you start the discussion?