
Gaming controllers are subjected to constant use, sweat, oils, dust, and occasional spills. Over time, grime builds up between buttons, around analog sticks, and along crevices—compromising both hygiene and performance. Many gamers avoid cleaning their controllers out of fear: fear of damaging delicate components, fear of using the wrong product, and above all, fear of accidentally voiding the warranty. The truth is, you can clean your controller thoroughly and safely—if you know the right tools, techniques, and timing.
This guide walks you through a methodical, risk-minimized approach to cleaning any major brand controller—whether it’s an Xbox Wireless Controller, PlayStation DualSense, Nintendo Switch Pro Controller, or third-party model—without opening the casing or applying anything that could leave residue or cause internal damage.
Why regular controller maintenance matters
A dirty controller isn’t just unpleasant—it can affect gameplay. Sticky analog sticks, unresponsive triggers, or delayed button presses are often caused by accumulated debris rather than hardware failure. Sweat and skin oils corrode contact points over time, especially on frequently pressed buttons like A/X or D-pad directions. Dust particles trapped under thumbsticks can scratch potentiometers, leading to drift issues down the line.
Regular maintenance extends the usable life of your device and keeps response accuracy sharp. According to Dr. Alan Park, an electronics durability researcher at the University of Michigan, “User-handled devices accumulate microbial colonies and conductive residues faster than most people realize. Simple surface cleaning every few weeks can reduce wear-related failures by up to 40%.”
“User-handled devices accumulate microbial colonies and conductive residues faster than most people realize. Simple surface cleaning every few weeks can reduce wear-related failures by up to 40%.” — Dr. Alan Park, Electronics Durability Researcher
The right tools for safe, effective cleaning
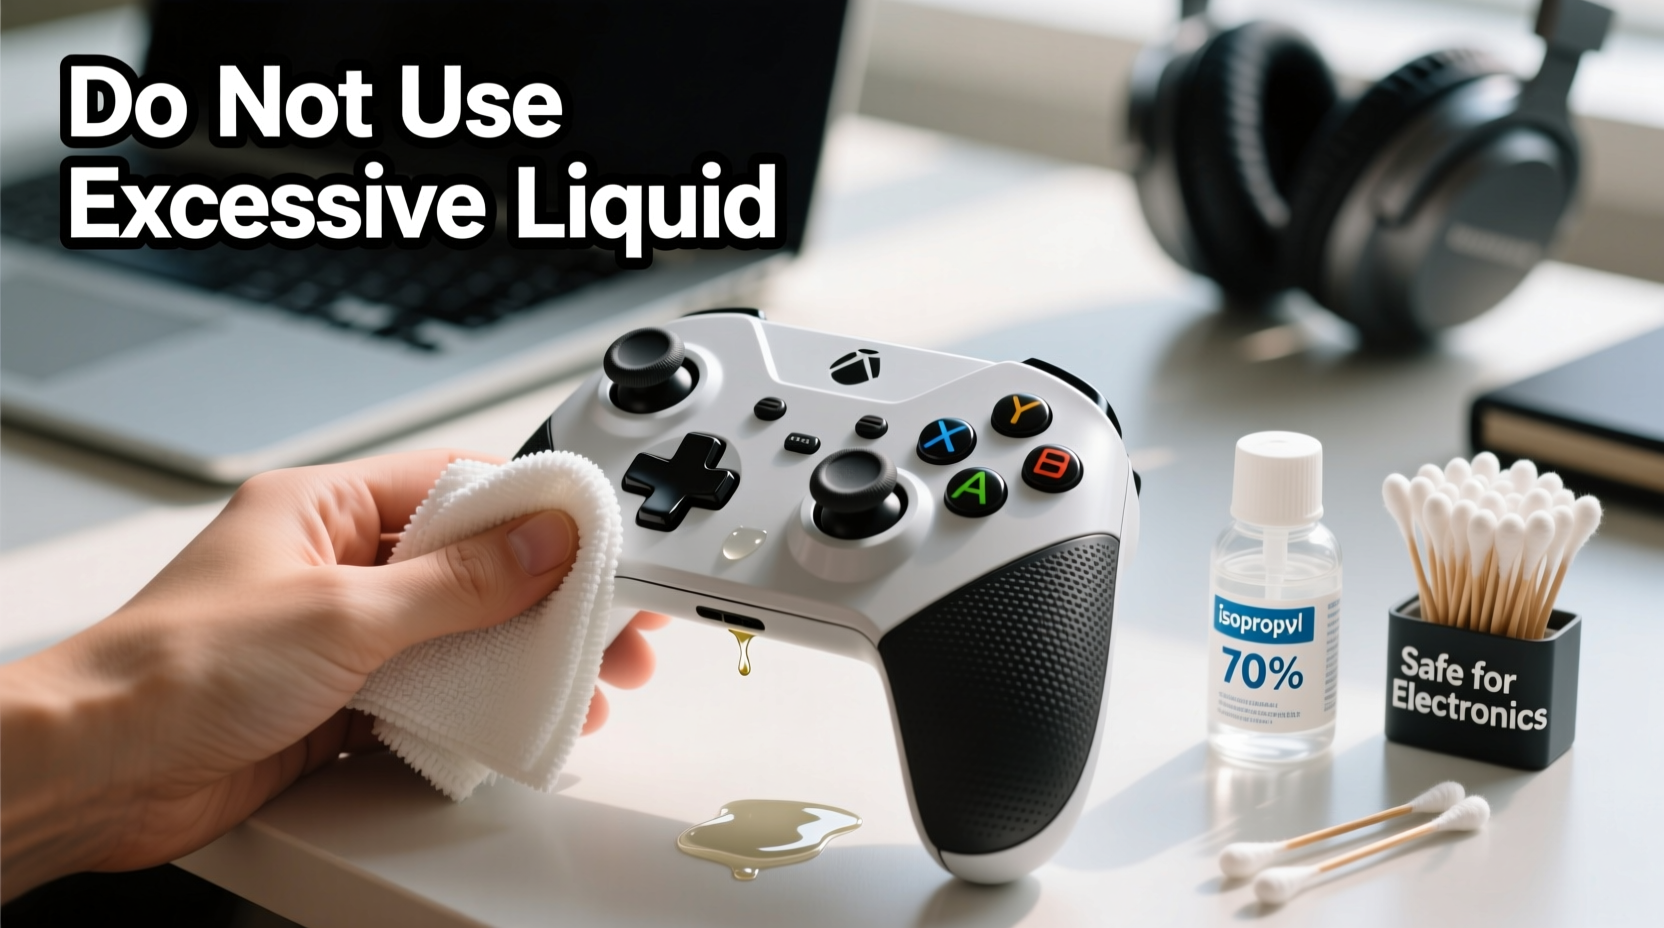
Using improper materials is one of the fastest ways to damage your controller. Avoid household cleaners like Windex, alcohol wipes meant for skin (which often contain moisturizers), or paper towels that shed fibers. Instead, assemble a dedicated cleaning kit with electronics-safe items:
| Tool/Item | Purpose | Safe Alternatives |
|---|---|---|
| Isopropyl alcohol (70%) | Disinfects without leaving residue; evaporates quickly | Vinegar-free disinfectant wipes (electronics-rated) |
| Microfiber cloth | Cleans surfaces without scratching | Lens cleaning cloth |
| Cotton swabs (non-foam tip) | Reach into gaps around buttons and sticks | Fine-tipped silicone cleaning tool |
| Compressed air (canned) | Blow out loose dust from crevices | Small handheld electric duster |
| Soft-bristle brush (e.g., clean toothbrush) | Loosen packed-in grime gently | Makeup brush (unused) |
Step-by-step cleaning process
Cleaning doesn’t require disassembly or technical expertise. Follow this six-stage routine to keep your controller pristine while preserving its integrity and warranty status.
- Power down and disconnect: Turn off the controller and unplug it if wired. For wireless models, ensure Bluetooth is disabled or disconnected from the host device.
- Dry dust removal: Use short bursts of compressed air to blow dust from analog stick bases, D-pad gaps, trigger wells, and USB-C/micro-USB ports. Hold the can upright and avoid prolonged spraying to prevent moisture buildup.
- Surface brushing: Gently scrub textured grips and button areas with a dry soft-bristle brush. Focus on seams where dirt accumulates. This loosens bonded oils before wet cleaning.
- Moist wipe-down: Dampen a microfiber cloth with isopropyl alcohol (70%). Wring it until barely moist. Wipe all surfaces in circular motions—especially face buttons, back paddles (if present), and grip zones. Do not saturate.
- Detail cleaning: Wrap a cotton swab around with a small piece of microfiber. Dip lightly in alcohol, squeeze excess, and clean around each button edge and stick base. Replace swabs as they pick up grime.
- Dry and rest: Let the controller air-dry for at least 30 minutes before powering on. Place it on a clean towel in a well-ventilated area, away from direct heat or sunlight.
This entire process takes less than 15 minutes once you’re equipped. Performing it every 4–6 weeks prevents deep buildup and maintains tactile responsiveness.
What not to do: Common mistakes that risk damage
Even with good intentions, certain habits can lead to long-term harm. Below are frequent errors—and their consequences.
- Using high-concentration alcohol (90%+): While more potent, it can degrade plastic polymers and rubber coatings over time, especially on thumbstick rings.
- Submerging or rinsing parts: Water exposure—even briefly—can seep into circuitry and cause corrosion, even if the unit appears functional immediately after.
- Forcing open the casing: Screws may be tamper-proof, and prying risks breaking clips or damaging internal ribbon cables. Most manufacturers consider opened housings a breach of warranty terms.
- Using adhesive tapes or putty: Some users press sticky tack into crevices to lift debris. However, residue can remain and attract more dust later.
- Skipping drying time: Residual moisture near electrical contacts may cause intermittent faults days later, misdiagnosed as hardware failure.
“Once I used a Clorox wipe thinking it was safe. Within a week, my left stick started drifting. Tech support said moisture likely reached the sensor board. Lesson learned: only electronics-rated cleaners.” — Jordan T., competitive FPS player
Warranty protection: How to clean without losing coverage
Most warranties cover manufacturing defects—not user-induced damage. But here’s the key: simply cleaning your controller does not void the warranty, as long as no permanent modifications or invasive procedures are performed.
Microsoft, Sony, and Nintendo all state that external cleaning with appropriate methods is considered normal maintenance. What invalidates coverage is evidence of liquid ingress due to misuse (like washing under tap water), physical breakage from disassembly, or chemical corrosion from harsh solvents.
To stay protected:
- Never remove screws unless under authorized repair service.
- Avoid introducing liquids beyond minimal damp swabs.
- Keep records of purchase and service history.
- If sending in for repair, inform support that you perform routine surface cleaning only.
In fact, showing responsible care can work in your favor during a warranty claim. Companies are more likely to honor claims when they see the device has been maintained properly.
When to seek professional help
There comes a point when home cleaning isn’t enough. If your controller exhibits any of the following symptoms, consider professional servicing:
- Analog sticks consistently drift despite cleaning
- Buttons register double inputs or fail intermittently
- Triggers feel gritty or resist movement
- Visible corrosion near charging port or battery compartment
Some third-party repair shops specialize in controller refurbishment without voiding original manufacturer warranties—provided they don’t replace proprietary parts. Look for services certified by iFixit or affiliated with official spare part distributors.
Alternatively, contact the manufacturer directly. Both Xbox and PlayStation offer paid repair programs that preserve future warranty eligibility on other components.
Real-world example: Reviving a two-year-old DualSense
Mark, a PS5 owner from Austin, noticed his DualSense had become sluggish during fast-paced games. The triangle and circle buttons occasionally failed to respond, and the right stick felt sticky. He almost replaced it—until he found a teardown video showing how much gunk collects under the rubber membrane.
Instead of opening it, he followed a conservative cleaning protocol: used compressed air, brushed with a dry toothbrush, then wiped with 70% alcohol on microfiber. After three rounds over two days (allowing full drying between), responsiveness returned. Six months later, the controller remains functional with no further issues.
His takeaway? “I thought I needed a new one. But really, it just needed a spa day. No screws touched, no warranty at risk.”
Frequently Asked Questions
Can I use hand sanitizer to clean my controller?
No. Hand sanitizers contain glycerin, fragrances, and thickening agents that leave behind a sticky film. This residue attracts dust and can interfere with button actuation over time.
How often should I clean my gaming controller?
For daily users, a light wipe-down every two weeks and a deeper clean every 4–6 weeks is ideal. Casual players can clean monthly. Increase frequency during illness seasons or if shared among multiple users.
Is it safe to clean a controller with visible mold or mildew?
If organic growth is present, immediate cleaning is necessary—but proceed cautiously. Use 70% isopropyl alcohol and thorough drying. If mold has penetrated beneath buttons or into seams, replacement may be safer than risking spore spread or persistent odor.
Final checklist: Your controller cleaning protocol
- Turn off and disconnect the controller
- Use compressed air to remove loose debris
- Brush gently with a dry soft-bristle tool
- Wipe surfaces with alcohol-dampened microfiber cloth
- Clean tight spaces with wrapped cotton swabs
- Air-dry completely before reuse
- Repeat every 4–6 weeks for optimal performance
Take control of your gear
Your gaming controller is an extension of your reflexes. Keeping it clean isn’t just about appearance—it’s about maintaining precision, hygiene, and longevity. With the right tools and technique, you can eliminate grime, restore responsiveness, and protect your investment—all without stepping outside warranty boundaries.
Start today. Grab a microfiber cloth and a bottle of 70% isopropyl alcohol. Give your controller the care it deserves. A few minutes every month can add years to its life and keep your gameplay smooth, reliable, and frustration-free.


 浙公网安备
33010002000092号
浙公网安备
33010002000092号 浙B2-20120091-4
Comments
No comments yet. Why don't you start the discussion?