
Mechanical keyboards are prized for their tactile feedback, durability, and responsiveness. But over time, they accumulate dust, crumbs, skin oils, and debris that can affect both performance and hygiene. While many guides recommend removing every keycap for a deep clean, not everyone has the time—or the confidence—to disassemble their entire keyboard. The good news: you can achieve a thorough, safe clean without pulling every switch. With the right tools and techniques, you’ll extend your keyboard’s lifespan, maintain typing precision, and keep it looking sharp—all without risking misalignment or damage from reassembly errors.
Why Avoid Full Key Removal?
Removing all keycaps allows for the deepest cleaning, but it comes with trade-offs. It's time-consuming, increases the risk of losing small parts, and may lead to improper reattachment—especially with non-standard layouts or stabilizers. For casual users or those with tight schedules, a full teardown isn’t always practical. Moreover, some keyboards use proprietary keycap designs or have sensitive switches that react poorly to moisture or physical stress during removal.
A targeted, non-invasive cleaning approach preserves functionality while addressing the most common contaminants: surface dust, debris between keys, and oily residue on keycaps. This method is ideal for routine maintenance between deeper cleans and suits environments where keyboards face daily exposure—like home offices, gaming setups, or shared workspaces.
Essential Tools for Safe, No-Disassembly Cleaning
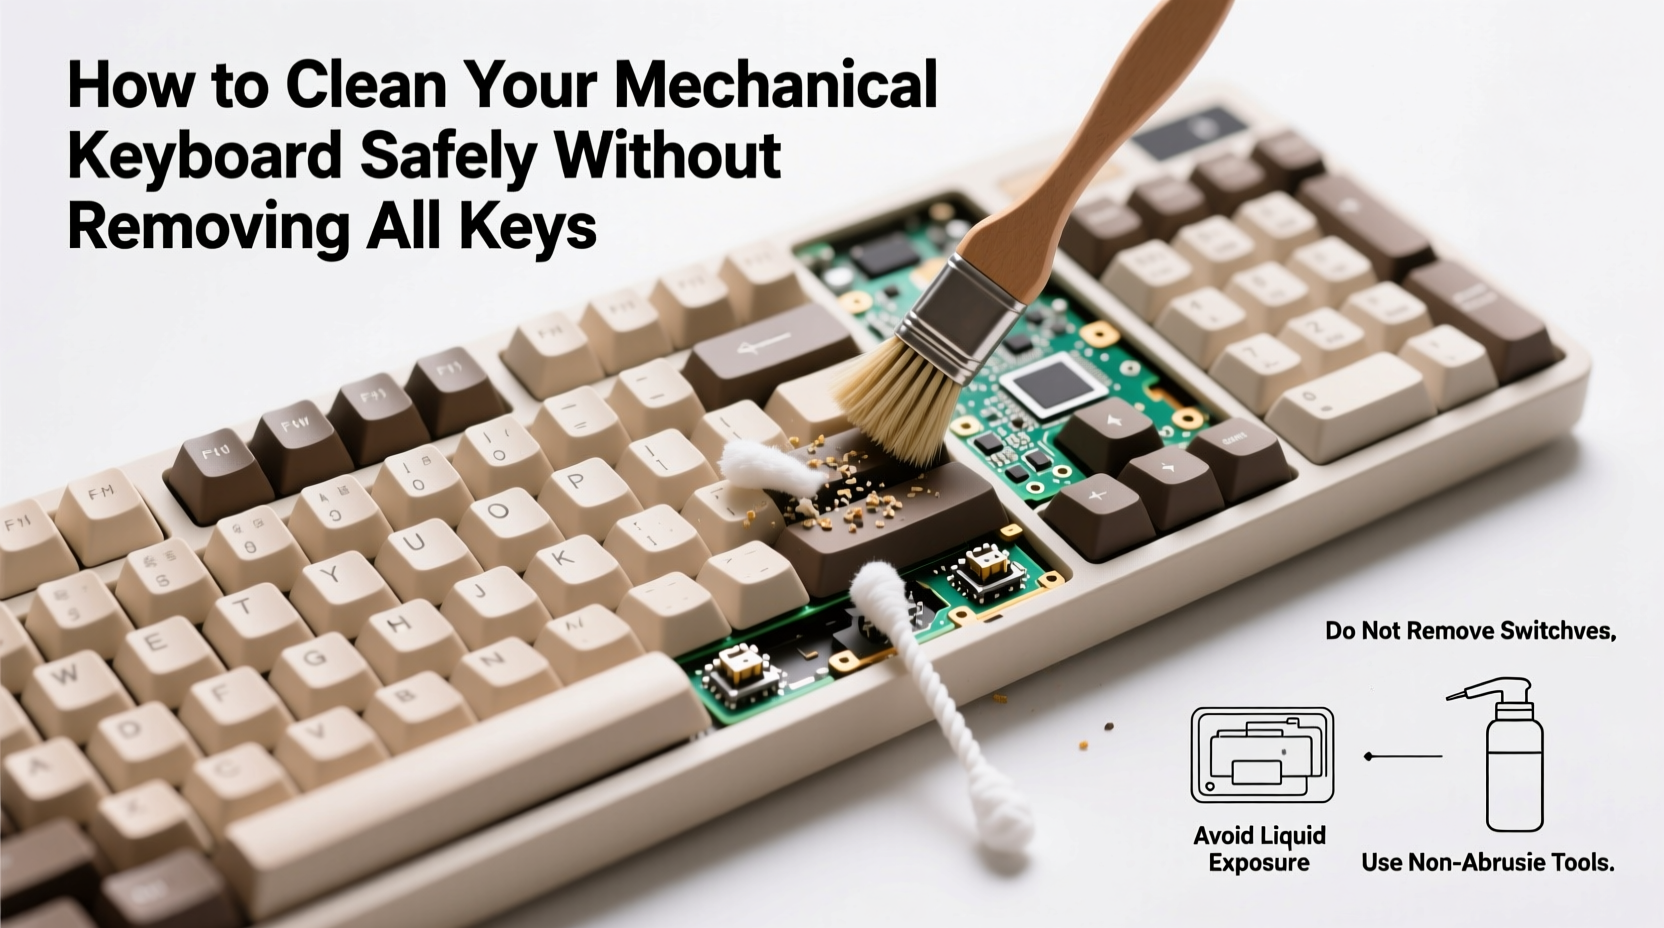
Cleaning without removing keys requires precision tools that reach into tight spaces without applying excessive force or moisture. Here’s what you should gather before starting:
- Compressed air canister – Blows out dust and debris from under and between keys.
- Soft-bristle brush (e.g., clean makeup or paintbrush) – Loosens particles without scratching.
- Microfiber cloth – Ideal for wiping surfaces without lint or abrasion.
- Isopropyl alcohol (70% or higher) – Effective at cutting grease and disinfecting; evaporates quickly.
- Cotton swabs or foam-tipped applicators – Reach narrow gaps around larger keys.
- Plastic dental pick or silicone key gap tool – Gently dislodges compacted debris.
Avoid using water, household cleaners, paper towels, or metal tools. Water can seep into switches and cause corrosion, while abrasive materials scratch keycap legends. Metal objects risk short-circuiting internal components if they slip beneath the plate.
“Many switch failures I’ve seen stem from liquid ingress during cleaning—not wear. A little caution goes a long way.” — Jordan Lee, Keyboard Technician & Repair Specialist
Step-by-Step: Safe Cleaning Without Key Removal
This timeline outlines a complete, low-risk cleaning process that takes 20–30 minutes and requires no disassembly.
- Power down and unplug: Disconnect the keyboard from your computer or turn off wireless mode. Never clean a powered device.
- Shake out loose debris: Hold the keyboard at a 45-degree angle over a trash can and gently shake. Crumbs and dust will fall out naturally.
- Blow with compressed air: Use short bursts to target gaps between keys. Tilt the can upright to avoid spraying propellant. Focus on high-use areas like WASD and spacebar.
- Brush between keys: Use a soft brush in circular motions to loosen trapped particles. Brush in one direction, then reverse to lift debris upward.
- Tackle stubborn grime with a damp swab: Moisten a cotton swab with isopropyl alcohol (never soak it). Wipe along key edges and under slightly lifted corners if accessible.
- Wipe keycaps and frame: Dampen a microfiber cloth with alcohol and gently wipe the tops and sides of keys. Avoid pooling liquid near switch stems.
- Clean around large keys: Use a plastic pick to nudge out lint under spacebars or shift keys. Follow with a dry swab to absorb residue.
- Dry thoroughly: Let the keyboard sit unplugged for 10–15 minutes to ensure all moisture evaporates.
- Test functionality: Reconnect and type across all zones to confirm no keys are sticking or unresponsive.
This method removes up to 80% of surface and sub-surface contaminants without exposing internal mechanisms to unnecessary risk. For best results, repeat this process every 4–6 weeks depending on usage.
Do’s and Don’ts: Quick Reference Table
| Do | Don’t |
|---|---|
| Use isopropyl alcohol on a cloth or swab | Apply liquids directly onto the keyboard |
| Hold compressed air can upright | Invert the can, which sprays liquid propellant |
| Clean regularly to prevent buildup | Wait until keys feel gritty or sticky |
| Use soft, non-conductive tools | Use metal screwdrivers or sharp objects |
| Store covered when not in use | Leave exposed on dusty desks or near food |
Real Example: Office Worker’s Weekly Maintenance Routine
Sarah, a technical writer in Seattle, uses her mechanical keyboard for six to eight hours daily. She types near her coffee and snacks, leading to frequent crumb drops and oily fingerprints. After two months of neglect, her spacebar began sticking intermittently. Instead of removing all keys—a task she feared might break the stabilizers—she followed a simplified version of this method.
She used a $10 compressed air can, a clean eyeshadow brush, and alcohol wipes. In under 20 minutes, she cleared the spacebar mechanism and restored smooth actuation. Now, she performs a 10-minute clean every Friday afternoon. “I don’t need to take it apart,” she says. “Just brushing and blowing keeps it running like new.” Her keyboard, over a year old, still feels factory-fresh with no signs of wear or lag.
When You Might Still Need Key Removal
While non-removal cleaning works well for routine upkeep, certain situations call for full disassembly:
- Visible mold or discoloration under keycaps
- Persistent stickiness despite cleaning
- Liquid spills that soaked through
- Deep grime visible beneath switches
In these cases, removing keycaps becomes necessary. However, even then, you don’t need to remove *every* key. Focus only on affected zones. For example, if coffee spilled near the arrow keys, remove just those caps and clean locally. This minimizes risk while addressing the problem.
“The goal isn’t perfection—it’s function. Clean what needs it, not everything because you think you should.” — Marcus Tran, Custom Keyboard Builder
FAQ: Common Questions About Key-Safe Cleaning
Can I use hand sanitizer to clean my keyboard?
No. Hand sanitizers often contain glycerin, fragrances, and thickeners that leave behind a sticky residue. Over time, this attracts more dust and can gum up switch mechanisms. Stick to pure isopropyl alcohol (70% or higher) for safe disinfection.
How often should I clean without removing keys?
For average use, a light clean every 2–3 weeks and a thorough session every 4–6 weeks is sufficient. Heavy typists, eaters, or those in dusty environments should clean weekly. Signs it’s time include visible dust, tactile grittiness, or reduced key responsiveness.
Will compressed air damage my switches?
Not if used correctly. Modern mechanical switches are sealed against minor debris. Short bursts of air won’t harm them. Just avoid prolonged spraying at close range, which can force particles deeper. Always hold the can 2–3 inches away and spray at an angle.
Final Checklist: Your No-Key-Removal Cleaning Routine
Keep this checklist handy for consistent maintenance:
- Unplug or power off the keyboard.
- Shake gently to dislodge loose debris.
- Use compressed air on all key gaps (short bursts).
- Brush between keys with a soft-bristle tool.
- Dampen a swab with isopropyl alcohol and clean tight spots.
- Wipe keycaps and frame with a microfiber cloth.
- Use a plastic pick to clear under large keys.
- Let dry for 10–15 minutes before reconnecting.
- Test each key zone for responsiveness.
- Repeat every 4–6 weeks (or weekly in high-use settings).
Conclusion: Maintain Performance Without the Hassle
You don’t need to remove every key to keep your mechanical keyboard in top condition. With careful technique and the right tools, you can eliminate most contaminants safely and efficiently. Regular maintenance prevents long-term damage, preserves typing feel, and keeps your setup hygienic. Whether you’re a gamer, writer, or developer, a clean keyboard enhances both comfort and productivity. Start today—grab your microfiber cloth and compressed air—and give your device the care it deserves without the disassembly stress.


 浙公网安备
33010002000092号
浙公网安备
33010002000092号 浙B2-20120091-4
Comments
No comments yet. Why don't you start the discussion?