
Discovering the authenticity of your diamond bracelet doesn’t always require a trip to a jeweler. With a few careful observations and straightforward tests, you can gain strong insight into whether your piece is genuine. While professional appraisal remains the gold standard, several at-home methods offer reliable indicators when performed correctly. These techniques focus on light behavior, thermal conductivity, weight, and craftsmanship—key characteristics that distinguish real diamonds from simulants like cubic zirconia or glass.
This guide walks you through practical, science-backed approaches to test your diamond bracelet safely and effectively. Whether you inherited a piece, received it as a gift, or are considering reselling, knowing how to evaluate its authenticity empowers you to make informed decisions.
Understanding Diamond Properties Before Testing
Diamonds are unique due to their extreme hardness (ranking 10 on the Mohs scale), high refractive index, and exceptional thermal conductivity. These physical traits form the basis of most home testing methods. Unlike imitations, real diamonds disperse light in a distinct way, resist fogging, and feel cool to the touch even after handling.
It’s important to note that while these tests increase confidence in authenticity, they cannot confirm certification or precise quality grading (such as cut, clarity, color, or carat). However, they can help rule out obvious fakes and identify red flags worth investigating further with a gemologist.
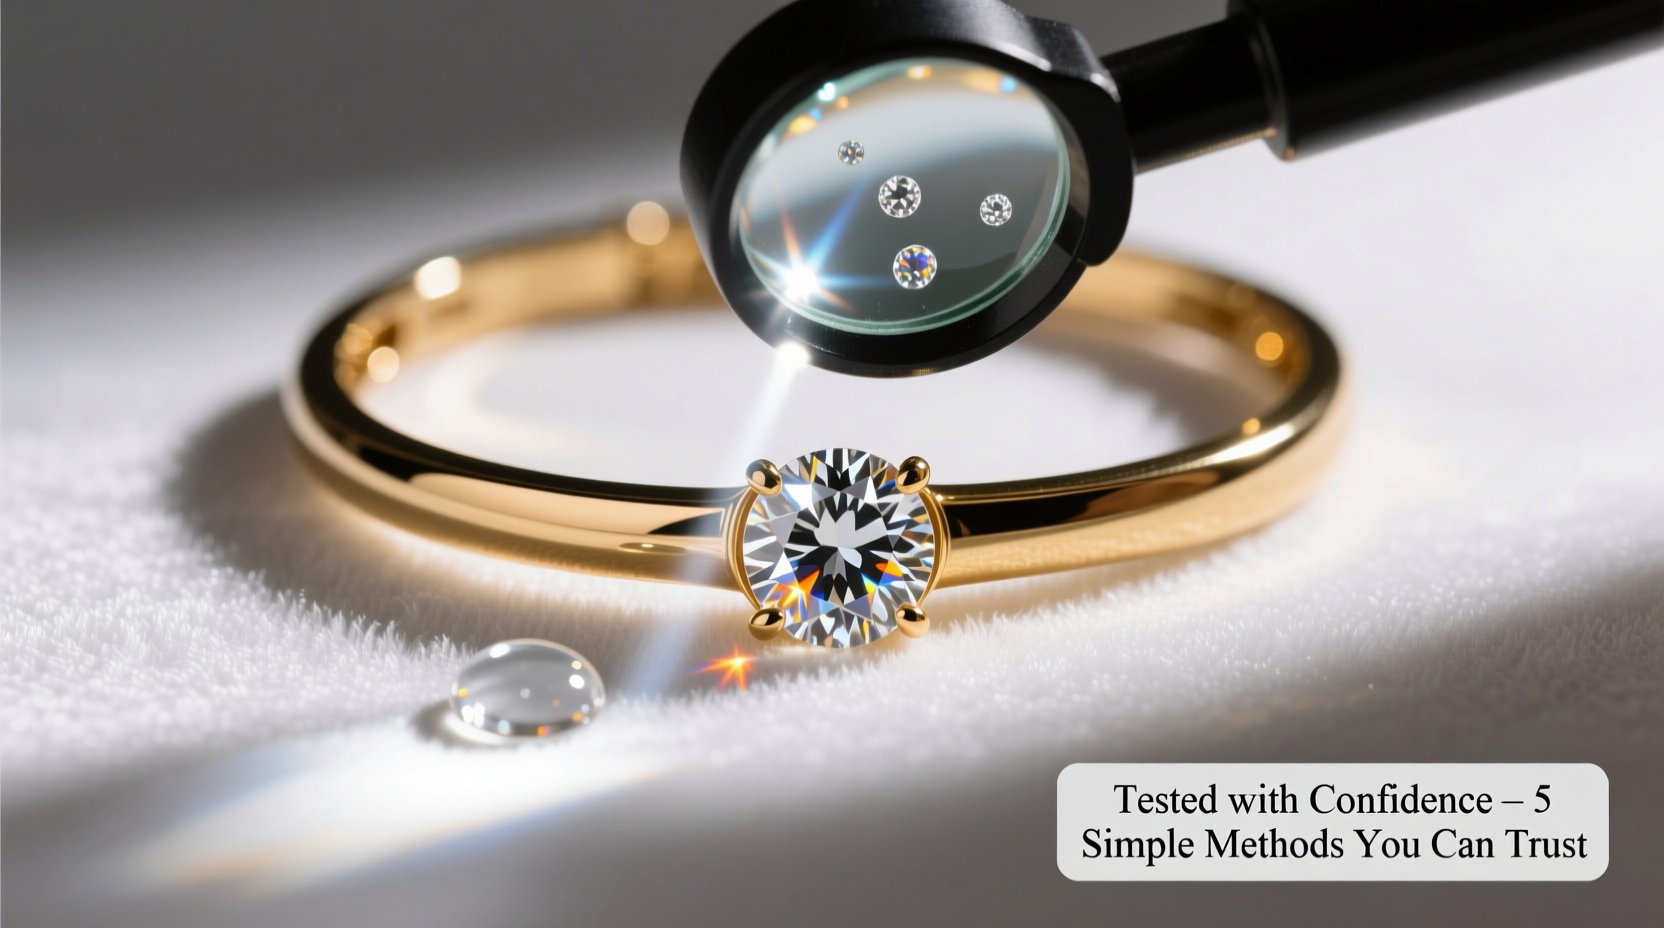
Step-by-Step Guide: Five Reliable Home Tests
Perform these tests in a well-lit room with minimal distractions. Use natural daylight if possible for accurate assessment of sparkle and color.
- The Fog Test
Breathe onto the diamond surface as if fogging a mirror. A real diamond will clear almost instantly because it disperses heat rapidly. If the fog lingers for more than a second or two, the stone is likely made of glass or cubic zirconia, which retain moisture longer. - The Sparkle Test (Light Performance)
Hold the bracelet under a direct light source and slowly rotate it. Real diamonds reflect white light brilliantly and produce subtle flashes of color (called \"fire\"). Cubic zirconia often shows excessive rainbow flashes, while glass may appear dull or overly bright without depth. - The Newspaper Test (Refractive Index Check)
Place the diamond face-down over printed text on a newspaper or book. Due to its high refractive index, a real diamond will bend light so intensely that you won’t be able to read through it. If letters remain visible—even blurred—the stone may be a simulant. - The Water Test (Density Check)
Fill a clear glass with water and carefully drop the bracelet inside. Genuine diamonds have a high density and will sink immediately. Many fake stones, especially those made from glass or crystal, float or fall slowly. Note: This test works best with loose stones; use caution with set pieces to avoid damage. - The UV Light Test
About 30% of real diamonds fluoresce blue under ultraviolet light. While not all real diamonds glow, and some fakes may mimic this effect, a strong blue reaction can support authenticity. Avoid black lights that emit visible purple; use a true UV flashlight (365nm wavelength) for accuracy.
Do’s and Don’ts When Testing at Home
| Do’s | Don’ts |
|---|---|
| Clean the bracelet before testing | Use abrasive materials or harsh chemicals |
| Use natural light for visual checks | Rely solely on one test for final judgment |
| Handle the piece over a soft surface | Scratch or rub the stone against other surfaces |
| Repeat tests for consistent results | Apply excessive force during any procedure |
| Take notes on each result | Assume fluorescence guarantees authenticity |
Real Example: Sarah’s Inherited Bracelet
Sarah inherited a delicate diamond tennis bracelet from her grandmother. Though beautiful, she wasn’t sure if the stones were real. She started with the fog test—each stone cleared instantly. Next, she held it under a lamp and noticed sharp, white sparkle with minimal rainbow hues. The newspaper test showed no readable text beneath any stone. Finally, she used a UV flashlight and saw faint blue glow on three of the diamonds.
Encouraged by consistent results, Sarah took the bracelet to a local jeweler. It was confirmed as genuine with VS clarity and near-colorless grading. Her cautious, multi-test approach gave her peace of mind before investing in a formal appraisal.
“Home tests aren’t replacements for lab certification, but they’re excellent first filters. Consistency across multiple methods builds strong preliminary evidence.” — Marcus Lin, GIA-Certified Gemologist
Checklist: Your At-Home Diamond Verification Routine
- ✅ Clean the bracelet with a microfiber cloth
- ✅ Perform the fog test on multiple stones
- ✅ Observe sparkle under direct lighting
- ✅ Conduct the newspaper readability test
- ✅ Try the water drop test (if safe for setting)
- ✅ Use a UV flashlight to check for fluorescence
- ✅ Record results and look for patterns
- ✅ Schedule a professional evaluation if results are positive
Frequently Asked Questions
Can I trust online diamond testers I see on shopping sites?
Many affordable electronic testers sold online are designed for loose stones and may misread moissanite as diamond due to similar thermal properties. For mounted jewelry, accuracy drops further. These devices can support other findings but shouldn’t be used alone.
What if my diamond doesn’t fluoresce under UV light?
No need for concern. Only about one-third of natural diamonds exhibit fluorescence. Lack of glow doesn’t indicate a fake—it simply means the stone lacks certain trace elements that react to UV exposure.
Is it safe to use water or cleaning solutions on my diamond bracelet?
Yes, but with care. Warm water and mild dish soap are safe for most settings. Avoid bleach, chlorine, or ultrasonic cleaners if your piece has aged prongs or unknown durability. Always dry thoroughly with a lint-free cloth.
Final Thoughts: Confidence Through Knowledge
Testing a diamond bracelet at home isn't about achieving laboratory precision—it's about gathering trustworthy clues. When multiple tests align—rapid defogging, inability to read through the stone, strong sparkle, and sinking in water—you build a compelling case for authenticity. These methods, grounded in physics and widely accepted in the jewelry community, put valuable knowledge in your hands.
Still, remember that definitive verification requires professional equipment and expertise. If your bracelet holds emotional or financial value, follow up with a certified gemologist. But until then, you now have the tools to separate myth from reality, doubt from confidence.


 浙公网安备
33010002000092号
浙公网安备
33010002000092号 浙B2-20120091-4
Comments
No comments yet. Why don't you start the discussion?