
Cooking corn on the cob in the oven is a surprisingly effective way to achieve tender, juicy kernels bursting with natural sweetness. Unlike boiling, which can leach flavor and moisture, roasting corn in its husk traps steam and enhances texture. This method requires minimal effort but delivers maximum payoff—especially during summer barbecues or weeknight dinners when simplicity matters. With precise timing, proper prep, and a few chef-inspired techniques, you can elevate basic corn into a standout side dish that complements grilled meats, salads, or stands proudly on its own.
The Science Behind Oven-Roasted Corn
When corn is exposed to dry heat in an oven, the moisture within each kernel expands and softens the interior while the outer layers caramelize slightly. By leaving the husks intact, you create a natural steaming environment. The husk acts like a built-in foil packet, sealing in humidity and preventing the ears from drying out. This technique preserves more of corn’s inherent sugars and avoids waterlogging—a common flaw of boiled corn.
Additionally, the gentle browning that occurs at the edges of the husk adds subtle nuttiness to the overall flavor profile. Because ovens provide consistent ambient heat, they eliminate hot spots often found on grills or stovetops, ensuring even cooking from end to end.
“Roasting corn in the oven with the husk on mimics the slow-steaming effect of traditional clambakes—it locks in moisture and intensifies natural sweetness.” — Chef Marcus Bell, Coastal Cuisine Specialist
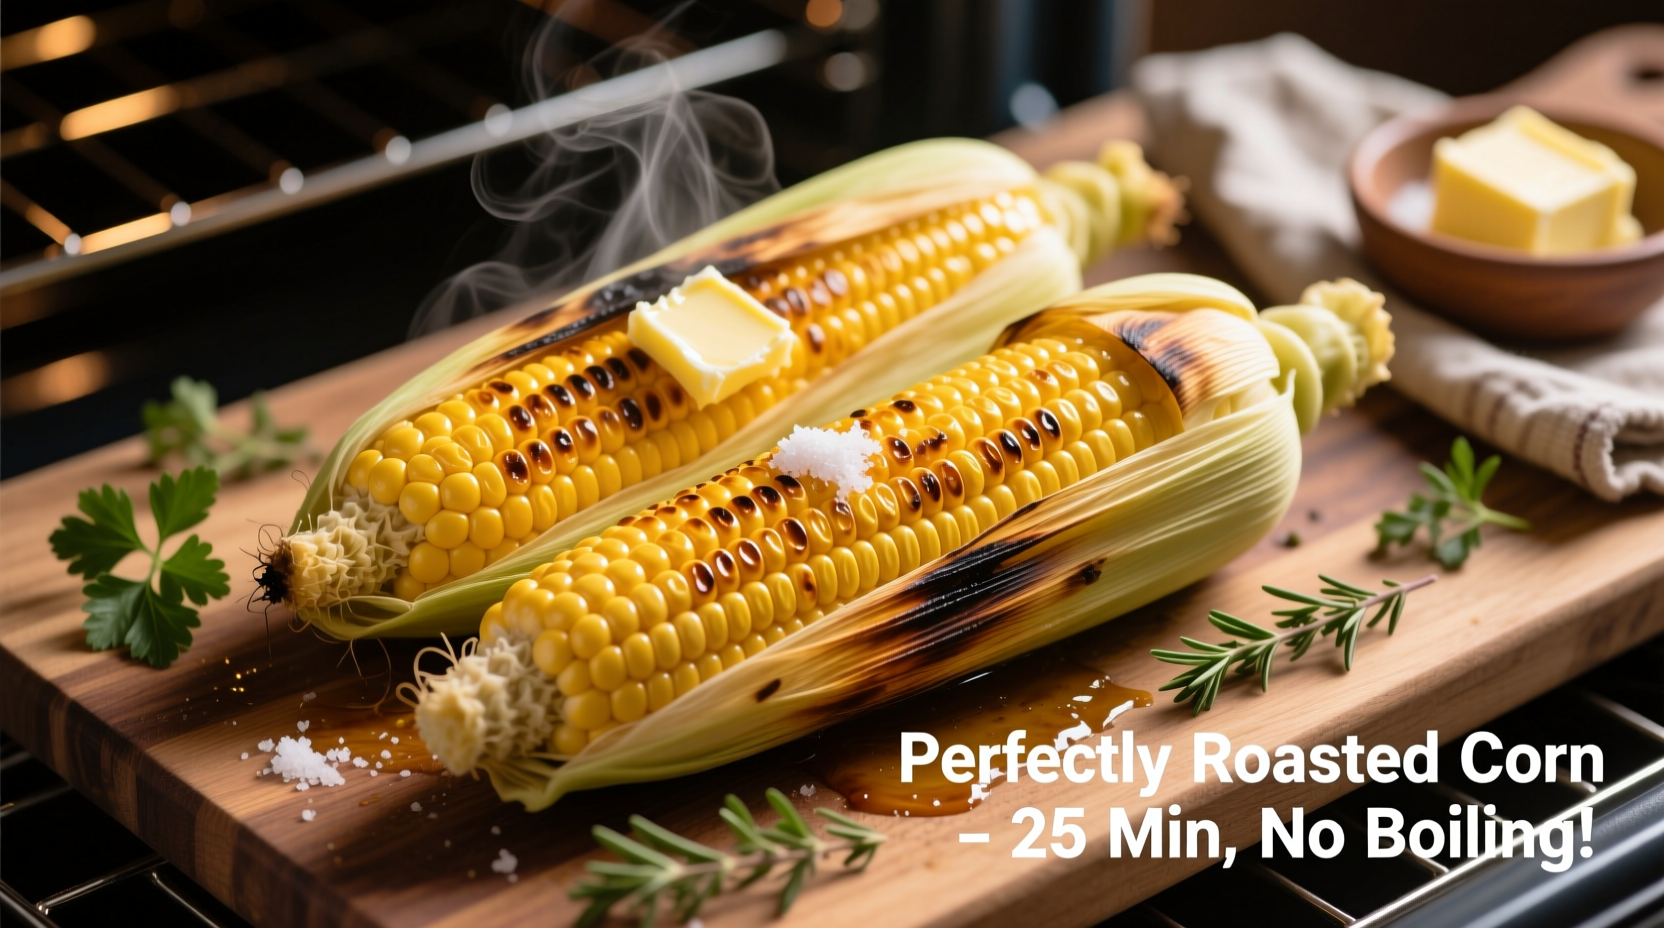
Step-by-Step Guide to Perfect Oven Corn
Follow this detailed process to achieve consistently moist and flavorful corn on the cob using your oven.
- Preheat the oven to 375°F (190°C). This temperature balances gentle roasting with efficient cooking time.
- Select fresh ears of corn. Look for bright green husks, moist silk, and plump kernels when pressed. Avoid dried-out tips or yellowed leaves.
- Leave the husks completely intact. Do not peel back or remove any layers before baking. The full husk is essential for moisture retention.
- Rinse the ears under cool water. Gently scrub the outside to remove dust or debris without damaging the husk.
- Optional: Soak the corn in cold water for 15–30 minutes. This boosts internal moisture and prevents scorching during longer roasts.
- Shake off excess water and place ears directly on the middle rack. No need for foil or baking sheets unless your oven has strong convection currents.
- Bake for 25–30 minutes. For extra tenderness, extend to 35 minutes. Rotate halfway through if your oven heats unevenly.
- Remove carefully with tongs or oven mitts. Let rest 3–5 minutes before peeling.
- Peel back the husk and silk. Use a paper towel for grip—the inner layers will be hot and slippery.
- Season immediately. Butter, sea salt, lime juice, chili powder, or fresh herbs all enhance the warm, sweet base.
Flavor Variations and Seasoning Ideas
Once cooked, corn becomes a canvas for bold flavors. Apply seasonings while the ears are still warm so ingredients adhere better and aromas bloom fully.
- Classic Butter & Salt: High-fat butter melts smoothly over hot kernels; flaky sea salt enhances sweetness.
- Mexican Street Corn (Elote): Coat with mayonnaise, sprinkle cotija cheese, chili-lime seasoning, and chopped cilantro.
- Herb-Infused Oil Finish: Drizzle with olive oil blended with thyme, rosemary, or basil.
- Lemon-Pepper Zest: Grate lemon zest over the top and add cracked black pepper for brightness.
- Smoky Paprika Glaze: Mix melted butter with smoked paprika and a touch of honey for depth.
For infused flavor during cooking, try placing a pat of herb butter inside the husk before baking—but only after partially peeling back the top third, adding the butter, then rewrapping.
Do’s and Don’ts of Oven-Cooked Corn
| Do’s | Don’ts |
|---|---|
| Keep husks fully intact for best moisture retention | Peel corn before baking—it will dry out quickly |
| Soak corn if baking above 350°F or for longer than 30 minutes | Forget to rotate ears in ovens with uneven heating |
| Use oven mitts when handling hot corn | Overcook beyond 40 minutes—kernels turn mushy |
| Season immediately after peeling | Store unpeeled leftovers—condensation promotes spoilage |
| Reheat gently in foil at 300°F for 10 minutes | Refrigerate whole baked corn in husk—it traps moisture and encourages mold |
Real Example: Backyard BBQ Success Story
Jamie, a home cook from Austin, Texas, used to boil her corn for family barbecues. She noticed the kernels often turned out soggy and bland, especially when preparing large batches. After switching to the oven method, she could bake 12 ears at once while focusing on grilling meats. Her guests commented on how “juicy” and “sweet” the corn tasted, unlike anything they’d had boiled. Jamie now soaks her corn for 20 minutes before baking at 375°F for exactly 28 minutes. She finishes with a mix of lime juice and Tajín, serving it straight from the husk. “It’s become my signature side,” she says. “No more standing over a pot, and the flavor is unbeatable.”
Frequently Asked Questions
Can I cook corn without the husk in the oven?
Yes, but you must wrap each ear tightly in aluminum foil with a tablespoon of water or butter. Without protection, bare corn dries out rapidly. Husk-free roasting works best when finishing already-cooked corn for grill marks or char.
How long does cooked corn last in the fridge?
Peeled, cooled corn should be stored in an airtight container and consumed within 3–4 days. Reheat gently to preserve texture. Unpeeled baked corn should not be refrigerated in the husk due to trapped moisture promoting bacterial growth.
Is oven-roasted corn healthier than boiled?
Nutritionally, both methods retain similar vitamin levels (like B vitamins and fiber). However, oven-roasting preserves more natural sugars and doesn’t dilute nutrients in water, making it slightly more nutrient-dense. Additionally, roasting allows for smaller amounts of added fats since flavors concentrate naturally.
Final Checklist for Best Results
- ☐ Choose fresh, high-quality corn with tight husks
- ☐ Rinse ears thoroughly before baking
- ☐ Keep husks fully intact during cooking
- ☐ Preheat oven to 375°F (190°C)
- ☐ Soak corn for 15–30 minutes (optional but recommended)
- ☐ Bake for 25–30 minutes, rotating halfway
- ☐ Allow brief resting period before peeling
- ☐ Season while hot for maximum flavor absorption
- ☐ Store only peeled leftovers in sealed containers
- ☐ Reheat wrapped in foil to preserve moisture
Conclusion
Cooking corn on the cob in the oven isn’t just convenient—it’s a superior method for preserving moisture, enhancing flavor, and simplifying meal prep. Whether you're feeding a crowd or enjoying a quiet dinner, this hands-off technique frees up stove space and delivers reliably delicious results. With attention to freshness, temperature, and timing, you can transform a simple summer staple into something extraordinary. Try it next time you’re hosting a cookout or craving a taste of seasonal goodness. Once you experience juicy, sweet, perfectly roasted corn, you may never go back to boiling again.


 浙公网安备
33010002000092号
浙公网安备
33010002000092号 浙B2-20120091-4
Comments
No comments yet. Why don't you start the discussion?