
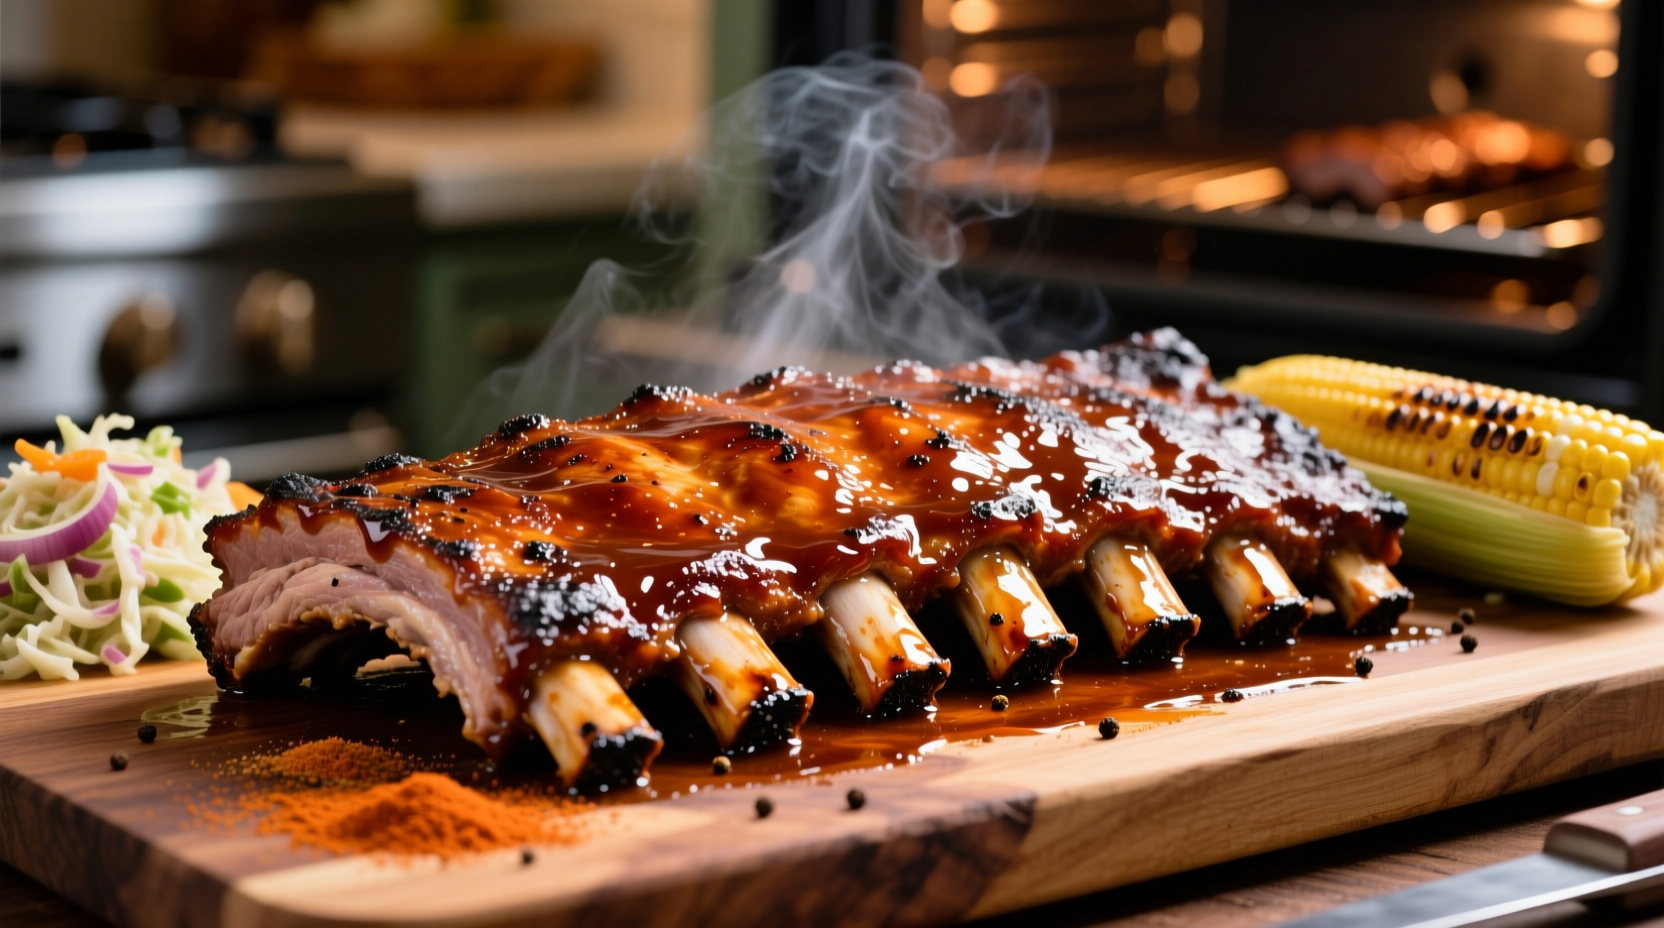
St. Louis pork ribs are a favorite among barbecue enthusiasts for their uniform shape, meaty texture, and ideal fat-to-meat ratio. Unlike spare ribs, they’re trimmed into neat rectangles, making them easier to handle and more consistent when cooking. Achieving perfectly cooked ribs isn’t about complexity—it’s about patience, temperature control, and layering flavor at every stage. Whether you're using a smoker, grill, or oven, the principles remain the same: low heat, slow cooking, and thoughtful seasoning.
The goal is tender meat that pulls away from the bone with gentle pressure but doesn’t fall apart. A good bark—a dark, flavorful crust—should form on the surface, locking in juices while adding depth. This guide breaks down proven methods, common pitfalls, and simple tricks to elevate your rib game without requiring professional equipment.
Understanding St. Louis-Style Ribs
St. Louis-style ribs come from the belly side of pork spareribs. Butchers remove the hard cartilage and sternum bone, trimming the rack into a neat rectangle. This not only improves appearance but also ensures even cooking. Compared to baby back ribs, St. Louis ribs are flatter and contain more fat, which translates to richer flavor and juicier results when cooked properly.
Because of their thickness and connective tissue, these ribs require long, slow cooking to break down collagen into gelatin. Rushing the process leads to tough, chewy meat. The ideal internal temperature range is between 195°F and 205°F. At this point, the collagen has melted, and the meat separates easily from the bone.
Step-by-Step Guide to Perfect Ribs
- Remove the membrane: Flip the rack bone-side up. Slide a butter knife under the thin membrane covering the bones, then grip it with a paper towel and peel it off. This allows seasoning to penetrate and prevents toughness.
- Season generously: Apply a dry rub evenly on both sides. Let sit for at least 30 minutes, or refrigerate overnight for deeper flavor infusion.
- Preheat your cooking method: Whether using a smoker, grill, or oven, stabilize the temperature at 225–250°F before placing ribs inside.
- Cook low and slow: Allow 4 to 6 hours depending on thickness. Maintain steady heat and avoid opening the lid frequently.
- Apply the 3-2-1 method (optional): Smoke uncovered for 3 hours, wrap in foil with liquid (apple juice, butter, honey) for 2 hours, then finish unwrapped with sauce for 1 hour.
- Check for doneness: Look for shrinkage of meat from bones, probe tenderness, and internal temp near 203°F.
- Rest before serving: Let ribs rest 10–15 minutes so juices redistribute.
Dry Rub vs. Wet Marinade: Which Works Better?
Dry rubs are the cornerstone of great barbecue. They create a flavorful crust and enhance smoke absorption. A balanced rub typically includes salt, sugar, paprika, garlic powder, onion powder, black pepper, chili powder, and brown sugar. The sugar helps with browning but can burn above 265°F—so keep temps moderate.
Wet marinades add moisture and tang, especially useful if grilling over higher heat. However, they can inhibit bark formation by keeping the surface too wet. For best results, use a dry rub as the base and spritz occasionally during cooking with apple cider vinegar, beer, or fruit juice.
| Method | Pros | Cons |
|---|---|---|
| Dry Rub Only | Strong bark, deep spice penetration, classic BBQ texture | Less surface moisture; needs occasional spritzing |
| Rub + Spritzing | Balanced moisture, enhanced flavor layers | Requires attention every 30–45 mins |
| Marinade Soak (12–24 hrs) | Tangy profile, slightly more tenderizing | Can wash out rub; harder to get crisp bark |
“The secret to competition-level ribs isn’t exotic ingredients—it’s consistency in temperature and timing.” — Derrick Moss, KCBS Certified Judge
Three Easy Cooking Methods You Can Try at Home
1. Smoker Method (Best Flavor)
Use indirect heat with wood chunks like hickory, apple, or cherry. Maintain 225°F. After applying rub, place ribs bone-side down. Spritz every hour after the second hour. Total cook time: 5–6 hours. Wrap optional after 3 hours for faster tenderness.
2. Grill (Charcoal or Gas)
Set up for indirect grilling—place coals to one side or turn off burners on one side. Add soaked wood chips for smoke. Cook ribs away from direct flame. Monitor temperature closely. Expect longer cook times if ambient temps are low.
3. Oven Baking (Most Convenient)
Preheat oven to 275°F. Place ribs on a foil-lined baking sheet or in a roasting pan. Cover tightly with foil. Bake for 2.5 hours. Unwrap, brush with sauce, and broil 5 minutes per side to caramelize. While less smoky, this method delivers reliable tenderness.
Real Example: From Tough to Tender in One Weekend
Mark, a home cook in Kansas City, had struggled with dry, rubbery ribs for years. He used high heat on his gas grill, finishing in under 2 hours. After switching to a 225°F smoker and applying the 3-2-1 method, his results transformed. He removed the membrane, applied a homemade rub with smoked paprika and dark brown sugar, and spritzed every 45 minutes with a mix of apple juice and cider vinegar. After six hours, the ribs passed the bend test—when lifted with tongs, they cracked slightly but didn’t break. His guests couldn’t believe he’d done it without a professional setup.
Essential Checklist for Success
- ☑ Remove the silver skin (membrane) from the bone side
- ☑ Use a balanced dry rub with salt, sugar, and spices
- ☑ Preheat cooker and stabilize temperature before adding ribs
- ☑ Maintain 225–250°F throughout cooking
- ☑ Spritz every 45–60 minutes after the first two hours
- ☑ Consider the 3-2-1 method for foolproof results
- ☑ Check doneness by probe tenderness or the bend test
- ☑ Rest ribs 10–15 minutes before slicing
Frequently Asked Questions
Should I boil ribs before cooking?
No. Boiling leaches flavor and can make meat mushy. The low-and-slow method breaks down collagen naturally without water.
How do I know when ribs are done?
Look for meat that has pulled back about 1/4 to 1/2 inch from the ends of the bones. Perform the bend test: lift the rack with tongs from one end—if it bends and small cracks appear in the bark, they’re ready.
Can I make ribs ahead of time?
Yes. Cook them fully, then cool and refrigerate. Reheat wrapped in foil at 275°F for 30–40 minutes, then glaze and serve. Many pitmasters say reheated ribs taste even better.
Final Tips for Flavorful, Foolproof Ribs
Avoid overcrowding the cooking chamber. Airflow matters—even in an oven. If stacking racks, rotate them halfway through. Also, resist the urge to constantly check. Every time you open the lid or door, you lose heat and humidity, extending cook time.
Sauce should be applied late—typically in the last 15–30 minutes. Sugar-heavy sauces burn easily. Brush on thin layers and let them caramelize without charring. For a sticky finish, apply a second coat after removing from heat.
“Great ribs aren’t about speed—they’re about rhythm. Once you find your groove with temperature and timing, consistency follows.” — Lila Chen, Barbecue Instructor & Cookbook Author
Cook with Confidence and Share the Flavor
Mastering St. Louis pork ribs doesn’t require expensive gear or secret ingredients. It starts with understanding the cut, respecting the process, and building flavor step by step. Whether you're hosting a backyard cookout or perfecting your weekend meal prep, these methods deliver restaurant-quality results at home.


 浙公网安备
33010002000092号
浙公网安备
33010002000092号 浙B2-20120091-4
Comments
No comments yet. Why don't you start the discussion?