
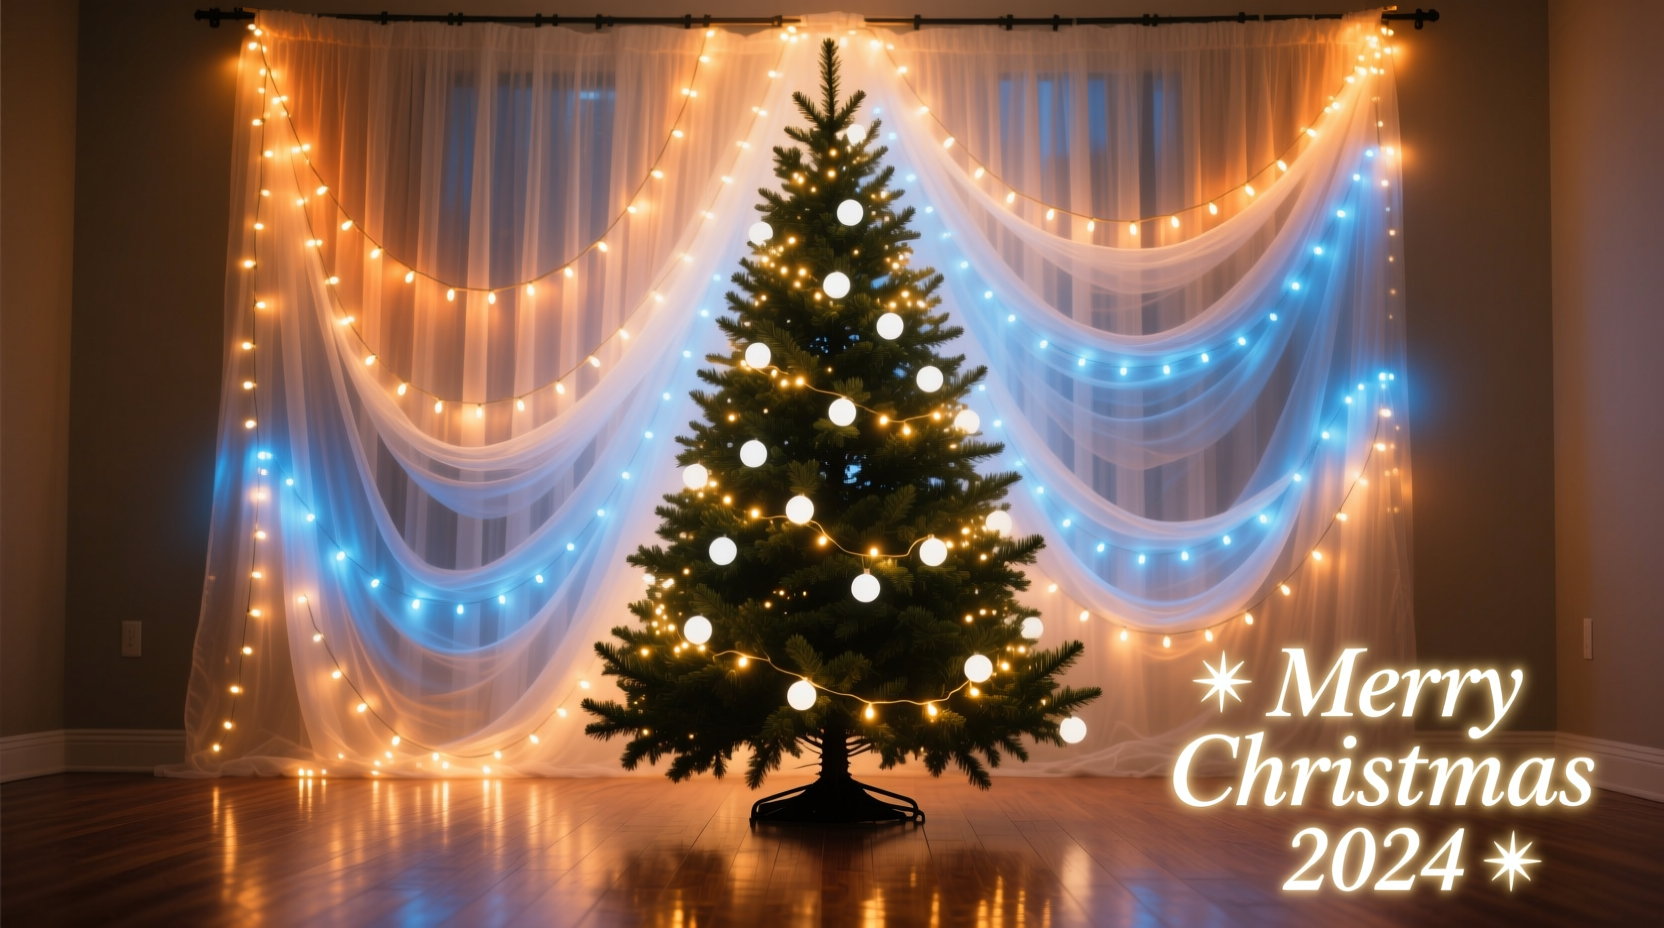
A Christmas tree is often the centerpiece of holiday decor, but adding depth and dimension can transform it from traditional to extraordinary. One of the most visually striking techniques gaining popularity among interior designers and festive decorators alike is the “light curtain” effect—strings of lights hung vertically behind the tree to create a shimmering backdrop that mimics falling stars or a soft aurora. This subtle yet dramatic enhancement draws the eye, adds warmth, and elevates the entire room’s ambiance. Unlike complex installations requiring scaffolding or custom frames, a light curtain is accessible, affordable, and achievable with basic tools and careful planning.
The key to success lies in precision: spacing, alignment, bulb type, and color temperature all contribute to the final illusion. When done well, the curtain appears seamless, like a veil of light suspended in air. When rushed or poorly executed, it can look haphazard or distracting. This guide walks through every phase—from planning and materials to installation and fine-tuning—so you can achieve a professional-quality result at home.
Planning Your Light Curtain Layout
Before purchasing a single strand of lights, take time to assess your space. The wall behind your tree should be unobstructed and ideally flat. Measure the height from floor to ceiling or the desired endpoint of the curtain. Most standard living rooms range from 8 to 9 feet in height, which means your light strands will need to match or slightly exceed this length to ensure full coverage.
Determine how many vertical lines you want. A general rule is one strand every 6 to 8 inches for a dense, luxurious curtain. For a 4-foot-wide wall area behind the tree, that’s roughly 6 to 8 strands. Fewer strands may leave gaps; too many can overwhelm the space. Use painter’s tape to mark where each strand will hang—this allows you to visualize the pattern before committing.
Consider power access. Each strand typically needs an outlet or a central power strip. Plan cord routing discreetly—along baseboards, under rugs, or secured with adhesive clips—to avoid tripping hazards and maintain clean lines. If your tree blocks the outlet, use a low-profile extension cord routed through the tree stand or behind the trunk.
Choosing the Right Lights and Materials
Not all Christmas lights work equally well for a curtain effect. The goal is uniformity, so select strands that are identical in bulb size, color, brightness, and spacing. Mismatched strands break the illusion of continuity.
Opt for mini LED lights—they’re energy-efficient, generate minimal heat, and come in consistent color temperatures. Warm white (2700K–3000K) creates a cozy, inviting glow that complements tree lights without competing. Cool white or multicolor LEDs can feel harsh or carnival-like unless integrated into a themed design.
Bulb spacing matters. Strands with bulbs spaced 4 to 6 inches apart provide even coverage without visible gaps. Avoid net lights or icicle lights designed for roofs—they lack the straight, controlled drop needed for a clean curtain.
| Feature | Recommended | Avoid |
|---|---|---|
| Light Type | Mini LED | Incandescent, rope lights |
| Color Temperature | Warm white | Cool white, RGB flicker |
| Bulb Spacing | 4–6 inches | Irregular or wide spacing |
| Strand Length | Matches ceiling height | Too short or overly long |
| Power Source | Plug-in with spare outlets | Battery-only (for large setups) |
If you're aiming for a modern, minimalist look, consider clear wires and small bulbs. For vintage charm, try Edison-style filament LEDs on brown wire. Always buy from the same product batch to ensure consistency. Purchase extra strands—one or two—for replacements or future repairs.
“Uniform lighting is critical in creating illusions. A single mismatched strand can disrupt the entire visual field.” — Lena Pruitt, Lighting Designer & Holiday Display Consultant
Step-by-Step Installation Process
With materials gathered and layout planned, begin the installation during daylight hours when visibility is best.
- Prepare the Wall: Clean the surface and remove any hooks, nails, or artwork. Ensure the wall is dry and free of dust for adhesive products to stick properly.
- Mark Vertical Lines: Using a laser level or plumb line, draw faint vertical guidelines with a pencil or use removable tape. These act as rails for precise alignment.
- Attach Mounting Clips: Use clear plastic clip ties or adhesive-backed cord clips every 12–18 inches along each line. These keep the strand straight and prevent swaying.
- Hang the First Strand: Start at one end. Unravel the strand fully to avoid tangles. Hook the top into the first clip, let it fall naturally, and secure it in each subsequent clip down to the floor.
- Repeat for Remaining Strands: Maintain exact spacing using a ruler or spacer block. Plug each strand into a power source temporarily to test before finalizing placement.
-
: Route excess cords behind baseboards or furniture. Use cord covers or paintable conduit if they cross visible areas. - Conceal Power Strip: Place the power strip behind the tree stand or in a nearby cabinet. Avoid stacking too many plugs to prevent overheating.
- Final Alignment Check: Step back and view from multiple angles. Adjust any crooked strands by loosening clips and repositioning.
After installation, dim the room lights and observe the effect. If some areas appear brighter or dimmer, check for loose connections or tangled wires. Replace any faulty bulbs immediately.
Enhancing the Effect with Design Techniques
A basic light curtain is beautiful, but thoughtful enhancements can make it unforgettable. Consider layering effects for added depth.
- Add a Backdrop Panel: Attach a sheer white or silver fabric panel to the wall before hanging lights. This diffuses the glow and creates a softer, more ethereal effect.
- Incorporate Dimmers: Use plug-in dimmer switches to control brightness. Lower intensity enhances ambiance during quiet evenings; full brightness works for parties.
- Synchronize with Tree Lights: If your tree lights are on a timer or remote, sync them with the curtain. A slow fade-up sequence at dusk adds drama.
- Integrate Color Accents: For a modern twist, replace one or two outer strands with soft blue or rose-gold LEDs. Keep the majority warm white to avoid clashing.
- Use Mirrors Strategically: Position a mirror opposite the curtain to reflect the lights and double the visual impact.
For those with smart lighting systems, program scenes such as “Twinkle,” “Wave,” or “Fade” across the curtain while keeping the tree lights steady. This dynamic contrast draws attention without overwhelming the space.
Mini Case Study: The Urban Apartment Transformation
Jessica, a graphic designer in Chicago, wanted to elevate her small living room for Christmas without cluttering the limited floor space. Her 6-foot pre-lit tree was attractive but felt isolated against a plain beige wall. After researching lighting techniques, she decided to try a light curtain.
She measured her wall—8 feet high and 5 feet wide—and purchased nine 9-foot strands of warm white mini LEDs with 6-inch spacing. Using adhesive clips and a laser level, she installed the strands 7 inches apart. She ran the cords behind a sideboard and used a slim power strip tucked beside the tree stand.
The result was immediate. Friends described the space as “magical” and “like something from a boutique hotel.” The curtain made the room feel taller and cozier. Jessica added a white linen drape behind the tree, which softened the light further. By syncing the curtain to a dimmer, she could adjust the mood from vibrant to serene with a dial.
Her total cost: $85. Installation time: under three hours. The setup remained flawless throughout the season and was easily removed in January with no wall damage.
Common Mistakes and How to Avoid Them
Even experienced decorators make errors when attempting a light curtain for the first time. Awareness helps prevent frustration.
- Skipping the layout phase: Guessing strand placement leads to uneven spacing. Always mark positions first.
- Using mixed light types: Combining different brands or color temperatures creates visible inconsistencies.
- Ignoring cord management: Exposed cords ruin the illusion. Plan routing early and conceal thoroughly.
- Hanging after tree placement: It’s nearly impossible to align strands precisely with a tree in the way.
- Overloading circuits: Plugging too many strands into one outlet can trip breakers. Distribute load across circuits.
FAQ
Can I use battery-powered lights for a light curtain?
Battery-operated strands are convenient for small accents but impractical for full curtains. They require frequent battery changes, may dim over time, and lack the length needed for floor-to-ceiling drops. Plug-in LEDs are more reliable and consistent for this application.
Will the lights damage my wall?
When using adhesive clips, choose removable, residue-free versions designed for painted walls. Avoid duct tape or nails. Remove clips slowly after the season and clean any residue with rubbing alcohol. Most quality clips leave no marks if used correctly.
How do I store the strands for next year?
To prevent tangles, wrap each strand around a piece of cardboard cut into a rectangle (about 8x12 inches). Label it clearly and store in a compartmentalized bin. Keep all strands together so you can reuse the exact set next year.
Checklist: Creating Your Light Curtain
- Measure wall height and width
- Decide on number of strands (one every 6–8 inches)
- Purchase matching warm white mini LED strands
- Buy adhesive cord clips or mounting hardware
- Test all strands for functionality
- Mark vertical alignment lines on the wall
- Install mounting clips along each line
- Hang strands one by one, securing in clips
- Route and conceal cords safely
- Connect to power and test overall effect
- Adjust spacing or brightness as needed
- Enjoy your illuminated backdrop
Conclusion
Creating a Christmas light curtain behind your tree isn’t about extravagance—it’s about intentionality. With careful planning and attention to detail, you can craft a luminous backdrop that transforms your holiday space into something truly memorable. The effect is subtle enough not to overpower, yet radiant enough to captivate. Whether you live in a spacious home or a compact apartment, this technique adds dimension, warmth, and artistry to your seasonal decor.
Start gathering your materials now, measure your space, and commit to the process. The effort pays off in countless moments of wonder—your family pausing to admire the glow, guests commenting on the elegance, and the quiet joy of sitting beneath a canopy of light. This holiday season, go beyond the ornaments and tinsel. Illuminate the space behind the tree, and let the magic extend beyond the branches.


 浙公网安备
33010002000092号
浙公网安备
33010002000092号 浙B2-20120091-4
Comments
No comments yet. Why don't you start the discussion?