
Building your own Minecraft server opens the door to endless creativity and shared adventures with friends. While paid hosting services offer convenience, many players—especially beginners—prefer starting with a free solution. Running a server from your own computer is not only cost-free but also gives you full control over settings, mods, and player access. With clear steps and some basic technical guidance, anyone can set up a functional Minecraft server in under 30 minutes.
Understanding the Basics of a Minecraft Server
A Minecraft server allows multiple players to connect and play together in the same world. When you run a server locally, your computer becomes the host, managing game data, player interactions, and world generation. The most common version used for personal servers is the Java Edition of Minecraft, which supports custom server software like the official Minecraft Server (Vanilla), Spigot, or Paper.
While free servers are great for learning and small groups, they come with trade-offs: performance depends on your internet connection and hardware, and keeping the server online requires your computer to stay powered on. Still, for casual play with friends or family, a self-hosted server is an excellent starting point.
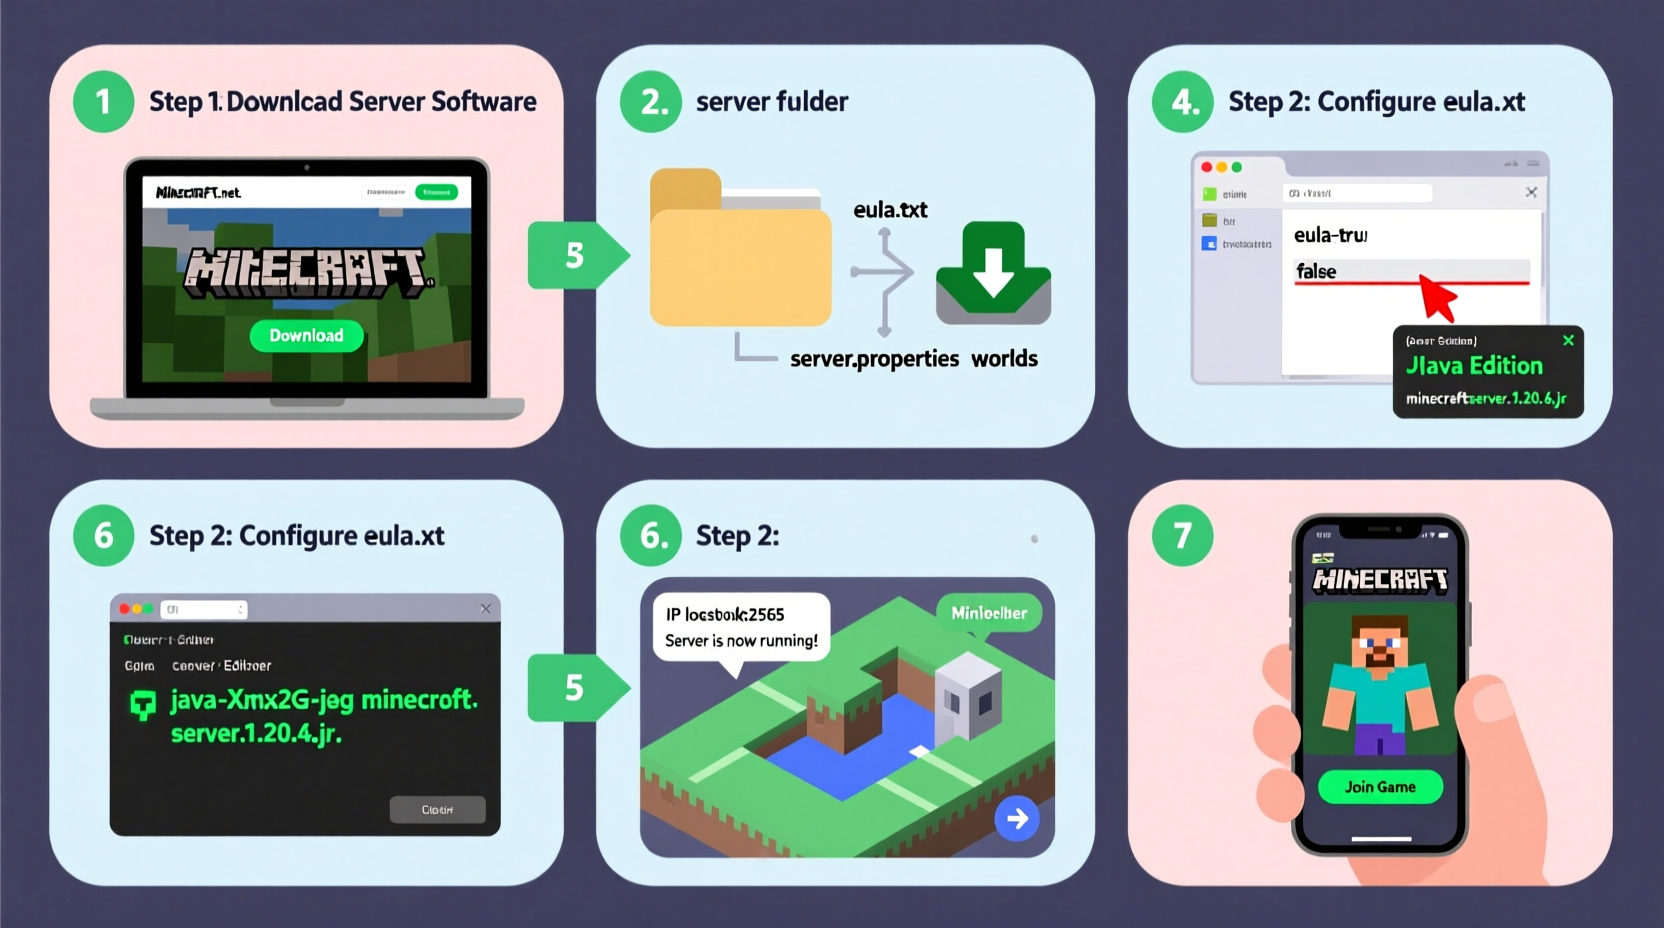
Step-by-Step Setup Guide
Follow these steps carefully to create a working Minecraft server on your Windows, macOS, or Linux machine.
- Check System Requirements: Ensure your computer has at least 4GB of RAM (8GB recommended), a stable internet connection, and enough disk space for world saves (start with 1–2GB).
- Download Java Development Kit (JDK): Minecraft servers require Java. Visit Eclipse Adoptium and download JDK 17 (recommended for newer Minecraft versions).
- Download the Minecraft Server Software: Go to the official Minecraft website and download the \"minecraft_server.x.x.x.jar\" file.
- Create a Dedicated Folder: Make a new folder (e.g., “MinecraftServer”) and place the .jar file inside.
- Run the Server for the First Time: Open Command Prompt (Windows) or Terminal (macOS/Linux), navigate to your folder, and type:
java -Xmx1024M -Xms1024M -jar minecraft_server.x.x.x.jar nogui
This launches the server and generates essential configuration files. - Accept the EULA: After running, open the generated
eula.txtfile and changeeula=falsetoeula=true. - Restart the Server: Run the same command again. This time, the server will start fully and generate a default world.
- Note Your Local IP Address: Type
ipconfig(Windows) orifconfig(macOS/Linux) to find your local IPv4 address (usually starts with 192.168.x.x). - Port Forwarding (For External Access): To allow friends outside your network to join, log into your router’s admin panel and forward port 25565 (TCP) to your computer’s local IP.
- Share Connection Details: Give your public IP address (find it via
whatismyip.com) and port number to friends so they can connect in Minecraft multiplayer.
Troubleshooting Common Startup Issues
- If you get a “Java not found” error, ensure Java is installed correctly and added to your system PATH.
- \"Could not bind to port\" means another application is using 25565. Restart your router or change the port in
server.properties. - Crashes on startup may indicate insufficient RAM. Increase the
-Xmxvalue (e.g.,-Xmx2048Mfor 2GB).
Configuring Your Server Settings
The server.properties file controls gameplay rules. Open it with a text editor to customize:
| Setting | Description | Recommended Value |
|---|---|---|
| gamemode | Sets default mode (survival, creative, adventure) | creative |
| difficulty | Controls mob aggression and hunger loss | easy |
| allow-cheats | Enables commands like /give and /tp | true |
| max-players | Limits concurrent connections | 5–10 |
| white-list | Restricts access to approved players only | true (for private servers) |
After making changes, restart the server for them to take effect.
“Running your first server teaches more about networking and game mechanics than any tutorial.” — Jordan Lee, Game Server Administrator
Security and Best Practices
Hosting a server exposes your network to potential risks. Protect yourself with these practices:
- Use strong passwords for your OS user account.
- Enable firewall rules to limit incoming connections to port 25565 only.
- Avoid sharing your public IP widely—only trusted friends should have access.
- Regularly update the server .jar file when Minecraft releases patches.
Mini Case Study: A Family-Friendly Server
Sarah, a parent of two young Minecraft fans, wanted her kids to play safely with cousins during weekends. She followed this guide to set up a server on an old laptop she kept running in the basement. By enabling whitelist mode and setting gamemode to creative, she ensured a peaceful environment without griefing or monsters. Using a simple Google Doc, she shared the IP address and login times. Within weeks, the cousins were building castles together every Saturday morning—no subscription fees, no third-party platforms.
Alternative Free Hosting Options
If self-hosting proves too complex or unreliable, consider free cloud-based alternatives. These platforms handle setup and networking but often include ads or limitations:
| Service | Max Players | Plugins Support | Uptime Guarantee |
|---|---|---|---|
| Aternos | 10–20 | Yes (Spigot/Paper) | No (starts on demand) |
| PlayIt.gg | 5–10 | Limited | Yes (tunnel-based) |
| McPro.io (Free Tier) | 3 | No | 24/7 |
Aternos is especially popular among beginners due to its intuitive interface and support for modded servers. However, free tiers usually require waiting in a queue to start the server and may shut down after inactivity.
Frequently Asked Questions
Can I run a Minecraft server without port forwarding?
Yes, but only players on your local Wi-Fi network can join using your local IP (e.g., 192.168.1.5). For external access, port forwarding or a tunneling tool like PlayIt or ZeroTier is required.
Is it legal to run a free Minecraft server?
Yes, as long as all players connecting have purchased the official Minecraft Java Edition. Mojang permits free servers for personal use but prohibits selling access or in-game items.
Why can’t my friend connect even with the correct IP?
Common causes include: incorrect port forwarding, firewall blocking the connection, mismatched Minecraft versions, or ISP restrictions. Double-check each step and ensure both players are on version-compatible clients.
Final Checklist Before Launch
- ✅ Installed Java 17
-
Confirmed via command line with
java -version. - ✅ Downloaded official server JAR
- From Mojang’s site, placed in dedicated folder.
- ✅ Accepted EULA
-
Edited
eula.txttoeula=true. - ✅ Configured server.properties
- Set gamemode, difficulty, and max players.
- ✅ Port forwarded 25565
- Directed to your computer’s local IP in router settings.
- ✅ Shared public IP and port
- Friends can now add server in Multiplayer menu.
Start Building Together
Creating a free Minecraft server is a rewarding project that blends gaming with real-world tech skills. Whether you're hosting weekend builds with friends or helping younger players explore safely, the process empowers you to shape your digital playground. The tools are free, the knowledge is accessible, and the experience is uniquely yours. Now that your server is ready, invite your first player, type /op yourusername, and begin crafting a world worth sharing.


 浙公网安备
33010002000092号
浙公网安备
33010002000092号 浙B2-20120091-4
Comments
No comments yet. Why don't you start the discussion?