
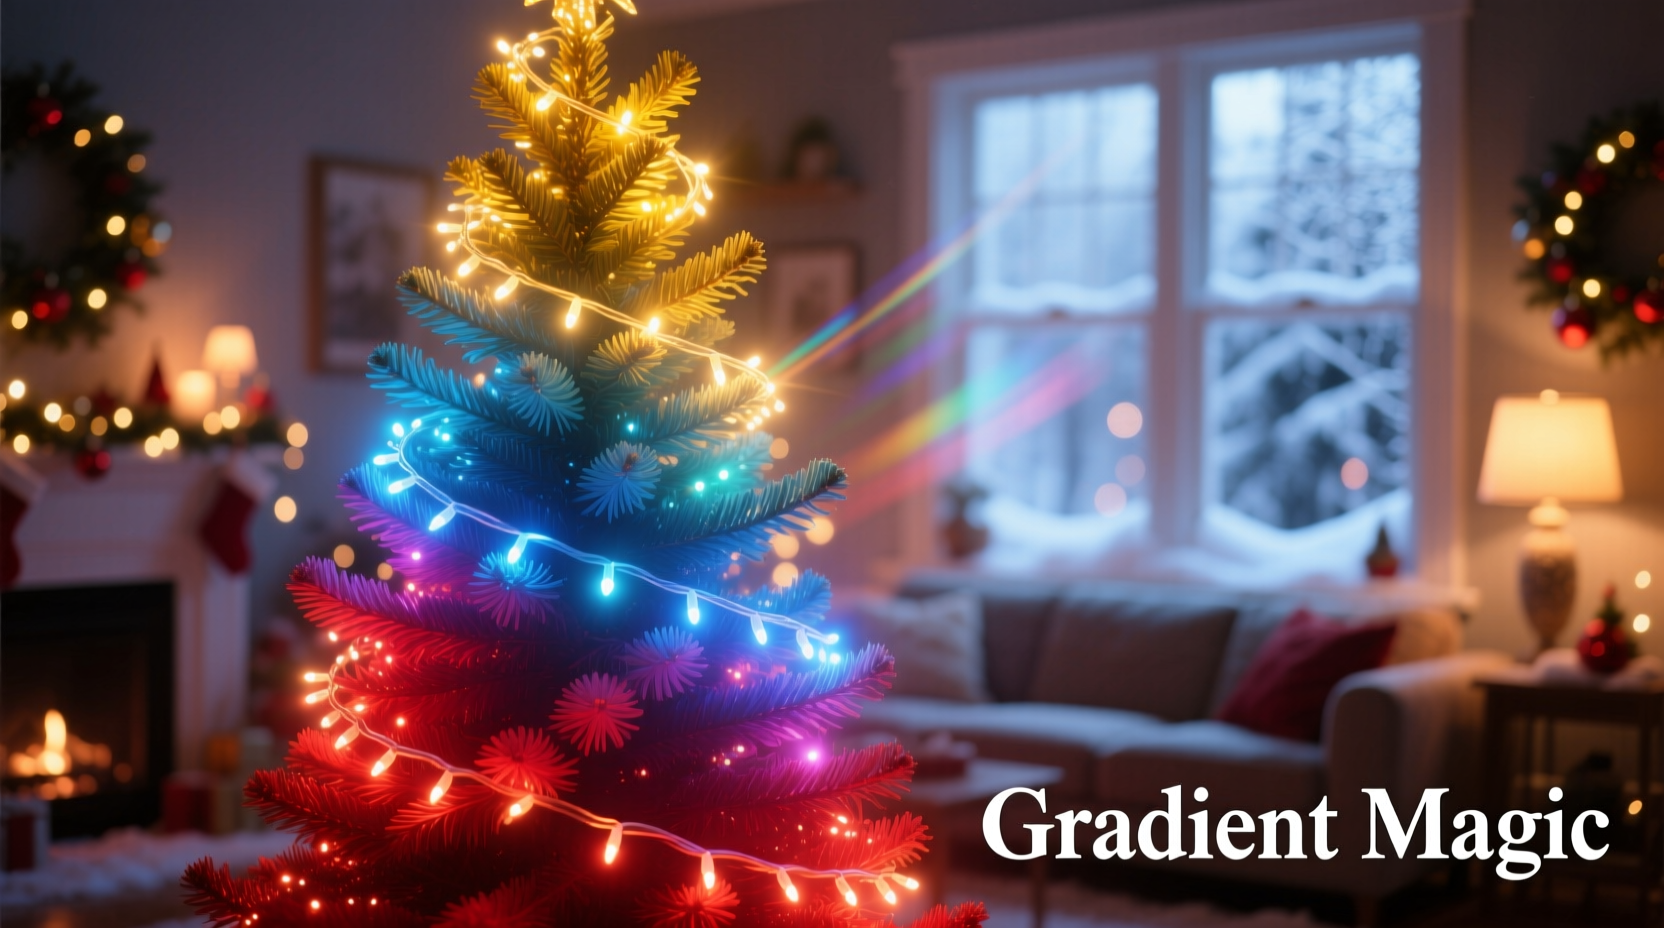
A beautifully lit Christmas tree can transform a room into a festive wonderland. While traditional multicolor strands offer cheerful charm, a more refined and visually captivating approach is the gradient lighting technique. Instead of random color placement, this method arranges lights in a smooth transition from one hue to another—such as warm reds fading into cool blues—creating depth, harmony, and a designer-level aesthetic. Whether you're decorating a living room centerpiece or preparing for a holiday open house, mastering the gradient effect elevates your decor with intentionality and artistry.
The key lies not just in the lights themselves but in thoughtful planning, strategic placement, and attention to color theory. Unlike haphazard stringing, gradient lighting requires deliberate sequencing and patience—but the results are well worth the effort. This guide walks through every step, from selecting the right bulbs to executing a seamless color flow that mimics natural light transitions.
Understanding Color Theory for Holiday Lighting
Before touching a single strand, it’s essential to understand how colors interact. A successful gradient doesn’t simply mix red, green, and blue—it follows a logical progression based on the visible spectrum. Think of a sunrise: soft pinks blend into oranges, then golds, before deepening into warm yellows. The same principle applies to Christmas lights.
For multicolor gradients, consider grouping hues by temperature:
- Warm tones: Red, orange, yellow, warm white
- Cool tones: Blue, purple, aqua, cool white
- Transitional tones: Pink, magenta, amber, lime (to bridge gaps)
Arranging lights in temperature-based sequences prevents jarring shifts. For example, jumping from red to blue creates visual tension, while red → pink → purple → blue forms a smooth, pleasing arc. Some decorators prefer circular gradients (e.g., red → orange → yellow → green → blue → purple → back to red), which work best on full, evenly shaped trees.
“Lighting is emotional design. A gradient doesn’t just illuminate—it guides the eye and evokes feeling.” — Marcus Lin, Lighting Designer & Holiday Display Consultant
Step-by-Step Guide to Installing a Gradient Light Effect
Creating a gradient isn’t about speed; it’s about precision. Follow this timeline to ensure consistency and balance across your tree.
- Unpack and sort your lights by color. Use ziplock bags or labeled containers to keep each hue separate. If using pre-lit strands, cut them into single-bulb sections if possible, or plan around fixed groupings.
- Choose your gradient direction. Decide whether the transition will move:
- Bottom to top (e.g., red at base, fading to blue at peak)
- Top to bottom (cool tones at top, warming toward floor)
- Spiral around the tree (most dynamic, mimicking a rainbow swirl)
- Begin at the power source. Plug in your first strand at the outlet location. Always start wiring from the plug end to avoid tangled cords mid-process.
- Lay the first color layer. Starting at the trunk base, wrap the first hue (e.g., deep red) around the lower third of the tree. Keep spacing even—about 4–6 inches between wraps—and tuck bulbs slightly inward for a glowing core effect.
- Transition gradually. After completing the red section, connect the next closest tone—like crimson or burgundy—on the middle tier. Overlap the final red wrap with the first burgundy wrap to soften the boundary.
- Continue upward with blending. Move through maroon, magenta, pink, lavender, blue, and finally icy white or pale aqua at the crown. Each color should occupy roughly equal vertical space.
- Fill gaps strategically. Once the main gradient is in place, use small accent strands or clip-on LEDs to fill dark spots without disrupting the flow.
- Test and adjust. Step back under dim ambient light. Rotate the tree if possible. Adjust any harsh transitions by repositioning a few bulbs or adding transitional shades.
Choosing the Right Lights and Materials
Not all Christmas lights are suitable for gradient designs. Here’s what to look for:
| Feature | Recommended | Avoid |
|---|---|---|
| Bulb Type | LED mini lights (individual replaceable bulbs) | Large C7/C9 bulbs (limited color variety, harder to blend) |
| Color Range | Strands with subtle variations (e.g., warm red, cherry, ruby) | Only primary colors (red, blue, green, yellow) |
| Wiring Flexibility | Sectional or customizable strings | Fixed-count pre-lit sets with no spares |
| Dimmability | Yes – allows mood control and softening harshness | No – limits ambiance options |
| Power Source | Low-voltage LED with adapter or battery backup | High-wattage incandescent (heat risk, less efficient) |
Invest in high-quality LED strands with consistent color temperatures. Cheap lights often have uneven tinting—even within the same “blue” batch—which breaks the illusion of a smooth gradient. Look for brands that offer “twinkle-free” or “steady glow” options if you want pure color control.
Real Example: A Coastal-Inspired Gradient Tree
Sarah M., a homeowner in Portland, Maine, wanted a non-traditional holiday tree that reflected her seaside cottage aesthetic. She opted for an oceanic gradient: starting with deep coral at the base, transitioning through sunset orange, sandy beige, seafoam green, turquoise, and finishing with arctic blue at the top.
She used 12 individual LED strands, each dedicated to a single shade, and wrapped them in ascending horizontal bands. To enhance the effect, she added clear crystal ornaments that refracted the colored light like sunlight on water. Neighbors reported slowing down on their evening walks just to admire the tree.
“People assumed I hired a decorator,” Sarah said. “But it was just careful sorting and taking my time. The colors tell a story—from shore to sea to sky.”
Pro Tips for Flawless Execution
Even experienced decorators encounter challenges when working with multiple colors. These insights help avoid common pitfalls:
- Work in natural light first. Sort and test colors during the day to see true hues. Artificial light can distort perception.
- Use a color wheel app. Apps like Adobe Color or Coolors help visualize complementary gradients and identify missing transitional tones.
- Limit your palette. More than 8–10 distinct colors can overwhelm. Stick to 5–7 core shades and use subtle variants within them.
- Label everything. Tag each strand with a small tag indicating its position in the sequence (e.g., “Layer 3: Magenta”).
- Keep spare bulbs. Have extras of each color on hand for replacements without breaking the gradient.
Checklist: Preparing Your Gradient-Lit Tree
Follow this checklist before and during installation to stay organized and effective:
- ☐ Choose a color sequence based on temperature and theme
- ☐ Purchase or gather LED strands in all required hues
- ☐ Test each strand for functionality and consistent color
- ☐ Sort and label strands by gradient order
- ☐ Position tree near a reliable power outlet
- ☐ Begin wiring from the bottom up, following the sequence
- ☐ Overlap adjacent colors slightly for smooth blending
- ☐ Step back frequently to assess visual flow
- ☐ Add accent lighting or reflective ornaments to enhance depth
- ☐ Take photos at different angles to catch missed spots
Frequently Asked Questions
Can I create a gradient with standard multicolor light sets?
Standard sets—with repeating patterns like red-green-blue-yellow—are not ideal for gradients because they lack control over color placement. However, you can disassemble them bulb by bulb and restring them manually. Alternatively, purchase solid-color strands in specific hues to maintain precision.
What if my tree has sparse areas or an irregular shape?
Focus the gradient along the most visible face of the tree. Use denser wrapping on the front and lighter coverage on the back. For lopsided trees, emphasize symmetry in color zones rather than physical spacing. You can also use garlands or ribbons to draw the eye along the intended flow.
How do I store gradient-lighted trees for next year?
Remove lights carefully, coil each color separately, and store in labeled containers. Wrap each strand around a piece of cardboard or use a plastic spool. Keep in a climate-controlled area away from rodents and moisture. Re-test each strand before reuse.
Conclusion: Illuminate with Intention
A gradient-effect Christmas tree is more than decoration—it’s a statement of care, creativity, and seasonal joy. By moving beyond random color scattering and embracing thoughtful transitions, you craft an experience that lingers in memory. The process demands patience, but each wrap brings you closer to a luminous masterpiece that feels both modern and timeless.
Whether you’re inspired by nature’s palettes, nostalgic sunsets, or abstract art, your gradient tells a story through light. Start small, refine your technique, and don’t be afraid to experiment. With the right materials and mindset, anyone can achieve professional-looking results.


 浙公网安备
33010002000092号
浙公网安备
33010002000092号 浙B2-20120091-4
Comments
No comments yet. Why don't you start the discussion?