
When friends, family, or guests come over, offering internet access is a courtesy. But handing out your primary Wi-Fi password exposes your personal devices, files, and online activity to potential risks. A smarter solution? Set up a guest network. This separate Wi-Fi network lets visitors go online while keeping your main network private and secure. Unlike simply giving out your password, a guest network isolates traffic, limits access to internal devices, and can even be scheduled or monitored independently.
Creating a guest network isn’t just for tech enthusiasts—it’s a practical step for any household or small office. Whether you're hosting a dinner party or running a home-based business, separating visitor access from your core network enhances security, improves performance, and gives you peace of mind. The process varies slightly depending on your router brand, but the underlying principles remain consistent across most modern systems.
Why You Should Use a Guest Network
Your primary Wi-Fi network likely connects sensitive devices: laptops with financial data, smart home cameras, networked storage drives, and phones with personal information. When you share your Wi-Fi password, you’re not just granting internet access—you're potentially enabling access to shared folders, printers, and local services if they're improperly configured.
A guest network acts as a digital buffer. It allows visitors to stream videos, browse social media, and check email without touching your private ecosystem. Most routers use network segmentation to ensure that devices on the guest network cannot communicate with those on the main network. This prevents unauthorized access even if a visitor’s device is compromised by malware.
“Isolating guest traffic is one of the simplest yet most effective steps in home network security.” — David Lin, Network Security Analyst at CyberShield Labs
Beyond security, a guest network helps manage bandwidth. Streaming, gaming, or large downloads by visitors can slow down your connection. With some routers, you can set speed limits or usage schedules on the guest network to prevent abuse.
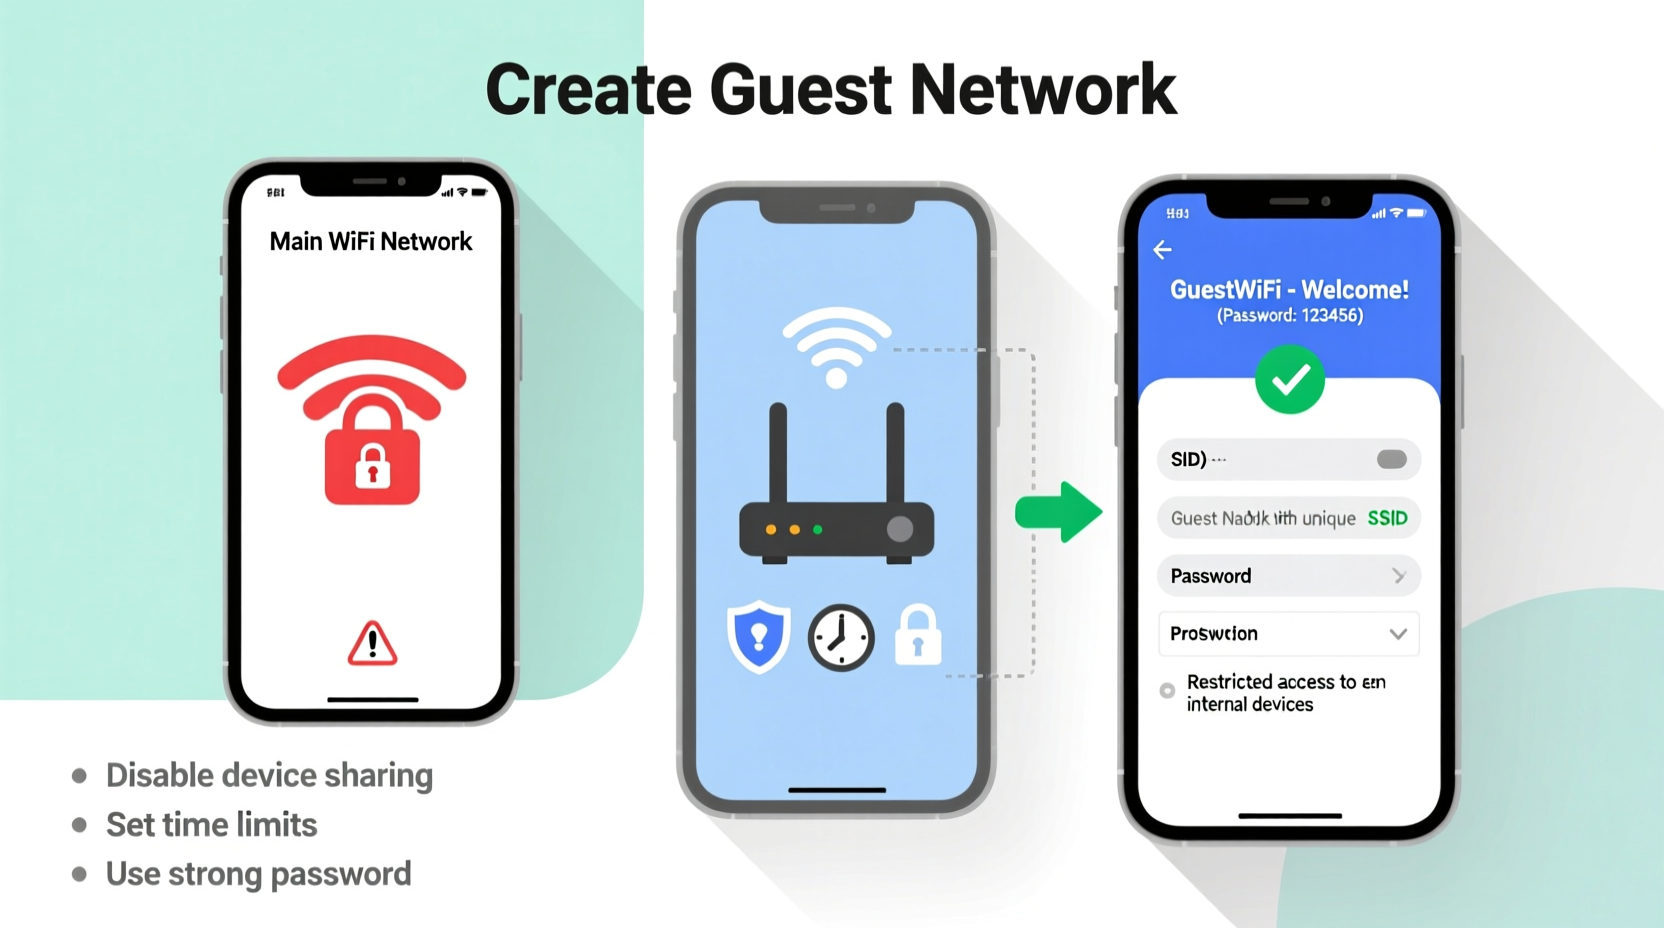
How to Set Up a Guest Network: Step-by-Step
Setting up a guest network involves accessing your router’s admin interface, enabling the guest feature, and customizing settings like name, password, and access rules. Follow this universal guide, adaptable to most routers including brands like TP-Link, Netgear, ASUS, Linksys, and Google Nest.
- Connect to Your Router: Use a computer or smartphone connected to your main Wi-Fi or via Ethernet cable.
- Access the Admin Panel: Open a browser and enter your router’s IP address—commonly
192.168.1.1,192.168.0.1, orrouterlogin.net. Check the label on your router for specifics. - Log In: Enter your admin username and password. If unchanged, defaults are often “admin/admin” or “admin/password.” If you’ve forgotten your credentials, you may need to reset the router.
- Navigate to Wireless Settings: Look for sections labeled “Wireless,” “Guest Network,” or “Advanced Settings.”
- Enable Guest Network: Toggle on the guest network option. Some routers allow multiple guest networks (e.g., one for 2.4GHz and another for 5GHz).
- Customize SSID and Password: Set a unique network name (SSID), such as “SmithGuest” or “Cafe_WiFi.” Avoid using your last name or address. Create a strong, memorable password—ideally 12+ characters with numbers and symbols.
- Configure Security Settings: Ensure the guest network uses WPA2 or WPA3 encryption. Never leave it open (no password).
- Apply and Save: Confirm settings and reboot the router if prompted.
Once complete, the guest network will appear as a separate option in Wi-Fi menus. Share only the guest credentials with visitors.
Brand-Specific Notes
| Router Brand | Admin URL | Guest Network Location |
|---|---|---|
| TP-Link | tplinklogin.net | Wireless > Guest Network |
| Netgear | routerlogin.net | Advanced > Guest Network |
| ASUS | router.asus.com | Wireless > Guest Network |
| Linksys | linksyssmartwifi.com | Connectivity > Guest Access |
| Google Nest Wifi | google.com/nest/wifi | Settings > Guest Network (in app) |
Best Practices for Managing Guest Access
A guest network isn’t “set and forget.” To maintain long-term security and usability, apply these best practices:
- Use a Unique SSID: Don’t name it “JohnsWiFi_Guest” or include identifying details. A neutral name like “VisitorWiFi” avoids exposing personal info.
- Set Time Limits: Many routers allow scheduling—activate the guest network only during expected visit hours (e.g., weekends 10 AM–8 PM).
- Limit Bandwidth: Prevent guests from hogging bandwidth by capping speeds. Ideal range: 10–25 Mbps per guest, depending on your total plan.
- Disable File Sharing: Ensure UPnP (Universal Plug and Play) is disabled on the guest network to block accidental device discovery.
- Change Password Periodically: Rotate the guest password monthly or after major events (e.g., a house party).
- Monitor Connected Devices: Check your router dashboard regularly to spot unknown devices or suspicious activity.
“We once traced a phishing campaign back to an unsecured guest network used to relay malicious emails.” — Maria Tran, IT Consultant at SecureHome Networks
If your router lacks advanced controls, consider upgrading to a model supporting Quality of Service (QoS), device prioritization, and intrusion detection. Mesh systems like Eero, Orbi, or Asus ZenWiFi offer intuitive apps and robust guest management.
Real-World Example: The Home Office Dilemma
Julie runs a freelance design business from her apartment. Clients occasionally drop by to discuss projects, and she routinely offers Wi-Fi access. After one client connected, her backup drive was accessed remotely, and confidential project files were copied. An investigation revealed the breach occurred because her client’s laptop had keylogging software. Though the main network password wasn’t stolen, the lack of network isolation allowed lateral movement.
She resolved the issue by enabling her ASUS router’s guest network, renaming it “Studio_Visitors,” setting a complex password, and limiting access to 6 PM–9 PM daily. She also enabled band steering so guests default to the less-congested 5GHz band. Since then, she’s hosted over 30 visitors without incident, and her main network remains untouched.
This case illustrates that even non-technical users benefit from basic network segmentation. The effort to set up a guest network paid off in both security and professional credibility.
Essential Guest Network Checklist
Before inviting guests online, run through this checklist to ensure safety and functionality:
- ✅ Enabled guest network in router settings
- ✅ Assigned a unique, non-identifiable SSID
- ✅ Set a strong, separate password
- ✅ Applied WPA2 or WPA3 encryption
- ✅ Disabled access to local devices (printers, NAS, etc.)
- ✅ Scheduled on/off times if supported
- ✅ Limited bandwidth to prevent congestion
- ✅ Verified functionality with a test device
- ✅ Posted guest credentials in a controlled way (e.g., QR code, not taped to fridge)
- ✅ Reviewed connected devices weekly
Frequently Asked Questions
Can guests see my devices on the main network?
No—if properly configured, guest networks are isolated using firewall rules. Devices on the guest network cannot discover or connect to computers, phones, or smart home gadgets on your main network. However, misconfigured routers or older firmware may have vulnerabilities. Always keep your router updated.
Do I need special hardware to create a guest network?
Most routers manufactured after 2015 support guest networking. Entry-level models from ISPs may hide the feature or lack customization, but the core function usually exists. If your current router doesn’t support it, upgrading to a mid-tier model ($70–$120) provides better control, security, and performance.
Is a guest network slower than the main Wi-Fi?
It can be, depending on settings. Some routers automatically reduce guest speeds to prioritize main users. You can adjust bandwidth allocation in QoS settings. Also, guest networks often operate on the more congested 2.4GHz band unless specified otherwise. For better performance, enable 5GHz guest access if your router supports it.
Final Thoughts and Next Steps
Creating a guest network is a small investment of time for lasting benefits. It protects your privacy, secures your devices, and maintains optimal network performance—all while being hospitable. In today’s connected world, where a single infected device can compromise an entire network, separation isn’t just smart—it’s essential.
Don’t wait for a security incident to act. Take 15 minutes today to log into your router and enable the guest feature. Customize it thoughtfully, apply strong passwords, and educate household members about its purpose. Over time, refine settings based on usage patterns and evolving needs.


 浙公网安备
33010002000092号
浙公网安备
33010002000092号 浙B2-20120091-4
Comments
No comments yet. Why don't you start the discussion?