
Avatars are more than just digital representations—they're extensions of identity in virtual spaces. Whether you're building an online persona for gaming, social media, or professional platforms, a well-crafted avatar enhances engagement and personal branding. For beginners, the process may seem technical or overwhelming, but with the right approach, creating a unique avatar is both accessible and enjoyable. This guide walks through each stage—from planning your concept to finalizing your design—using beginner-friendly tools and methods.
Understand What an Avatar Is and Why It Matters
An avatar is a visual representation of a user in digital environments. These can range from cartoon-style characters in apps like Bitmoji to 3D models used in VR platforms or stylized icons on forums. A personalized avatar adds personality to your digital presence, helping others recognize and connect with you across platforms.
Modern avatars serve multiple purposes: they foster recognition in online communities, express individuality, and even improve user experience in gamified learning or remote collaboration tools. According to Dr. Lena Torres, a digital interaction researcher at Stanford’s Human-Computer Interaction Lab:
“Users who adopt consistent, personalized avatars report higher levels of engagement and perceived authenticity in virtual interactions.” — Dr. Lena Torres, HCI Researcher
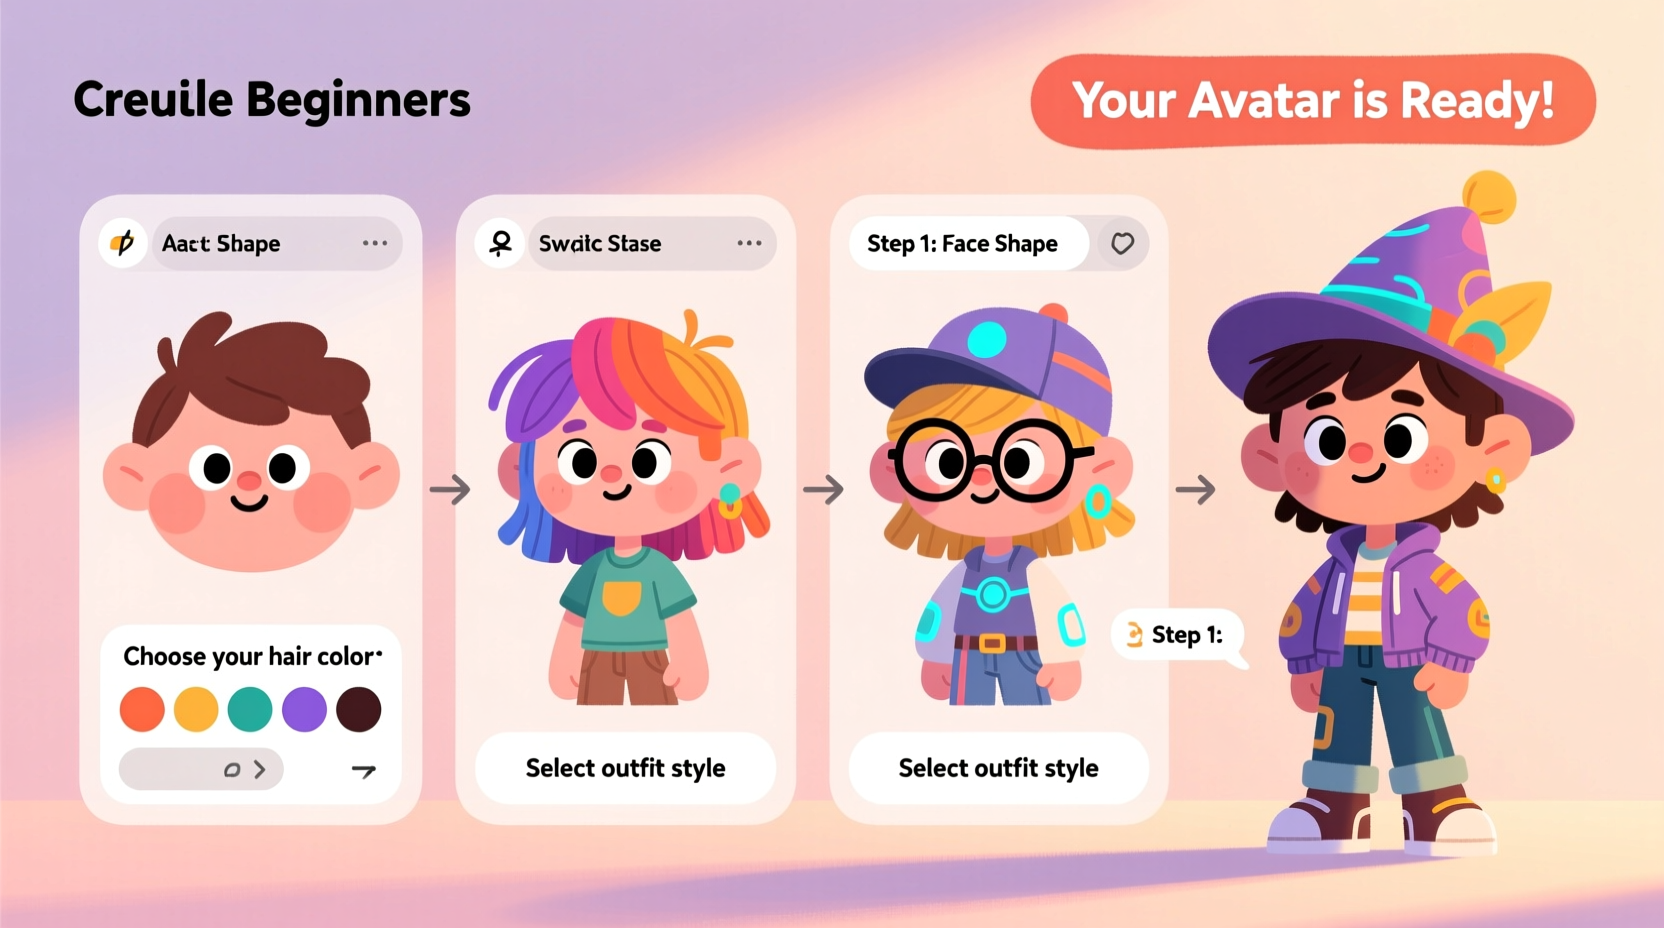
Step-by-Step Guide to Creating Your Avatar
Follow this structured process to build your first personalized avatar. Each phase builds upon the last, ensuring clarity and creative control without requiring advanced artistic skills.
- Define Your Purpose: Determine where the avatar will be used—social media, gaming, video conferencing, etc. This influences style (realistic vs. cartoonish) and complexity.
- Gather Inspiration: Browse avatar galleries on platforms like Zepeto, Ready Player Me, or Meta Avatars. Note features you like: hairstyle, facial expressions, clothing style.
- Choose Creation Tools: Select software or apps based on your comfort level. Beginners should start with mobile apps or browser-based editors.
- Build Core Features: Begin with face shape, skin tone, eyes, nose, and mouth. Adjust sliders until the base resembles your likeness or idealized self.
- Add Style Elements: Customize hair, accessories, outfits, and colors. Reflect real-life preferences or experiment with fantasy themes.
- Test Across Devices: Preview how your avatar looks on different screens and backgrounds. Ensure visibility and clarity at small sizes.
- Export and Save Variants: Download multiple versions (front, side, expressive poses) for flexibility in use.
Best Tools for Beginners
You don’t need graphic design experience to make a great avatar. The following tools offer intuitive interfaces, drag-and-drop functionality, and instant preview options.
| Tool | Platform | Best For | Learning Curve |
|---|---|---|---|
| Bitmoji | Mobile & Web | Social media stickers and messaging | Very Low |
| Ready Player Me | Web & Unity | Cross-platform 3D avatars | Low |
| Meta Avatars | VR & Horizon Worlds | Immersive experiences | Moderate |
| Animaze | Windows & Mac | Live streaming and webcam avatars | Moderate |
| Daz Studio | Desktop | Advanced 3D modeling (free version available) | High |
For most beginners, starting with Bitmoji or Ready Player Me offers the smoothest entry point. Both allow quick customization and export options compatible with major apps and websites.
Common Mistakes to Avoid
- Overcomplicating early designs: Resist adding too many accessories or effects before establishing a solid base look.
- Ignoring platform limitations: Some systems require specific file formats or restrict animation capabilities—check compatibility early.
- Using inconsistent proportions: Misaligned eyes or oversized hats break realism. Use grid guides if available.
- Skipping backups: Save progress frequently. Many web tools don’t auto-save between sessions.
Real Example: Sarah’s First Avatar Journey
Sarah, a freelance graphic designer, wanted a fun yet professional avatar for her Zoom meetings and portfolio site. She began by sketching rough ideas on paper—emphasizing her signature glasses and curly hair. Then she tried three tools:
- First, Bitmoji felt too cartoonish for her brand.
- Next, Meta Avatars didn’t support high-resolution exports.
- Finally, she found success with Ready Player Me, which let her fine-tune facial symmetry and wear a blazer that matched her real wardrobe.
She exported two versions—one neutral for professional use, another smiling with sparkles for social posts. Within a week, clients started commenting positively on her “friendly digital presence.”
Checklist: Create Your Avatar in One Sitting
Use this actionable checklist to complete your avatar efficiently:
- ☐ Decide on usage context (casual, work, gaming)
- ☐ Choose a beginner-friendly tool (e.g., Ready Player Me)
- ☐ Upload a reference photo (optional but helpful)
- ☐ Set base skin tone and face shape
- ☐ Adjust五官 (eyes, nose, mouth) for likeness
- ☐ Add hair, glasses, or distinguishing features
- ☐ Pick 1–2 outfit styles that reflect your personality
- ☐ Test expression settings (smile, wave, surprise)
- ☐ Export in PNG format with transparent background
- ☐ Save source file for future edits
Frequently Asked Questions
Can I make an avatar that looks exactly like me?
Yes, especially with tools like Ready Player Me or FaceGen Modeller, which use AI to match uploaded photos. However, perfect realism depends on the software’s detail level and texture quality. Most consumer-grade apps prioritize stylization over photorealism.
Do I need to pay for avatar creation?
Not necessarily. Many platforms offer free tiers with full customization. Premium upgrades usually unlock extra clothes, animations, or higher resolution downloads. For basic use, free versions are sufficient.
How do I use my avatar once it's made?
You can upload it as a profile picture on LinkedIn, Discord, Slack, or Twitter. Gamers integrate them into platforms like Roblox or Fortnite. Streamers map avatars to their faces via apps like Animaze during live broadcasts.
Final Thoughts and Next Steps
Creating a personalized avatar isn’t just about appearance—it’s about crafting a digital identity that feels authentic and engaging. By following these steps, even those with no prior design experience can produce a compelling visual representation in under an hour. As virtual communication grows in importance, having a recognizable, consistent avatar gives you an edge in networking, creativity, and self-expression.


 浙公网安备
33010002000092号
浙公网安备
33010002000092号 浙B2-20120091-4
Comments
No comments yet. Why don't you start the discussion?