
In a studio apartment, every square foot counts. When your bedroom, living room, kitchen, and office all share the same footprint, maintaining focus and order becomes a daily challenge. A cluttered environment doesn’t just take up physical space—it drains mental energy, reduces productivity, and blurs the boundary between work and rest. Creating a productive workspace in such a compact setting requires intentionality, creativity, and discipline. The goal isn’t just to fit a desk into the room, but to design a functional, distraction-free zone that supports deep work while preserving the apartment’s livability.
The key lies in strategic planning: choosing multifunctional furniture, establishing visual boundaries, managing cables and supplies efficiently, and cultivating habits that prevent clutter from creeping back. With the right approach, a studio apartment can host a workspace that feels separate, professional, and energizing—without sacrificing comfort or style.
Define Your Workspace with Visual and Physical Boundaries
One of the biggest challenges in a studio is the lack of separation between life domains. Without clear cues, your brain struggles to shift into “work mode.” Defining your workspace begins with creating psychological and physical separation—even if only symbolic.
Use area rugs, bookshelves, folding screens, or low cabinets to subtly partition your desk area. A change in flooring texture or color under your desk signals transition. Even positioning your desk to face away from the bed or kitchen helps train your mind to associate that direction with focus.
If you’re renting and can’t install permanent dividers, consider lightweight options like a tall plant in a corner, a curtain on a tension rod, or a slim console table behind the sofa acting as a room divider and surface for storage.
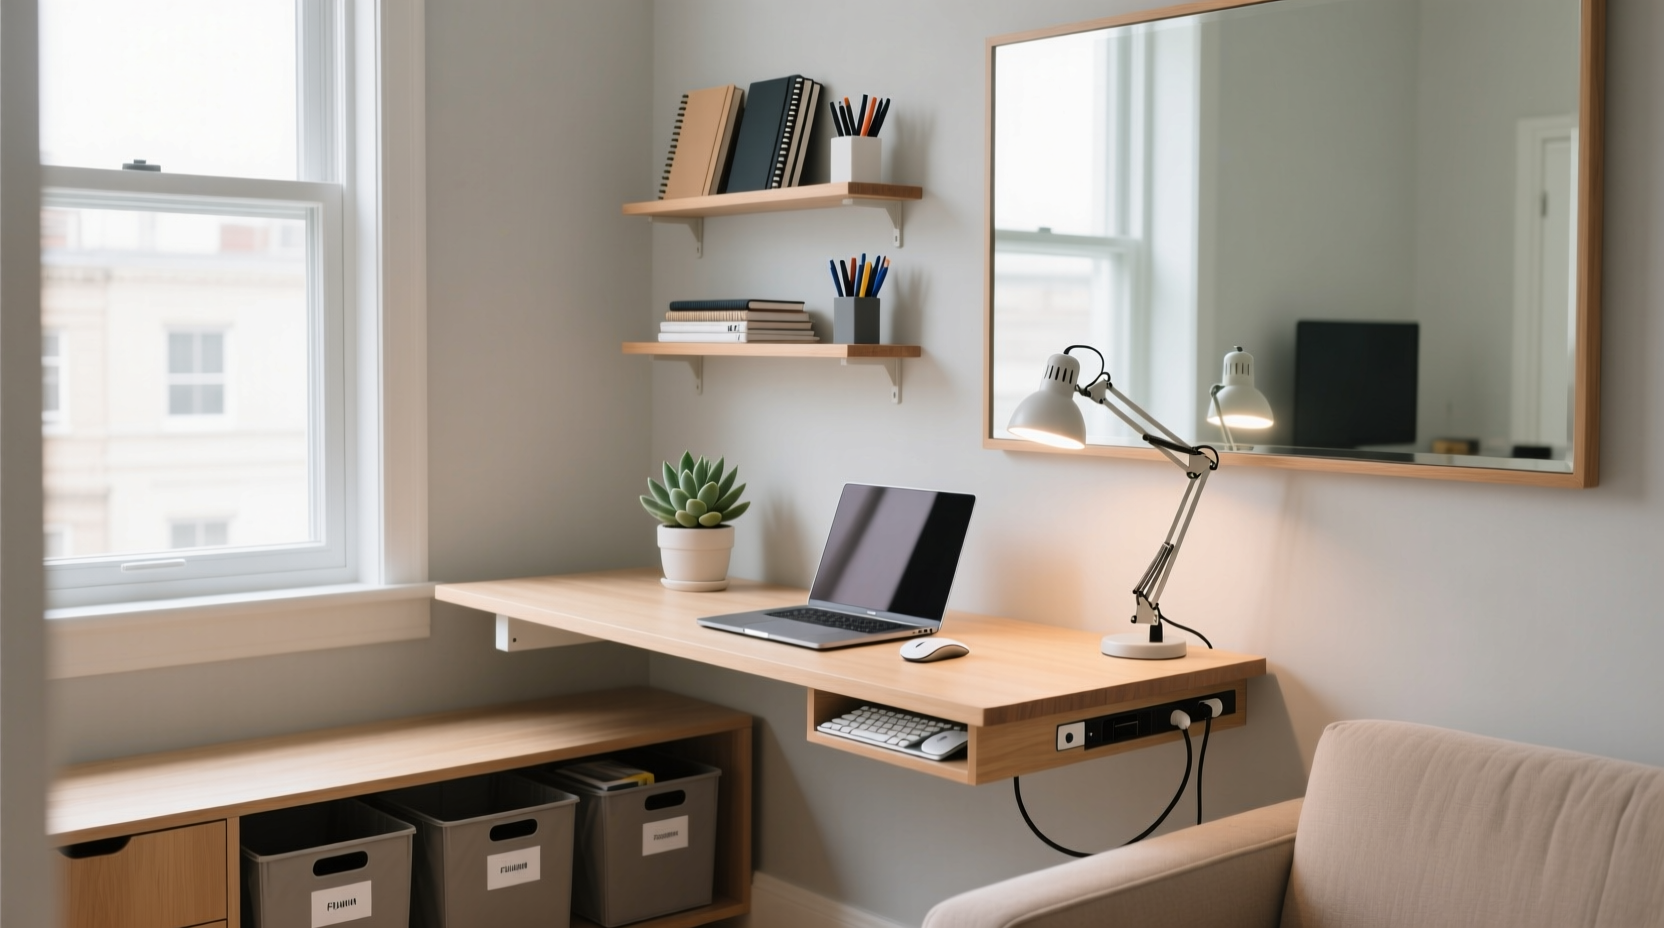
Choose Multifunctional Furniture Wisely
Furniture must earn its place in a studio. Every piece should serve at least two purposes. The wrong desk or chair can dominate the space, leaving no room for movement or relaxation.
Look for desks that fold into the wall, slide under a bed, or double as a console table. Some models convert into dining tables or nightstands. Desks with built-in shelving or drawers reduce the need for additional storage units.
Chairs should be ergonomic yet compact. Consider a drafting stool if ceiling height allows, freeing floor space when not in use. Alternatively, use a sturdy ottoman that doubles as seating and storage.
“Furniture in small spaces should be agile, not anchored. If it can’t adapt by evening, it’s probably too dominant.” — Lena Torres, Urban Interior Designer
| Furniture Type | Multifunctional Option | Space-Saving Benefit |
|---|---|---|
| Desk | Wall-mounted drop-leaf desk | Folds up when not in use; clears floor space |
| Chair | Nesting stool or stackable chair | Stores easily under table or bed |
| Storage | Bench with hidden compartment | Serves as seating and keeps supplies out of sight |
| Lighting | Adjustable arm lamp with USB ports | Reduces cable clutter and saves outlet space |
Optimize Storage to Prevent Clutter Buildup
Clutter doesn’t appear overnight—it accumulates from unchecked paper, tangled cords, and misplaced office supplies. In a studio, even a single disorganized drawer can make the entire space feel chaotic.
Adopt a “one in, one out” rule: for every new notebook, pen, or gadget brought in, remove an old or unused item. Use vertical space aggressively. Wall-mounted shelves, pegboards, and magnetic strips keep essentials accessible but off the desk.
Label clear bins or baskets for categories: charging cables, notebooks, headphones, sticky notes. Store them under the desk, inside a credenza, or on a high shelf. Avoid open bins unless contents are neatly arranged—visual clutter impacts focus as much as physical mess.
Digital files contribute to mental clutter too. Set up a weekly 15-minute ritual to delete unnecessary downloads, archive old projects, and rename files consistently. A clean digital desktop supports a clean physical one.
Step-by-Step Guide to Setting Up Your Studio Workspace
Follow this sequence to build a functional, clutter-free workspace tailored to a studio layout. Each step reinforces the last, ensuring sustainability beyond initial setup.
- Assess your daily workflow. Do you need constant access to reference books? Are video calls frequent? This determines what stays within reach versus stored away.
- Measure available space. Mark the footprint of your ideal desk and chair with tape on the floor. Test movement paths—can you walk around freely?
- Select a primary work surface. Prioritize adjustability and storage integration. A floating desk with a pull-out keyboard tray maximizes flexibility.
- Install vertical organizers. Mount a pegboard above or beside the desk for headphones, notebooks, pens, and task lists. Customize with hooks and bins.
- Manage power sources. Use a cord sleeve or under-desk tray to bundle chargers and adapters. Label each plug for quick identification.
- Add task lighting. Choose a focused LED lamp with adjustable brightness to reduce eye strain without adding floor lamps.
- Define end-of-day reset. Spend five minutes clearing the desk, returning items to bins, and closing browser tabs. This routine signals closure.
This process takes less than a weekend but establishes long-term habits. Reassess monthly: Is the system still working? Has clutter started to return? Adjust before small issues become overwhelming.
Real Example: How Maria Transformed Her 400-Square-Foot Studio
Maria, a freelance graphic designer in Brooklyn, struggled with burnout in her studio apartment. Her dining table served as her desk, but by evening, it was buried under sketches, coffee mugs, and laptop chargers. She felt unable to relax, and her work suffered from constant distractions.
She restructured her space by installing a wall-mounted desk in a quiet corner near a window. Above it, she mounted a slim pegboard with labeled sections: “Current Projects,” “Supplies,” and “Incoming Tasks.” She replaced her dining table with a drop-leaf version that folds against the wall, doubling as a sideboard when closed.
For seating, she chose a cushioned stool that slides under the desk. All digital devices charge in a locked basket under the desk, pulled out only during work hours. At 6 p.m., she resets the space: files saved, cables coiled, and desk wiped down. Now, when she closes her laptop, the transition to personal time feels deliberate and complete.
Within three weeks, Maria reported improved focus, fewer late-night work sessions, and greater satisfaction with her home environment. The clarity of her workspace translated into clarity of mind.
Do’s and Don’ts of Studio Workspace Design
Avoid common pitfalls by following these practical guidelines. Small missteps can undermine even the most thoughtful layout.
| Do | Don’t |
|---|---|
| Use light colors and mirrors to enhance perceived space | Paint walls dark or clutter them with heavy art |
| Invest in one high-quality chair for posture support | Sacrifice ergonomics for style or size |
| Keep only daily-use items on the desk surface | Let paperwork, snacks, or personal items pile up |
| Use timers to limit work sessions and encourage breaks | Work indefinitely without stepping away from the zone |
| Rotate decor seasonally to refresh the space | Accumulate sentimental or unused objects “just because” |
FAQ: Common Questions About Studio Workspaces
Can I have a productive workspace without a door or privacy?
Yes. While a door offers acoustic and visual separation, it’s not essential. Use directional lighting, sound masking (like white noise apps), and consistent routines to signal work time. Position your desk to minimize sightlines to high-traffic areas like the front door or kitchen sink.
How do I deal with limited outlets in my studio?
Use a slim, surge-protected power strip with USB ports mounted under the desk or behind a baseboard. Avoid daisy-chaining extension cords. If possible, consult an electrician about adding a single outlet near your workspace—many landlords approve minor upgrades that don’t alter structure.
What if my landlord won’t allow wall modifications?
Fear not. Tension rods can hold curtains or lightweight shelves. Adhesive hooks rated for weight (like those with nano-suction pads) support small organizers. Freestanding room dividers, rolling carts, and furniture arranged strategically achieve similar results without drilling.
Checklist: Building Your Clutter-Free Studio Workspace
- ✅ Measure your available space and mark desk footprint
- ✅ Choose a desk that folds, lifts, or integrates into existing furniture
- ✅ Select an ergonomic, space-efficient chair
- ✅ Install vertical storage (pegboard, shelves, or magnetic strips)
- ✅ Bundle and label all cables using sleeves or clips
- ✅ Assign a dedicated bin or drawer for office supplies
- ✅ Add focused task lighting with adjustable brightness
- ✅ Establish a 5-minute daily reset routine
- ✅ Remove non-essential items from the workspace surface
- ✅ Test the flow: Can you move freely and switch modes easily?
Create a Space That Works for You—Not Against You
A studio apartment doesn’t have to limit your productivity. In fact, its constraints can inspire smarter, more intentional design. By treating your workspace as a dynamic zone—one that transforms with your needs—you reclaim control over both your environment and your attention.
The absence of walls doesn’t mean the absence of boundaries. With careful planning, multifunctional choices, and disciplined habits, you can cultivate a workspace that feels distinct, efficient, and sustainable. Clutter isn’t inevitable; it’s a symptom of systems that haven’t been designed for real life. Fix the system, and the clarity follows.


 浙公网安备
33010002000092号
浙公网安备
33010002000092号 浙B2-20120091-4
Comments
No comments yet. Why don't you start the discussion?