
Determining whether you're pregnant doesn’t always require a trip to the pharmacy or doctor’s office. For generations, women have relied on homemade methods to detect early signs of pregnancy using common household items. While modern digital tests offer clinical accuracy, DIY pregnancy tests can provide preliminary insights—especially when used correctly and interpreted with care. This guide walks through scientifically grounded, historically practiced methods to help you conduct a reliable at-home test using simple materials.
Understanding How DIY Pregnancy Tests Work
Pregnancy begins with the fertilization of an egg and implantation in the uterine lining. Shortly after, the body starts producing human chorionic gonadotropin (hCG), a hormone detectable in urine. Most commercial tests identify hCG levels as low as 20–50 mIU/mL. DIY methods attempt to observe chemical reactions influenced by this hormone, though they are not regulated or standardized like FDA-approved kits.
Despite their informal nature, certain DIY techniques—such as the bleach, sugar, or toothpaste tests—have shown consistent anecdotal results due to observable changes in pH, protein interaction, or chemical decomposition caused by hCG-rich urine. However, it's crucial to understand that these tests are indicators, not diagnostics. They should be followed up with medical confirmation if positive.
“While some home methods show interesting correlations, only laboratory-grade testing can confirm pregnancy with certainty.” — Dr. Lena Patel, OB-GYN and Women’s Health Researcher
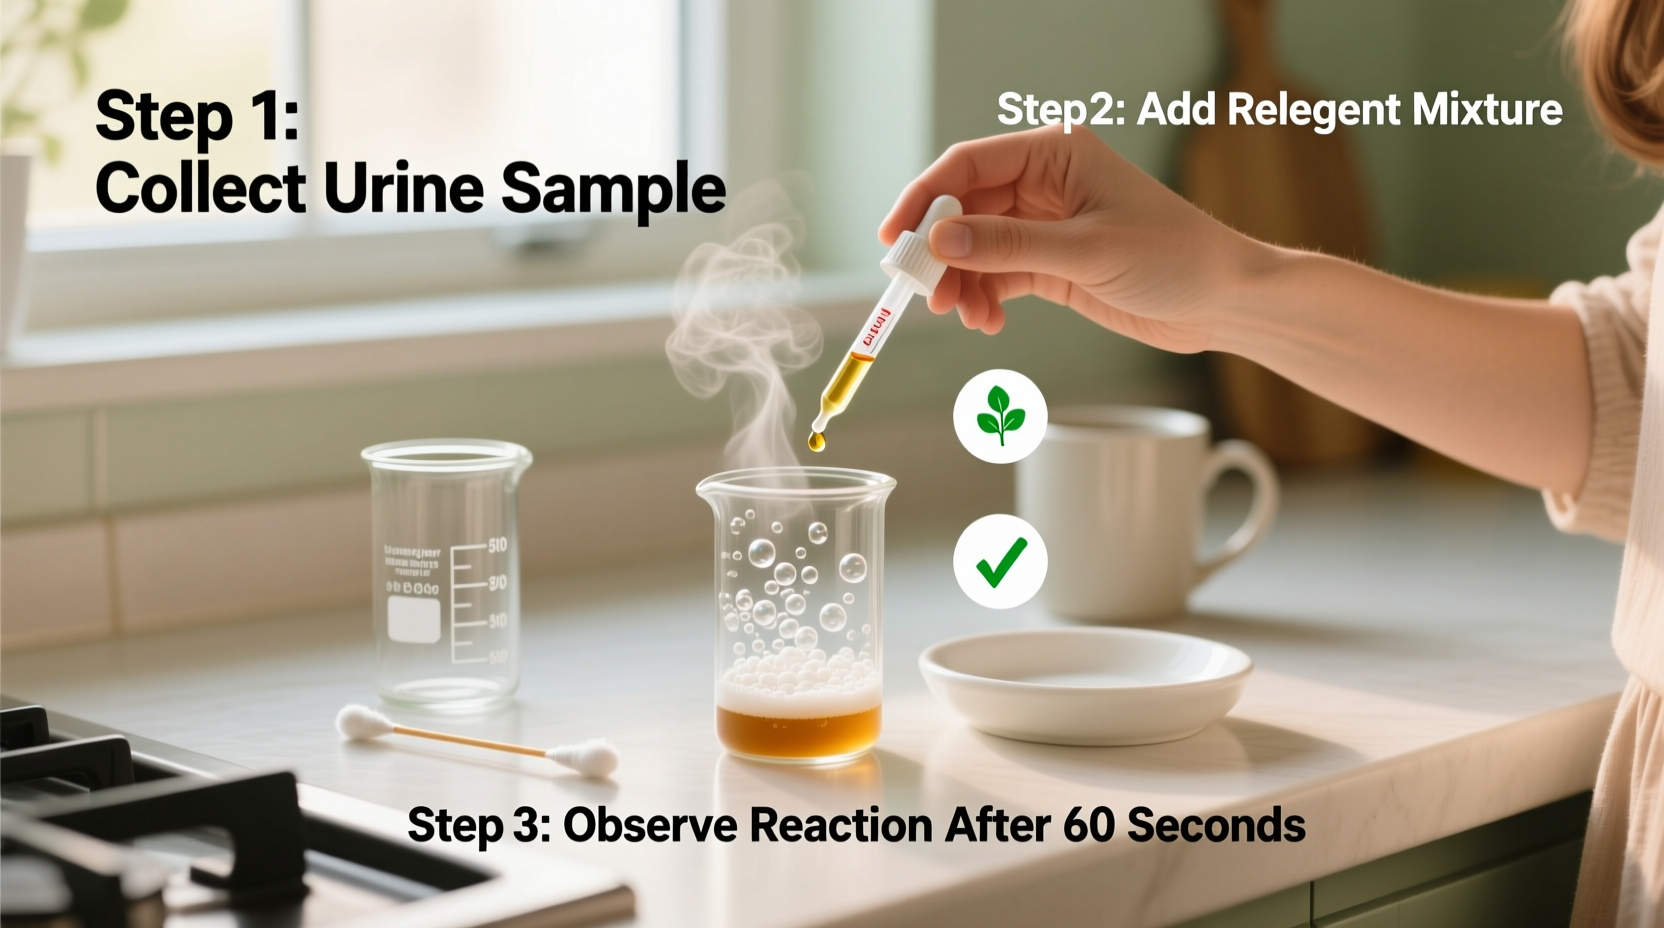
Step-by-Step Guide: Creating an Accurate DIY Pregnancy Test
To maximize reliability, follow this structured approach for conducting a DIY pregnancy test at home. The steps below apply broadly across multiple methods, with variations explained later.
- Wait Until After a Missed Period: hCG levels double every 48 hours in early pregnancy. Testing too early increases false negatives. Wait at least one week after your missed period for best results.
- Collect First-Morning Urine: This sample has the highest concentration of hCG, increasing the likelihood of detecting hormonal changes.
- Gather Clean Materials: Use sterile containers, spoons, and fresh supplies to avoid contamination.
- Perform the Test Carefully: Follow exact proportions and timing based on the method chosen.
- Observe Results Within 5–10 Minutes: Delayed readings may lead to misinterpretation due to evaporation or continued chemical breakdown.
- Repeat If Uncertain: Conduct the same test twice over two consecutive mornings for consistency.
Popular DIY Methods Compared
Below is a comparison of three widely used at-home pregnancy detection methods, including their basis, procedure, and reliability factors.
| Method | How It Works | Procedure Summary | Expected Positive Result | Reliability Notes |
|---|---|---|---|---|
| Sugar Test | hCG alters protein structure, affecting sugar dissolution | Add 1–2 tbsp white sugar to urine; wait 3–5 mins | Sugar clumps instead of dissolving | Moderate anecdotal support; sensitive to sugar quality |
| Bleach Test | hCG reacts with sodium hypochlorite, producing bubbles | Mix equal parts bleach and urine in disposable cup | Frothy bubbling within seconds | High risk of fumes; not recommended for safety reasons |
| Toothpaste Test | Alkaline-sensitive toothpaste reacts to acidic-hormonal shift | Add urine to white toothpaste (not gel); stir gently | Color change to blue/green + foaming | Most accessible; fewer hazards than bleach |
The Sugar Method: A Closer Look
This is one of the safest and most commonly reported-effective DIY approaches. Here’s how to do it properly:
- Place 1–2 tablespoons of granulated white sugar in a clean, dry bowl.
- Pour fresh first-morning urine over the sugar slowly.
- Watch closely for 3–5 minutes.
- If the sugar clumps together and does not dissolve, it may indicate the presence of hCG.
- If the sugar dissolves normally, the result is likely negative.
Why might this work? Anecdotal evidence suggests that proteins associated with hCG interfere with sucrose solubility, causing aggregation. While no peer-reviewed study confirms this mechanism, thousands of user reports describe similar outcomes when repeating the test under controlled conditions.
The Toothpaste Test: Safe and Visual
White, non-gel toothpaste (preferably fluoride-based) contains ingredients that react to pH and biological compounds. When mixed with pregnant urine, users often report foaming and a color shift toward blue.
- Use a small spoonful of plain white toothpaste in a clean container.
- Add enough urine to wet it thoroughly.
- Stir gently and wait 5 minutes.
- Positive sign: Foaming and bluish tint.
- Negative sign: No reaction or slight dilution without foam.
Common Mistakes That Reduce Accuracy
Even with careful execution, errors can skew results. Be aware of these pitfalls:
- Testing Too Early: hCG may not yet be concentrated enough to trigger a visible reaction.
- Using Diluted Urine: Drinking large amounts of water before testing lowers hCG density.
- Contaminated Tools: Residue from detergents or prior use affects chemical balance.
- Incorrect Timing: Reading results after 10 minutes risks false positives from drying patterns.
- Assuming All Reactions Are Positive: Some fizzing occurs naturally due to carbonation or temperature differences.
Mini Case Study: Sarah’s Experience with the Sugar Test
Sarah, a 29-year-old teacher, suspected she was pregnant but wanted to avoid store-bought tests due to privacy concerns. She waited five days after her missed period and collected first-morning urine. Using pure cane sugar in a glass dish, she poured the sample and observed. Within two minutes, the sugar began forming dense clusters at the bottom while the surrounding liquid remained clear. The next day, she repeated the test with identical results. Encouraged, she took a pharmacy test which confirmed pregnancy at 3 weeks. Though not diagnostic, the sugar method gave her early confidence to seek medical care.
Checklist: Preparing for Your DIY Pregnancy Test
- ☑ Wait at least 7 days after a missed period
- ☑ Collect first-morning urine in a clean container
- ☑ Use unexpired, plain white sugar or fluoride toothpaste
- ☑ Perform the test in a well-ventilated area (especially if using bleach)
- ☑ Set a timer for 5 minutes to read results promptly
- ☑ Repeat the test the following morning for verification
- ☑ Schedule a doctor visit if results suggest pregnancy
Frequently Asked Questions
Can a DIY pregnancy test be 100% accurate?
No. While some methods show strong anecdotal correlation, none match the precision of lab-tested strips calibrated to detect specific hCG thresholds. False positives and negatives are possible due to diet, medications, or improper technique.
Is the bleach test dangerous?
Yes. Mixing bleach with organic matter like urine can release chlorine gas, which is toxic when inhaled. This method is discouraged despite its popularity online. Safer alternatives like the sugar or toothpaste tests are strongly preferred.
What should I do if my DIY test is positive?
Treat any positive result as a signal to consult a healthcare provider. Schedule a blood test or use a store-bought kit for confirmation. Early prenatal care improves outcomes significantly.
Final Thoughts and Responsible Use
DIY pregnancy tests offer a low-cost, private way to gain initial insight into potential pregnancy. When performed carefully, methods like the sugar or toothpaste test can provide meaningful clues—especially in situations where access to commercial kits is limited. However, they must never replace professional medical evaluation.
Accuracy depends on timing, hygiene, material quality, and interpretation discipline. By combining traditional knowledge with scientific awareness, you empower yourself with information while respecting the limits of home experimentation.


 浙公网安备
33010002000092号
浙公网安备
33010002000092号 浙B2-20120091-4
Comments
No comments yet. Why don't you start the discussion?