
In compact homes and urban apartments, square footage is precious—and closets are often the first to suffer from limited space. A cluttered closet doesn’t just make mornings stressful; it reduces functionality and shortens the lifespan of your clothes. But even in the smallest footprint, there’s one dimension most people overlook: vertical space. By rethinking how you use the full height of your closet—from floor to ceiling—you can double storage capacity without expanding the footprint. This guide explores proven strategies, innovative tools, and real-world applications for transforming an overcrowded closet into an efficient, accessible, and visually calming space.
Assess Your Current Closet Layout
Before installing new systems or purchasing organizers, take stock of what you already have. Stand inside your closet (if possible) and look up. Is the top shelf empty? Are hanging rods placed too high or too low? Many standard closets come with inefficient default configurations that waste valuable vertical inches.
Begin by removing everything. Sort items into categories: keep, donate, repair, store off-season. Be ruthless—every item returned to the closet should earn its place. Once cleared, measure the total height from floor to ceiling. Standard residential closets range from 7 to 8 feet tall, yet most built-in systems only use the lower 5–6 feet. That leaves 12 to 24 inches of unused airspace at the top—a goldmine for storage expansion.
Optimize Hanging Zones with Double Rods and Cascading Hangers
Hanging clothes vertically is more efficient than folding bulky knits or wrinkling delicate fabrics. But single rods limit capacity. The solution? Stack hanging zones.
Install a second rod directly beneath the primary one, ideally 36–40 inches above the floor. This lower rod is perfect for shirts, blouses, or pants, while the upper rod holds longer garments like dresses and coats. The gap between allows both rows to function without interference.
For extra density, use cascading hangers—angled or tiered hangers that hold multiple garments on a single hook. These are ideal for scarves, ties, or tank tops. While not suitable for heavy coats, they maximize space in narrow sections where shelves won’t fit.
| Solution | Best For | Clearance Needed |
|---|---|---|
| Double hanging rods | Dresses + shirts/pants | 36–40” between rods |
| Cascading hangers | T-shirts, scarves, ties | Minimal (adds depth) |
| Adjustable sliding rails | Deep closets with limited access | Full ceiling height |
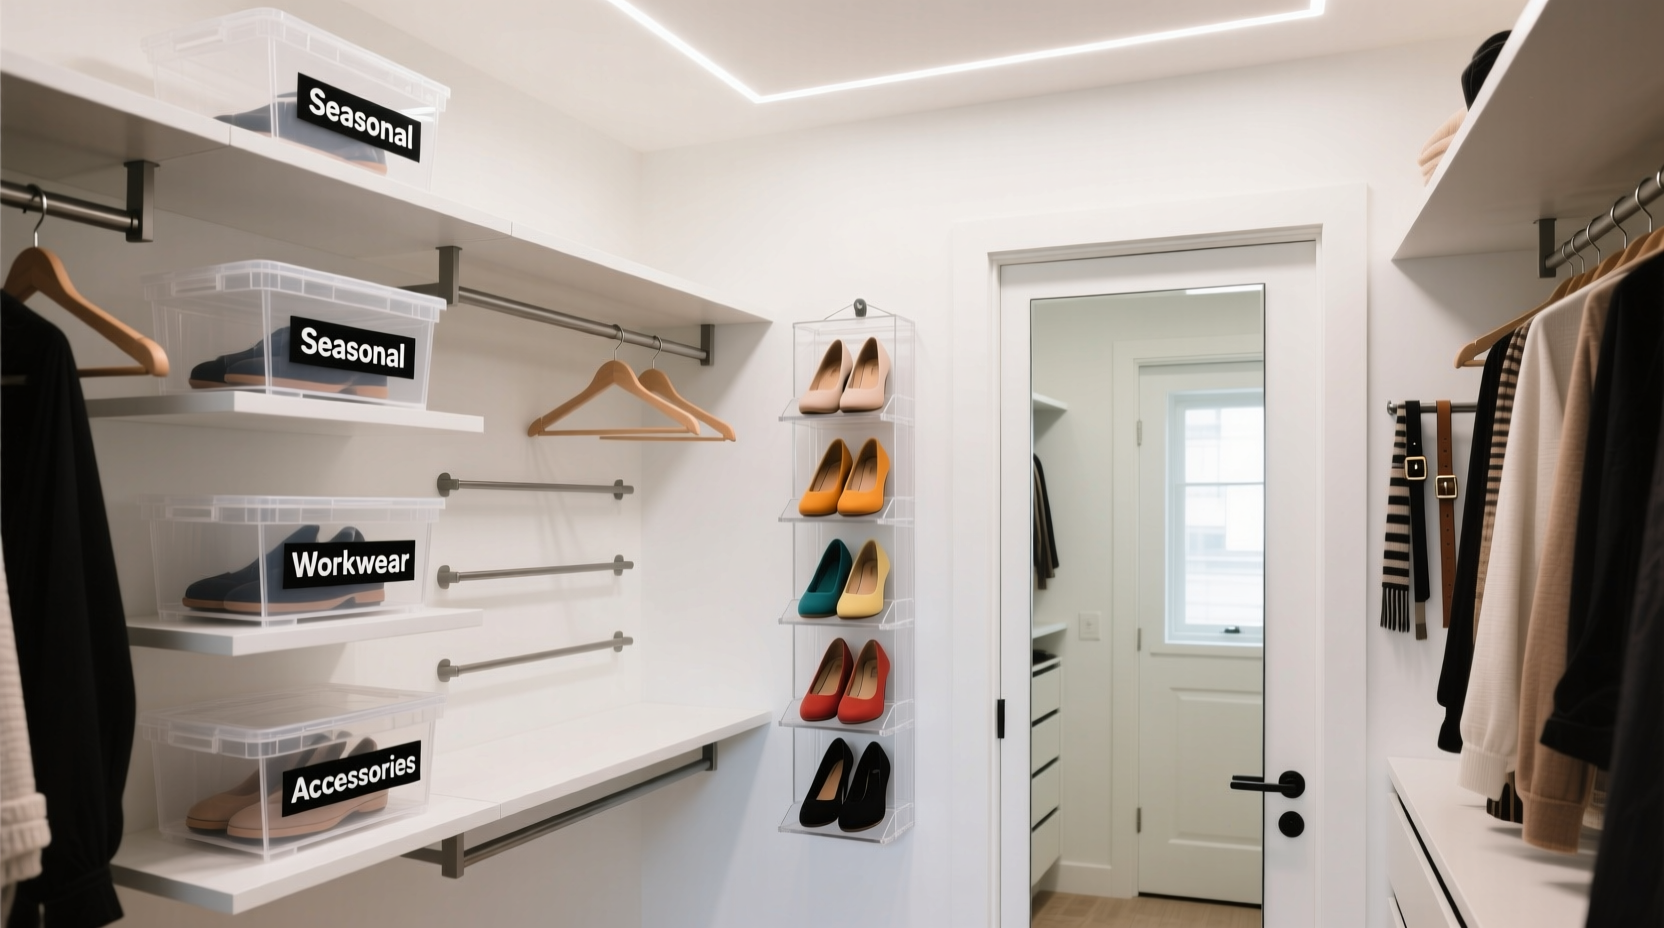
Install High-Shelf Storage for Underutilized Items
The top 12–18 inches of a closet is prime real estate for lightweight, infrequently used items. Think winter hats, archival boxes, or out-of-season clothing stored in breathable containers. To access this zone safely, invest in a slim step stool that tucks beside or under hanging clothes.
Use shallow bins (no deeper than 8 inches) so contents don’t get buried. Label each container clearly—color-coded tags or printed labels prevent rummaging. Canvas bins with handles offer breathability and easy removal, while clear plastic lets you see contents at a glance.
For DIY enthusiasts, floating shelves secured into wall studs can extend across the full width of the closet. Mount them 1–2 inches below the ceiling to maximize headroom clearance while creating a finished look.
“Most people ignore the top third of their closet. That space alone can store six months’ worth of seasonal accessories.” — Lena Torres, Interior Organizer & Author of *Small Space, Big Order*
Create a Vertical Shoe and Accessory Grid
Shoes sprawled on the floor consume disproportionate space and create visual chaos. Instead, go vertical with modular solutions.
A hanging shoe organizer on the back of the closet door uses otherwise wasted surface area. Choose one with fabric pockets for flexibility—each slot can hold not just shoes but also gloves, belts, or rolled-up scarves. For heavier footwear like boots, install wall-mounted boot huggers that suspend pairs from hooks aligned vertically.
Alternatively, use a pegboard system. Mounted on the side wall or rear panel, a perforated board allows customizable placement of hooks, baskets, and shelves. Arrange frequently worn shoes at eye level, less-used pairs higher up. Add small bins for jewelry or sunglasses.
Step-by-Step: Building a Pegboard Organizer
- Measure the available wall space and purchase a pegboard cut to size (or trim with a utility knife).
- Mark stud locations and secure the board with screws for stability.
- Paint or cover with contact paper if aesthetics matter.
- Arrange pegs, baskets, and hooks based on item weight and frequency of use.
- Label zones (e.g., “Work Shoes,” “Jewelry,” “Belts”) for quick identification.
Utilize Door and Wall-Mounted Systems
Doors and side walls are passive zones that become active storage when properly outfitted. Over-the-door organizers are affordable and tool-free—ideal for renters. Look for models with reinforced hinges to support weight over time.
For permanent installations, consider narrow shelving units that run vertically along the side wall. These can house folded sweaters, handbags, or even small bins for socks and underwear. Slim metal towers (under 10 inches deep) maintain walkway clearance while offering 5–6 levels of storage.
Magnetic strips, often used in kitchens, work surprisingly well for small metal items like bobby pins, safety pins, or earring backs. Attach one near a mirror or lighting strip for daily-use accessories.
Real Example: Maria’s 4x6 Closet Transformation
Maria lives in a studio apartment in downtown Seattle. Her reach-in closet measured just 4 feet wide and 6 feet deep, yet housed all her clothing, shoes, and travel bags. After consulting a professional organizer, she implemented vertical strategies:
- Removed the single shelf and replaced it with two adjustable shelves at the top, plus a deep bin for winter scarves.
- Installed a second hanging rod 38 inches from the floor, doubling shirt storage.
- Mounted a pegboard on the left wall for jewelry, belts, and clutches.
- Added an over-the-door shoe rack with 24 pockets—now holding flats, sandals, and workout socks.
- Placed a pull-out valet rod behind the door for outfit planning.
The result? She reclaimed 40% of floor space, reduced morning decision fatigue, and could finally close the closet door.
Checklist: Maximize Vertical Space in 7 Steps
- Empty the closet completely and sort items by category and frequency of use.
- Measure total height and identify dead zones (especially above hanging rods).
- Install a second hanging rod for shirts or pants beneath the primary one.
- Add high shelves or shallow bins for seasonal or lightweight items.
- Mount a pegboard or grid wall for customizable accessory storage.
- Use the back of the door for a shoe organizer or hanging pockets.
- Label all containers and maintain a “one in, one out” rule for new purchases.
Avoid Common Vertical Storage Mistakes
Even well-intentioned upgrades can backfire if poorly executed. Here are key pitfalls to avoid:
- Overloading top shelves: Heavy boxes on high shelves are unsafe and hard to retrieve. Reserve this zone for light, flat items like blankets or off-season swimwear.
- Blocking airflow: Stacking bins floor to ceiling traps moisture, especially in poorly ventilated closets. Leave at least 2 inches of space above and behind storage units.
- Ignoring ergonomics: Frequently used items should be at waist-to-eye level. Rarely used ones belong up top or down low.
- Using non-adjustable systems: Fixed shelves limit future flexibility. Opt for track systems or adjustable brackets that let you reconfigure as needs change.
“The goal isn’t just to fit more in—it’s to make everything easier to find and use.” — Raj Patel, Urban Living Consultant
Frequently Asked Questions
Can I use vertical space in a rental closet without drilling?
Absolutely. Over-the-door organizers, tension poles for double hanging rods, and adhesive hooks for lightweight items require no permanent modifications. Freestanding shelving towers and rolling bins also work well and can be taken when moving.
How do I keep items on high shelves accessible?
Keep a slim, stable step stool inside or beside the closet. Choose one with a handle for easy pulling. Alternatively, use a retractable grabber tool to retrieve boxes without climbing. Prioritize storing only semi-frequent or long-term items up top.
What’s the best way to store handbags vertically?
Use shelf dividers or upright purse organizers that prevent bags from slumping or crushing each other. Stuff delicate bags with tissue paper to maintain shape, then place them side-by-side on a mid-level shelf. Avoid stacking unless using protective dust bags and rigid inserts.
Conclusion: Turn Height Into Advantage
Decluttering a small closet isn’t about reducing what you own—it’s about reimagining how you use the space you have. Vertical organization transforms overlooked airspace into functional, accessible storage. From double hanging rods to pegboards and door-mounted systems, each upgrade compounds efficiency. The result is more than neatness: it’s daily convenience, preserved clothing quality, and mental clarity from a space that works for you, not against you.


 浙公网安备
33010002000092号
浙公网安备
33010002000092号 浙B2-20120091-4
Comments
No comments yet. Why don't you start the discussion?