
Most people today have thousands of digital photos scattered across smartphones, computers, cloud storage, and external drives. Without a clear system, finding a specific photo can feel like searching for a needle in a haystack. Over time, duplicates pile up, blurry shots go unsorted, and precious memories get buried under digital clutter. The good news is that with a structured approach, you can transform chaos into clarity—preserving what matters and discarding the rest. This guide walks you through proven methods to declutter, categorize, and maintain an organized photo library that’s both functional and sustainable.
Assess Your Current Photo Collection
Before making any changes, take stock of what you’re working with. Begin by identifying all the devices and platforms where your photos live: smartphone galleries, desktop folders, cloud services (like Google Photos or iCloud), external hard drives, and even old USB sticks. Consolidate everything into one central location—preferably your main computer—for easier processing.
Once gathered, use tools like built-in file explorers or third-party software such as Duplicate Cleaner or Gemini Photos to scan for duplicates. These programs compare image content, not just filenames, so they catch near-identical shots taken in rapid succession—common with burst mode photography.
After removing obvious duplicates, review photo counts per year. You might be surprised how many images were captured during a single event. This awareness helps set realistic expectations for the cleanup process, which should be approached in phases rather than rushed in one sitting.
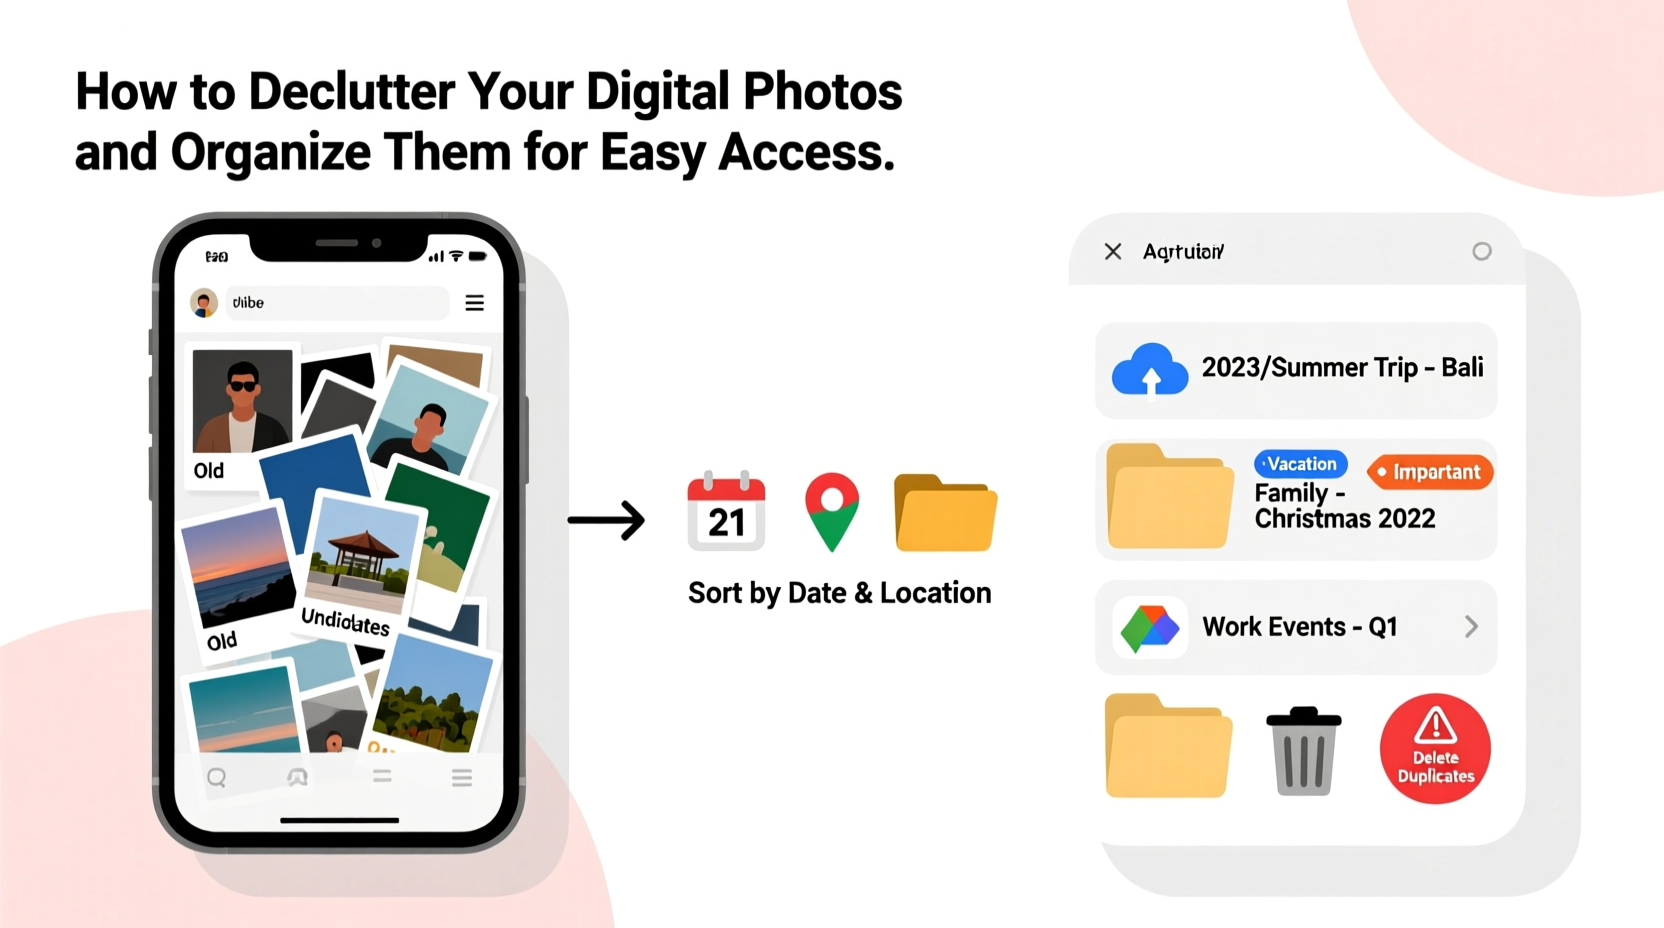
Create a Logical Folder Structure
A well-designed folder hierarchy makes retrieval intuitive. Avoid vague labels like “Misc” or “Old Photos.” Instead, adopt a consistent naming convention based on time, location, and subject. A recommended format is:
Photos/YYYY/YYYY-MM-DD_Event_or_Location/
For example:
- Photos/2023/2023-07-15_Family_Reunion_At_Lake_Tahoe/
- Photos/2022/2022-12-24_Christmas_Dinner_Home/
- Photos/2024/2024-03-02_James_Birthday_Party_Backyard/
This structure ensures chronological order while providing context at a glance. For broader categories—such as personal, professional, or travel—you can add top-level folders above the year-based ones if needed, but simplicity often wins in long-term usability.
“Organization isn’t about perfection—it’s about creating systems that reduce friction when you need something.” — David Allen, productivity expert and author of *Getting Things Done*
Step-by-Step Guide to Decluttering Your Photos
Decluttering digital photos requires decision-making discipline. Follow this seven-step process to streamline your collection efficiently:
- Backup Everything First: Before deleting anything, ensure all photos are backed up in at least two locations—one local (external drive) and one offsite (cloud storage).
- Remove Blurry or Unusable Images: Scroll quickly through folders and delete photos that are out of focus, accidental triggers, or pure duplicates.
- Eliminate Near-Duplicates: Keep only the best version from sequences (e.g., five nearly identical pet photos). Tools like Adobe Lightroom or VisiPics automate this task.
- Sort by Events or Themes: Group remaining photos into meaningful sets using the folder structure mentioned earlier.
- Add Metadata Where Possible: Use descriptive filenames and embed keywords or captions using photo management apps. This enhances searchability later.
- Archive Old Collections: Move completed yearly folders to long-term storage (e.g., labeled external drives) to free up active workspace.
- Delete What Doesn’t Add Value: Be ruthless. If a photo brings no joy, memory, or utility, let it go.
This process may take several sessions depending on volume. Aim for 60–90 minute blocks to avoid fatigue. After each session, verify backups and commit changes before moving forward.
Do’s and Don’ts of Digital Photo Management
| Do’s | Don’ts |
|---|---|
| Use consistent naming conventions across all folders | Store photos directly on your desktop or downloads folder indefinitely |
| Back up photos regularly using the 3-2-1 rule (3 copies, 2 media types, 1 offsite) | Rely solely on your phone’s internal storage without syncing elsewhere |
| Review and clean new photos monthly | Wait years before organizing—clutter compounds over time |
| Leverage facial recognition and tagging features in apps like Google Photos or Apple Photos | Assume cloud services will never lose data—always maintain independent backups |
| Keep a master catalog or index file listing major albums and their storage locations | Create overly complex nested folders that become hard to navigate |
Real Example: How Sarah Reclaimed Her Photo Library
Sarah, a freelance photographer and mother of two, had over 45,000 photos spread across three phones, two laptops, and a failing external drive. She hadn’t accessed most of them in years and dreaded looking for birthday pictures when asked by family. Over four weekends, she followed a systematic approach: first backing up everything to a new NAS (Network Attached Storage) device, then using Google Photos to surface duplicates and blurry shots. She created a standardized folder tree on her main laptop and began sorting by year and event. By tagging key people and adding short descriptions to important albums, she made searches effortless. Within two months, she reduced her active collection by 60%, kept only high-value images, and established a monthly maintenance routine. Today, she finds any photo in under a minute—and even prints favorites quarterly.
Choose the Right Tools for Organization
The right software can dramatically accelerate organization. Consider these options based on your needs:
- Google Photos: Best for automatic backup, AI-powered search (e.g., “beach,” “dog,” “birthday”), and cross-device syncing. Offers limited editing and sharing features.
- Apple Photos: Seamless integration for iPhone and Mac users. Includes Memories, facial recognition, and robust album management.
- Adobe Lightroom: Ideal for advanced users who want powerful editing, metadata control, and cloud sync. Requires subscription but offers superior organizational capabilities.
- DigiKam or XnView MP: Free, open-source alternatives for Windows and Linux users needing batch renaming, tagging, and duplicate detection.
No tool replaces thoughtful curation, but automation features—like geotagging, facial grouping, and smart albums—can save hours. Whichever platform you choose, ensure it supports exporting your data in standard formats (JPEG, TIFF, etc.) so you’re never locked in.
Checklist: Essential Steps to Organize Your Digital Photos
Use this checklist to stay on track during your photo cleanup project:
- ✅ Identify all sources of digital photos (phones, computers, clouds)
- ✅ Back up all existing photos to two separate locations
- ✅ Delete obvious junk: screenshots, duplicates, blurry images
- ✅ Choose a consistent folder naming system (e.g., YYYY-MM-DD_Description)
- ✅ Sort photos into thematic or chronological folders
- ✅ Apply tags, keywords, or captions to key images (optional but helpful)
- ✅ Archive older collections to long-term storage
- ✅ Set up a monthly maintenance habit to prevent future buildup
- ✅ Test your system by searching for a random photo (e.g., “cousin’s wedding 2019”)
Frequently Asked Questions
How many photos should I keep?
There’s no fixed number. Focus on quality over quantity. Keep photos that evoke emotion, document milestones, or serve a purpose (e.g., identification, legal records). Research suggests people derive more joy from curated albums than massive unsorted libraries.
Is it safe to delete photos after uploading to the cloud?
Only delete originals after confirming successful upload and maintaining at least one additional backup. Cloud providers can experience outages or account breaches. The 3-2-1 backup rule remains essential: three total copies, two different media, one offsite.
What’s the best way to share large photo collections with family?
Use shared albums via Google Photos or iCloud, or create a private gallery link through services like SmugMug or Dropbox. Avoid emailing large attachments. For permanent sharing, consider burning DVDs or loading a small external drive with selected highlights.
Conclusion: Start Small, Stay Consistent
Decluttering your digital photos doesn’t require perfection—it requires progress. Begin with a single folder or recent vacation. Apply consistent naming, remove the obvious clutter, and back up your work. Each step builds momentum. Over time, you’ll develop a system that preserves memories without the stress of disorganization. The goal isn’t just neatness; it’s accessibility. When you can find a cherished moment in seconds, your digital archive becomes a living record, not a burden. Take action today—your future self will thank you when they’re able to relive a smile, a trip, or a quiet moment, exactly when they need it most.


 浙公网安备
33010002000092号
浙公网安备
33010002000092号 浙B2-20120091-4
Comments
No comments yet. Why don't you start the discussion?