
A blender is one of the most frequently used appliances in modern kitchens—whipping up smoothies, soups, sauces, and nut butters with ease. However, frequent use often leads to stubborn residue buildup, lingering odors, and bacterial growth, especially in hard-to-reach crevices near the blade assembly. While many users assume deep cleaning requires unscrewing blades or removing gaskets, doing so can be risky, void warranties, or damage seals over time. Fortunately, it’s entirely possible to achieve a thorough deep clean without ever taking your blender apart.
This guide provides proven, non-invasive techniques to restore your blender to pristine condition, maintain hygiene, and prolong its lifespan—all while avoiding unnecessary disassembly. Whether you own a high-speed countertop model or a compact personal blender, these methods are universally applicable, safe, and highly effective.
The Risks of Disassembling Your Blender
Many manufacturers explicitly advise against disassembling blenders, particularly at the base where the blade meets the jar. Tampering with this seal can compromise the waterproof integrity, leading to leaks or electrical hazards. Additionally, reassembling incorrectly may cause uneven blending, excessive vibration, or even motor strain. Over time, repeated disassembly wears down rubber gaskets, increasing the risk of cross-contamination and mold growth beneath the blade housing.
“Blender manufacturers design these units for sealed operation. Breaking that seal without proper tools or expertise introduces long-term reliability issues.” — Dr. Lena Pruitt, Appliance Safety Engineer
Instead of dismantling, focus on internal cleaning methods that reach every surface through circulation, agitation, and natural breakdown of residues. These approaches not only protect your appliance but also deliver results comparable to full disassembly.
Step-by-Step Guide: Deep Cleaning Without Disassembly
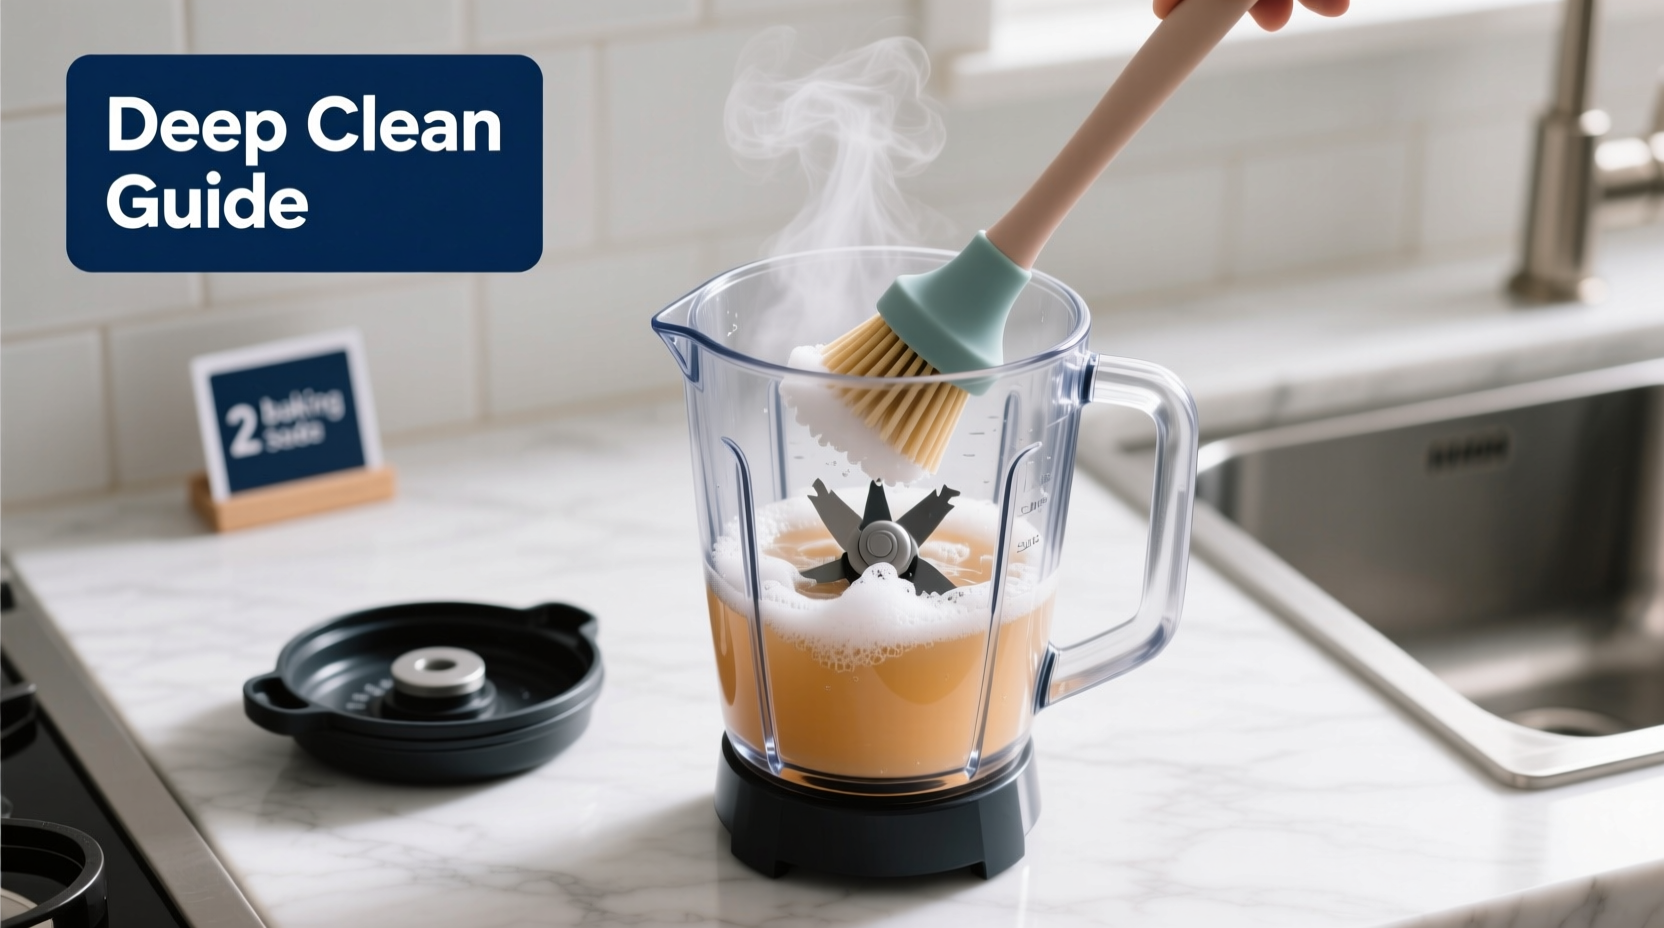
Cleaning your blender thoroughly without removing any components involves a combination of mechanical action (blending), chemical breakdown (using natural cleaners), and proper rinsing. Follow this detailed process to ensure maximum cleanliness and odor elimination.
- Empty and Rinse Immediately After Use
As soon as you finish blending, pour out remaining contents and rinse the jar with warm water. This prevents food from drying and sticking, making deep cleaning far more effective later. - Create a Cleaning Paste or Solution
Choose one of the following safe, non-abrasive formulas:- Baking Soda & Warm Water: Mix 2 tablespoons of baking soda with 1 cup of warm water.
- Vinegar & Water: Combine equal parts white vinegar and water (ideal for deodorizing).
- Dish Soap & Hot Water: Add 1–2 drops of liquid dish soap to fill the blender halfway with hot water.
- Blend for Abrasion and Circulation
Secure the lid tightly and run the blender on high for 30–60 seconds. The spinning blades create turbulence, forcing the cleaning solution into all interior surfaces—including under the blade plate—without physical contact. - Let It Soak (Optional for Tough Residue)
For dried-on foods like nut butter or cooked grains, let the solution sit for 5–10 minutes after blending. This allows the cleaner to penetrate stuck particles. - Scrub Gently with a Bottle Brush (If Needed)
Use a long-handled bottle brush or sponge stick to lightly wipe the inside walls and around the rim. Avoid touching the blade area directly. Most residue will have already loosened during blending. - Rinse Thoroughly
Empty the contents and rinse multiple times with clean water until no suds or odor remain. - Deodorize with Citrus (Monthly Maintenance)
Blend lemon or orange peels with water for 30 seconds. The citric acid cuts grease and leaves a fresh scent naturally. - Air-Dry Upside Down
Place the jar upside down on a drying rack to allow complete drainage and prevent moisture trapping near the seal.
Comparison Table: Cleaning Methods and Effectiveness
| Method | Ingredients | Best For | Effectiveness Rating (1–5) |
|---|---|---|---|
| Baking Soda + Water | 2 tbsp baking soda, 1 cup warm water | General stains, mild odors | ★★★★☆ |
| Vinegar + Water | ½ cup vinegar, ½ cup water | Mineral deposits, strong odors | ★★★★★ |
| Dish Soap + Hot Water | 1–2 drops soap, hot water | Fresh spills, oily films | ★★★★☆ |
| Lemon Peel Blend | Peels from 1 lemon, 1 cup water | Natural deodorizing, monthly refresh | ★★★☆☆ |
| Commercial Blender Cleaner | Manufacturer-recommended product | All-purpose, brand-specific models | ★★★★★ |
Real Example: Reviving a Neglected Blender
Sarah, a busy working mom from Portland, used her blender nearly every morning for green smoothies. Over six months, she noticed a persistent grassy smell and brownish tint near the blade—even after rinsing. Afraid of damaging the unit, she avoided disassembly and instead tried the vinegar-blend method described above.
She filled the jar halfway with equal parts white vinegar and water, blended for one minute, then let it sit for ten minutes. After emptying and repeating with soapy water, the discoloration was gone. A final rinse with lemon peel water eliminated the sour vinegar odor. “I couldn’t believe how much gunk came out without touching a screw,” she said. “Now I do this once a week—it takes less than five minutes.”
This case illustrates how consistent, non-invasive cleaning prevents buildup before it becomes unmanageable. Regular maintenance reduces the need for aggressive scrubbing or part replacement.
Do’s and Don’ts of Blender Hygiene
“Prevention is better than cure when it comes to appliance care. A few smart habits go a long way.” — Mark Tran, Home Appliance Technician
| Do’s | Don’ts |
|---|---|
| ✔ Clean immediately after use | ✘ Let food sit overnight in the jar |
| ✔ Use hot (not boiling) water for cleaning | ✘ Pour boiling water into plastic jars (can warp) |
| ✔ Run a cleaning cycle weekly | ✘ Submerge the base in water |
| ✔ Store with the lid off to air out | ✘ Use steel wool or abrasive pads |
| ✔ Check manufacturer guidelines for approved cleaners | ✘ Use bleach unless specified by the brand |
Checklist: Monthly Deep-Clean Routine
Use this checklist to maintain optimal blender hygiene without disassembly:
- ☐ Perform a baking soda or vinegar blend cycle
- ☐ Inspect for cloudiness or staining in the jar
- ☐ Smell the interior for lingering odors
- ☐ Wipe the motor base with a damp microfiber cloth
- ☐ Clean the lid and sealing ring separately (if removable)
- ☐ Run a citrus deodorizing blend
- ☐ Allow full air-drying before storage
FAQ: Common Questions About Blender Cleaning
Can I use bleach to disinfect my blender?
Only if your blender’s manual specifically permits it. In general, diluted bleach (1 tablespoon per quart of water) can sanitize but must be followed by multiple rinses. Vinegar or hydrogen peroxide are safer alternatives for routine use.
Why does my blender still smell bad after washing?
Odors often linger in the rubber gasket beneath the blade or in microscopic scratches in plastic jars. Try soaking with vinegar or running a blend cycle with lemon juice and water. If the smell persists, consider replacing the gasket (available from most manufacturers).
How often should I deep clean my blender?
For daily users, a deep clean once a week is ideal. Occasional users should perform a thorough cleaning every 2–3 weeks. Immediate rinsing after each use significantly reduces long-term maintenance needs.
Conclusion: Keep It Clean, Keep It Safe
Maintaining a spotless blender doesn’t require technical skill or risky disassembly. With simple household ingredients and a few minutes of effort, you can eliminate grime, neutralize odors, and ensure hygienic performance every time you blend. The key lies in consistency—making quick cleans part of your post-use routine and scheduling deeper treatments before problems arise.
Your blender works hard for you; returning the favor with smart, safe maintenance ensures years of reliable service. Start today: grab some vinegar or baking soda, run a cleaning cycle, and experience the difference a truly clean appliance makes.


 浙公网安备
33010002000092号
浙公网安备
33010002000092号 浙B2-20120091-4
Comments
No comments yet. Why don't you start the discussion?