
Makeup sponges are essential tools for achieving a seamless, airbrushed finish. However, their porous nature makes them breeding grounds for bacteria, oil, and leftover product if not cleaned regularly. Over time, unclean sponges can contribute to clogged pores, irritation, and persistent breakouts—especially for those with acne-prone or sensitive skin. Despite their widespread use, many people underestimate the importance of proper sponge hygiene. A 2017 study published in the Journal of Applied Microbiology found that over 90% of used makeup sponges harbored harmful microbes, including E. coli and staphylococcus. This isn’t just about cleanliness—it’s about protecting your skin’s health. Deep cleaning your makeup sponge isn’t a luxury; it’s a necessity for maintaining clear, healthy skin.
Why Makeup Sponges Become Contaminated
Makeup sponges absorb more than just foundation—they soak up oils from your skin, residual makeup, sweat, and environmental pollutants. Their damp, warm environment between uses is ideal for microbial growth. Unlike brushes, which have bristles that allow some airflow, sponges retain moisture longer, creating a perfect storm for bacterial proliferation. When pressed against the face, contaminated sponges transfer these impurities directly into pores, potentially leading to blackheads, whiteheads, and inflammatory acne.
Even high-end sponges made from latex-free or antimicrobial materials aren’t immune. Without regular deep cleaning, they degrade faster and become less effective. The issue isn’t limited to visible dirt; microscopic residue builds up over time, dulling the sponge’s bounce and compromising its ability to blend evenly.
Recommended Cleaning Frequency
Experts agree that makeup sponges should be cleaned at least once a week for daily users. If you wear full-coverage makeup or live in a humid climate, cleaning every 3–4 days is advisable. For occasional use, a biweekly deep clean suffices. However, frequency alone isn’t enough—the method matters just as much as timing.
Surface wiping with micellar water or makeup wipes may remove visible stains but does nothing to eliminate embedded bacteria. These quick fixes give a false sense of cleanliness. True hygiene requires deep penetration of cleanser into the sponge’s core, followed by thorough rinsing and drying.
Effective Methods for Deep Cleaning Your Makeup Sponge
Not all cleaning techniques are equally effective. Some popular hacks, like using dish soap or boiling water, can damage sponge integrity or leave behind residues. Below are five proven, dermatologist-approved methods for deep cleaning your sponge without compromising its lifespan.
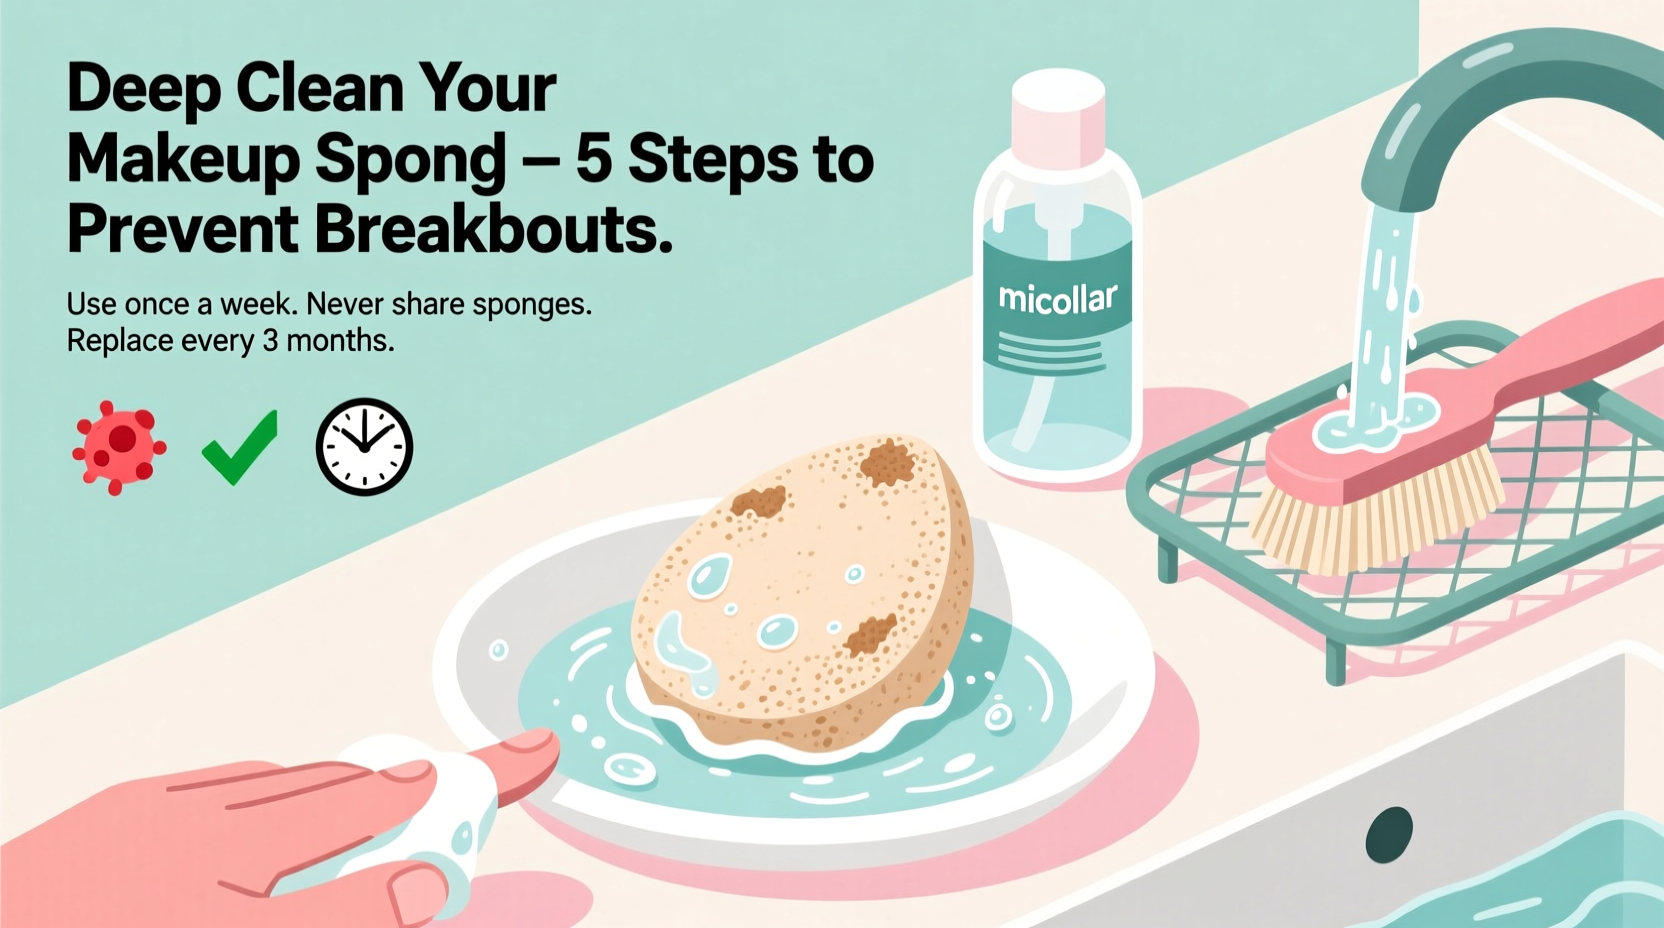
1. Gentle Cleanser and Warm Water (Manual Method)
This is the most accessible and widely recommended technique. It requires only a mild facial cleanser or baby shampoo and lukewarm water.
- Squeeze the sponge under running water to loosen surface debris.
- Apply a pea-sized amount of gentle cleanser to your palm or a cleaning mat.
- Gently press and roll the sponge in circular motions to work the cleanser through the material.
- Rinse thoroughly until the water runs clear—this may take several cycles.
- Squeeze gently to remove excess water and lay flat on a clean towel in a ventilated area.
This method is safe for all sponge types and preserves elasticity when done correctly.
2. Microwave Steam Cleaning (For Latex-Free Sponges Only)
A quick and powerful sanitizing option, this method uses steam to kill bacteria. However, it's only suitable for sponges labeled microwave-safe and free of latex or rubber components.
- Soak the sponge in a mixture of water and a drop of antibacterial dish soap.
- Place it in a microwave-safe bowl, cover with a lid or plate, and heat on high for 1 minute.
- Let it cool completely before handling—steam burns are a real risk.
- Rinse under cold water to remove soapy residue.
- Dry upright or on a stand to promote airflow.
The high temperature effectively kills 99% of surface bacteria, according to lab tests conducted by consumer safety groups.
“Steam cleaning is one of the fastest ways to sanitize porous beauty tools, but caution is key. Never microwave a dry sponge—it can ignite.” — Dr. Lena Patel, Board-Certified Dermatologist
3. Solid Sponge Cleansing Disk
These textured disks, often made from silicone or ridged plastic, are designed to enhance lather and scrubbing action. They’re especially useful for removing thick, silicone-based foundations.
- Wet the disk and apply cleanser to its surface.
- Press and twist the sponge across the grooves to dislodge trapped product.
- Flip and repeat on the other side.
- Rinse until water is clear.
The abrasive texture increases friction without tearing the sponge, making it ideal for weekly deep cleans.
4. UV Sanitizer Devices
UV-C light technology has gained popularity in beauty tool maintenance. Compact sanitizing boxes use ultraviolet light to destroy bacteria, mold, and viruses within minutes.
While UV devices don’t replace physical cleaning (they don’t remove physical debris), they serve as an excellent secondary step. After washing and drying your sponge, place it in the sanitizer for 5–10 minutes to eliminate lingering microbes.
5. DIY Vinegar and Baking Soda Soak
For a natural disinfectant solution, combine one tablespoon of baking soda with two tablespoons of white vinegar in a cup of warm water. Submerge the sponge for 15–20 minutes.
The fizzing action helps lift stubborn buildup, while vinegar’s acetic acid acts as a mild antimicrobial agent. After soaking, rinse thoroughly and wash again with a gentle cleanser to neutralize any lingering odor.
Note: This method may weaken sponge fibers over time. Limit use to once per month.
Do’s and Don’ts of Makeup Sponge Care
| Do’s | Don’ts |
|---|---|
| Clean your sponge at least once a week | Leave your sponge in a damp makeup bag |
| Use a gentle, sulfate-free cleanser | Use hot water that could melt or warp the sponge |
| Replace your sponge every 3–6 months | Share your sponge with others |
| Dry your sponge upright or on a breathable surface | Store it in a sealed container while wet |
| Sanitize with UV light after cleaning | Boil sponges—this degrades foam quickly |
Real-Life Example: How One User Reduced Breakouts by Changing Her Routine
Sophia, a 28-year-old marketing professional from Austin, struggled with recurring chin acne for over a year. She followed a consistent skincare routine, used non-comedogenic products, and visited a dermatologist regularly. Despite this, her breakouts persisted. During a consultation, her dermatologist asked about her makeup application tools. Sophia admitted she cleaned her sponge “once in a while” and replaced it only when it started falling apart.
She began cleaning her sponge every four days using a facial cleanser and sponge cleaning mat. She also invested in a small UV sanitizer and stopped storing her sponge in her humid bathroom. Within three weeks, her chin breakouts significantly reduced. By week six, her skin was clearer than it had been in months. “I never thought my sponge was the culprit,” she said. “Now I treat it like part of my skincare regimen—not just a tool.”
When to Replace Your Makeup Sponge
No amount of cleaning can revive a deteriorating sponge. Over time, repeated use and washing cause the foam to break down, lose its bounce, and develop tears or rough patches. These micro-tears trap bacteria and cannot be fully sanitized.
Signs it’s time to replace your sponge include:
- Fraying edges or visible holes
- Persistent odor even after cleaning
- Foundation absorbs unevenly or pills during application
- Texture feels gritty or stiff
Most dermatologists recommend replacing makeup sponges every 3 to 6 months, depending on usage. Daily users should lean toward the 3-month mark. High-quality sponges may last longer with meticulous care, but hygiene should always take precedence over cost-saving.
Checklist: Weekly Deep Clean Routine
Follow this simple checklist to ensure your sponge stays hygienic and functional:
- ✅ Remove excess makeup by squeezing under lukewarm water
- ✅ Apply a gentle cleanser to palm or cleaning mat
- ✅ Work the sponge in circular motions until water runs clear
- ✅ Rinse thoroughly—no soap residue should remain
- ✅ Squeeze gently and reshape before drying
- ✅ Place in a dry, open area with good airflow
- ✅ Optional: Sanitize with UV device once dry
- ✅ Inspect monthly for wear and tear
Frequently Asked Questions
Can I use hand soap to clean my makeup sponge?
It’s not recommended. Many hand soaps contain harsh surfactants, fragrances, and antibacterial agents like triclosan that can irritate facial skin and degrade sponge material. Stick to mild facial cleansers, baby shampoos, or dedicated sponge cleaners.
Is it safe to put a makeup sponge in the dishwasher?
No. Dishwasher detergents are too abrasive, and high heat can melt or distort the foam. Additionally, sponges placed in dishwashers often don’t get direct water flow, leading to incomplete cleaning. This method poses both hygiene and structural risks.
Can dirty makeup sponges cause hormonal acne?
Dirty sponges don’t directly cause hormonal acne, which is driven by internal factors like stress and hormones. However, they can exacerbate it by introducing bacteria and inflammation to already sensitive skin. Keeping your tools clean minimizes external triggers and supports overall skin balance.
Final Thoughts and Call to Action
Your makeup sponge plays a direct role in your skin’s health. Treating it as a disposable tool undermines both your skincare efforts and your complexion. Regular deep cleaning isn’t just about extending the life of your sponge—it’s about preventing breakouts, reducing irritation, and ensuring your makeup applies smoothly every time.
Start today: pull out your current sponge and assess its condition. If it hasn’t been cleaned in over a week, wash it using one of the safe methods outlined here. Set a reminder to clean it weekly. Consider pairing your routine with a UV sanitizer for added protection. Small changes in your beauty habits can lead to dramatic improvements in skin clarity.


 浙公网安备
33010002000092号
浙公网安备
33010002000092号 浙B2-20120091-4
Comments
No comments yet. Why don't you start the discussion?