
Cleaning a microwave often means elbow grease, unpleasant odors, and stubborn splatters baked into the walls from months of reheating leftovers. But what if you could deep clean your microwave without touching a sponge or scrubbing a single spot? It’s not only possible—it’s surprisingly simple. With everyday household ingredients and smart techniques, you can dissolve grime, eliminate odors, and restore your microwave to near-new condition using steam, chemistry, and time instead of physical effort.
This method is ideal for busy households, people with limited mobility, or anyone who simply wants to avoid the mess and frustration of manual scrubbing. The key lies in understanding how heat and moisture work together to loosen dried-on food particles, making them easy to wipe away effortlessly after just a few minutes.
The Science Behind Steam Cleaning
Steam cleaning works because water, when heated, turns into vapor that penetrates dried food residues. As the steam condenses on cooler surfaces inside the microwave, it rehydrates stuck-on splatters, softening them until they slide off with minimal wiping. This process mimics professional steam cleaners used in kitchens and bathrooms but requires nothing more than a bowl and some common pantry items.
When combined with mild acids like vinegar or citrus, the steam becomes even more effective. Acids help break down organic compounds—like grease, sugars, and proteins—that typically cling to microwave interiors. The result is a deep clean achieved passively, without aggressive scrubbing or harsh chemicals.
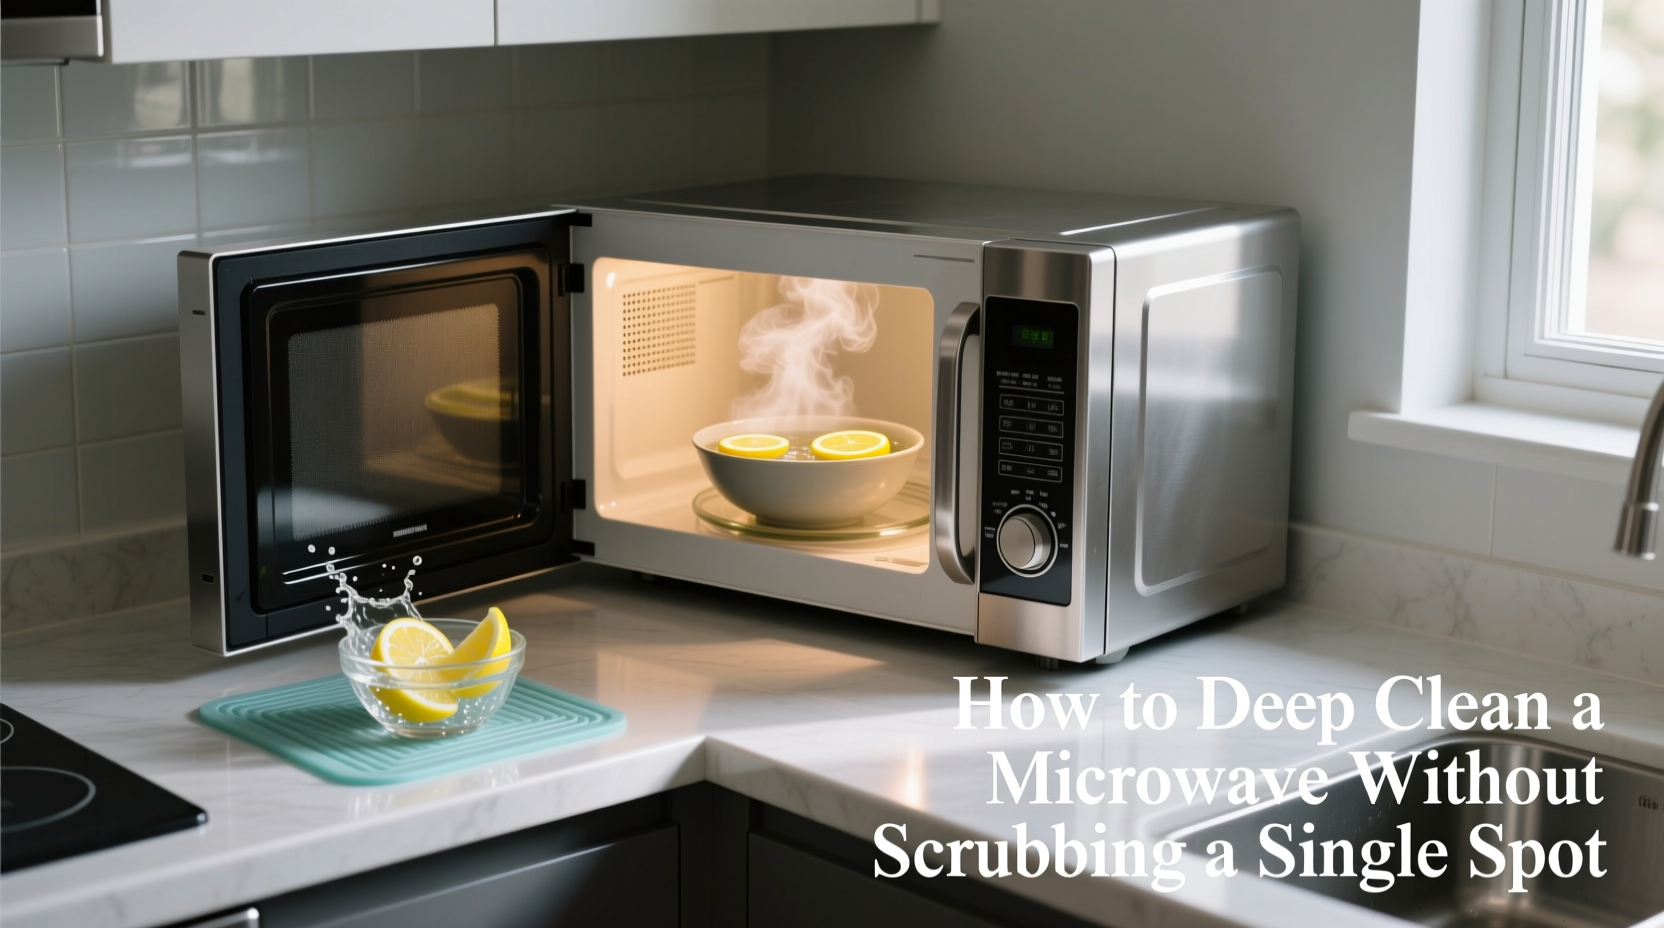
Step-by-Step: Deep Clean Your Microwave in 15 Minutes
- Prepare the cleaning solution: Mix 1 cup of water with 1/4 cup of white vinegar in a microwave-safe bowl. Alternatively, squeeze one lemon into the water and toss in the spent halves.
- Place the bowl inside: Set the bowl in the center of the microwave turntable. Make sure it's stable and won’t tip over.
- Heat on high for 5 minutes: Run the microwave at full power until the mixture boils and produces heavy steam. Keep an eye on it to prevent boiling over.
- Let it sit for 10 minutes: Do not open the door. Allow the steam to saturate the interior, loosening all residue.
- Wipe gently with a damp cloth: After 10 minutes, carefully remove the hot bowl (use oven mitts), then use a soft microfiber or cotton cloth to wipe down the walls, ceiling, floor, and door. Most grime will come off with light pressure.
- Clean the turntable separately: Remove the glass tray and wash it in warm, soapy water. For extra cleanliness, soak it in the same vinegar-water mix for 5–10 minutes before rinsing.
- Dry thoroughly: Use a dry towel to finish the job and prevent water spots or mildew buildup.
This entire process takes less than 15 minutes of active time and delivers results comparable to hours of scrubbing. The vinegar or lemon scent dissipates quickly, leaving behind a fresh, neutral smell rather than chemical fumes.
Alternative Methods for Different Needs
While the vinegar-water method is the most universally effective, there are variations depending on available ingredients and specific concerns such as odor removal or grease breakdown.
| Method | Ingredients | Best For | Notes |
|---|---|---|---|
| Vinegar & Water | 1 cup water + 1/4 cup white vinegar | All-purpose cleaning, disinfecting, deodorizing | Vinegar kills bacteria and cuts through grease naturally |
| Lemon & Water | 1 cup water + juice and rinds of 1 lemon | Fresh scent, light stains, alkaline buildup | Natural citric acid helps dissolve mineral deposits |
| Baking Soda Paste (external) | 3 parts baking soda + 1 part water | Door seals, control panel, exterior | Apply paste, let sit 5 mins, wipe—no scrubbing needed |
| Commercial Steam Cleaner Pods | Prefilled tablets or pods | Convenience, consistent dosing | More expensive; check eco-friendliness and ingredients |
Each method leverages moisture and mild acidity to do the work for you. Even commercial products rely on the same principle: generate steam with a cleaning agent, wait, then wipe. Making your own solution ensures no synthetic fragrances or preservatives enter your kitchen environment.
Expert Insight: Why Passive Cleaning Works Better
“Time and moisture are more effective than force when dealing with organic soils. Allowing a solution to dwell reduces surface tension and breaks molecular bonds holding food debris in place.” — Dr. Lena Patel, Food Safety and Surface Hygiene Researcher, Institute of Home Appliance Studies
Dr. Patel’s research confirms that dwell time—the period during which a cleaning agent remains in contact with a surface—is far more critical than mechanical action for breaking down complex residues. In fact, excessive scrubbing can scratch plastic or enamel interiors, creating microscopic grooves where bacteria and odors later accumulate. By relying on steam and natural solvents, you preserve the integrity of your appliance while achieving superior cleanliness.
Real Example: A Busy Parent’s Game-Changer
Sarah M., a mother of three in Portland, had avoided cleaning her microwave for nearly nine months. Between school lunches, toddler snacks, and quick dinners, splatters built up daily. “I’d look inside and feel instantly defeated,” she said. “It looked like a science experiment gone wrong.”
After reading about the vinegar-steam method, she tried it one evening while waiting for dinner to cook. She mixed the solution, heated it, waited, and opened the door expecting to still need to scrub. Instead, she wiped the walls with a dishcloth and watched years of grime slide off in sheets. “I actually laughed out loud,” Sarah recalled. “It took ten minutes, and my microwave looked better than when I bought it.”
She now cleans it every four weeks using the same technique, keeping it consistently fresh without stress or effort.
Pro Tips for Long-Term Maintenance
Preventing buildup is easier than removing it. Incorporating small habits can extend the time between deep cleans and keep your microwave functioning efficiently.
- Cover food always: Use microwave-safe lids, paper towels, or wax wraps to contain splatters before they happen.
- Wipe spills immediately: If something bubbles over, let the microwave cool slightly, then wipe the spot with a damp cloth before it dries.
- Deodorize weekly: Heat a lemon-water mix for 2–3 minutes once a week to keep odors at bay.
- Avoid sugary or fatty foods uncovered: These leave sticky, hard-to-remove residues that attract dust and microbes.
- Check the seal: Wipe the door gasket monthly with a vinegar-dampened cloth to prevent mold and ensure proper closure.
Common Mistakes to Avoid
Even simple cleaning routines can go wrong if basic precautions aren’t followed. Here are frequent errors that reduce effectiveness or damage appliances:
- Using abrasive cleaners: Steel wool, scouring pads, or powdered cleansers scratch surfaces and trap dirt.
- Skipping the dwell time: Opening the door too soon releases steam before it can penetrate grime.
- Overheating the solution: Boiling dry can damage the microwave or create smoke. Always monitor the heating phase.
- Ignoring the turntable mechanism: Food debris under the glass tray can cause uneven rotation and odors. Lift and wipe the roller ring regularly.
- Using bleach or ammonia: These corrosive chemicals can react with stainless steel or plastic components and release toxic fumes when heated.
Stick to non-toxic, low-risk solutions. When in doubt, simpler is safer—and often more effective.
FAQ: Quick Answers to Common Questions
Can I use apple cider vinegar instead of white vinegar?
Yes, but white vinegar is preferred due to its higher acetic acid concentration (typically 5–6%) and lack of color. Apple cider vinegar may leave a faint tint or residual sweetness if not rinsed well.
How often should I deep clean my microwave?
Every 1–2 months for average household use. High-use kitchens (e.g., meal prep, large families) should clean monthly. Light users can go up to three months between deep cleans if maintained weekly.
Is it safe to mix vinegar and lemon juice?
Yes, combining vinegar and lemon juice is safe and can enhance cleaning power due to dual acid profiles. However, it may increase the sour smell temporarily. Rinse well afterward if sensitivity is a concern.
Final Checklist: No-Scrub Microwave Deep Clean
- ✔ Gather: microwave-safe bowl, 1 cup water, 1/4 cup white vinegar or 1 lemon
- ✔ Mix solution and place in center of microwave
- ✔ Heat on high for 5 minutes (boil gently)
- ✔ Wait 10 minutes (do not open door)
- ✔ Carefully remove bowl (hot!)
- ✔ Wipe interior with soft, damp cloth
- ✔ Remove and wash turntable separately
- ✔ Dry all surfaces with a clean towel
- ✔ Optional: wipe exterior and control panel with vinegar-dampened cloth
Conclusion: A Cleaner Kitchen Starts with Smarter Habits
Deep cleaning a microwave doesn’t have to mean kneeling in front of a greasy cavity, scrubbing for 20 minutes. With the right approach, you can achieve a spotless interior using only steam, time, and two common ingredients. This method saves energy, protects your appliance, and fits seamlessly into a modern, efficient lifestyle.
Start today. Chances are, you already have everything you need in your pantry. In less time than it takes to reheat a frozen meal, you can transform your microwave from grimy to gleaming—without lifting more than a finger. Once you experience the ease of passive cleaning, you may never pick up a sponge again.


 浙公网安备
33010002000092号
浙公网安备
33010002000092号 浙B2-20120091-4
Comments
No comments yet. Why don't you start the discussion?