
Dust, pet hair, and grime accumulate quickly on standing fans, especially after months of continuous use. While most people assume you need to take the entire unit apart to clean it properly, that’s not only unnecessary but also risky. Disassembling a fan incorrectly can damage internal components, void warranties, or make reassembly difficult. The good news? You can achieve a thorough deep clean without removing a single screw. With the right tools, techniques, and a bit of patience, your fan will run smoother, quieter, and more efficiently—all while staying fully intact.
Why Cleaning Without Disassembly Matters
Standing fans are engineered for airflow, not frequent teardowns. Manufacturers design them to be durable and low-maintenance, but they’re not always user-serviceable in ways that encourage part removal. Attempting to dismantle blades, motor housings, or oscillation mechanisms often leads to stripped screws, broken clips, or misaligned parts. Moreover, many modern fans have sealed motors or integrated wiring that should never be opened by consumers.
Cleaning without disassembly respects the integrity of the device while still delivering excellent results. When done correctly, this method removes 90% or more of surface and internal dust buildup. It also reduces strain on the motor, improves air quality, and extends the appliance’s lifespan.
“Most household fans don’t require full disassembly for cleaning. In fact, improper handling during teardown is one of the top causes of premature failure.” — Raj Mehta, Appliance Maintenance Technician with 15+ years of field experience
Essential Tools and Supplies
Before starting, gather everything you’ll need. Having all supplies ready prevents interruptions and ensures a smooth process. Most items are likely already in your home.
| Tool/Supply | Purpose | Recommended Type |
|---|---|---|
| Microfiber cloths | Wipe down surfaces without scratching | Lint-free, medium-weight |
| Cotton swabs (Q-tips) | Reach tight spaces around grilles and vents | Standard or extra-long |
| Soft-bristle brush | Dislodge dust from blade edges and housing | Toothbrush or paintbrush (unused) |
| Compressed air canister | Blast out hidden dust from crevices | Electronics-safe, short bursts |
| All-purpose cleaner | Clean exterior plastic/metal surfaces | Non-abrasive, non-ammonia formula |
| Isopropyl alcohol (70%) | Sanitize touchpoints and disinfect | Diluted in water (1:1) |
| Vacuum with brush attachment | Suction loose debris from front and back grilles | Low suction setting preferred |
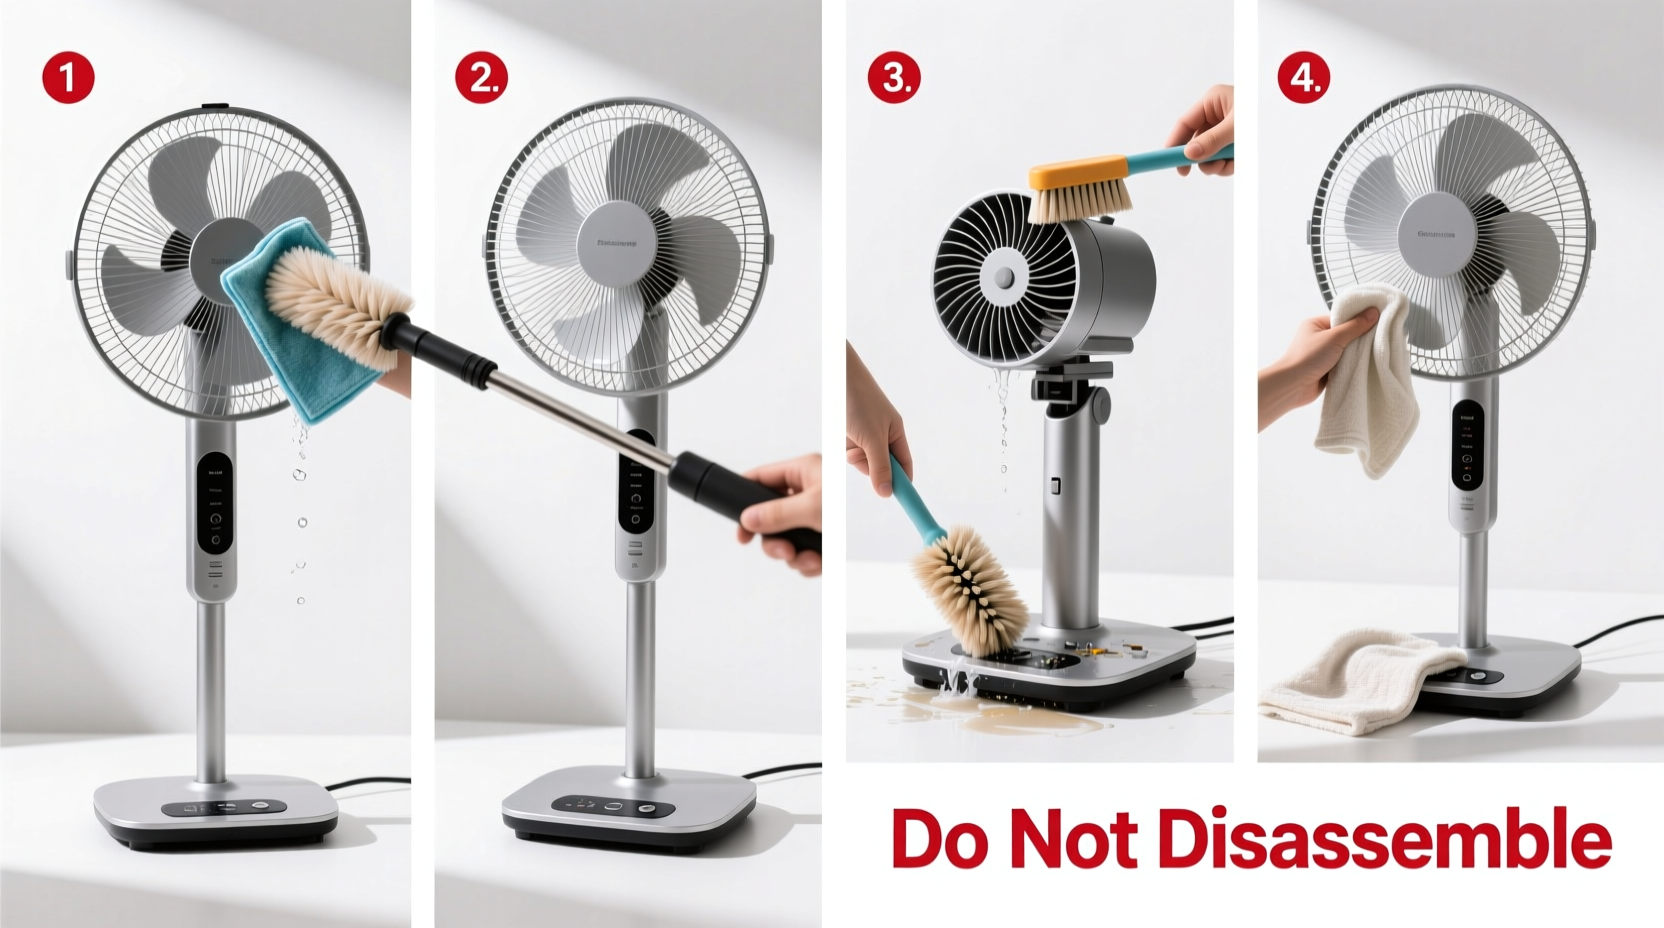
Step-by-Step Deep Cleaning Process
This sequence ensures maximum cleanliness while protecting sensitive parts. Allow 30–45 minutes for the full process, depending on dust accumulation.
- Unplug the fan completely. This is non-negotiable. Even if the fan is switched off, leave it unplugged for the entire cleaning session to avoid electrical hazards.
- Position the fan for access. Lay it on its side on a towel-covered surface, preferably outdoors or over a hard floor. Avoid carpets where possible—they trap dust and make cleanup harder.
- Vacuum the outer grille. Use the brush attachment to gently go over both front and rear grilles. Move in circular motions to lift dust without pushing it deeper into the housing.
- Use compressed air on internal blades. Hold the can upright and spray short bursts through the front grille toward the blades. Rotate the fan head slowly to cover all angles. Repeat from the back if accessible.
- Wipe each visible blade section. Dip a microfiber cloth in soapy water (a few drops of dish soap in a cup of water), wring it until nearly dry, and carefully insert it between the grille wires to wipe each blade surface. Turn the blades manually by hand (after ensuring power is off) to expose all sides.
- Clean the front and rear grilles. Dampen a cloth with mild cleaner and wipe both grilles thoroughly. For stubborn grime, use a soft brush dipped in soapy water, then dry immediately.
- Tackle tight spots with cotton swabs. Dip swab tips in rubbing alcohol to clean around screw heads, control knobs, and vent slits. Alcohol evaporates quickly and kills bacteria without residue.
- Wipe down the base and pole. These areas collect dust and fingerprints. Clean with a damp microfiber cloth and dry promptly. If your fan has rubber feet, check underneath for dirt buildup.
- Let it air-dry for 15–20 minutes. Even if no wet cleaning was used near electronics, allow time for any residual moisture to dissipate before plugging back in.
- Test operation. Plug in the fan and run it at high speed for a few minutes. Listen for unusual noises and ensure smooth oscillation (if applicable).
Common Mistakes to Avoid
Even well-intentioned cleaning efforts can cause harm if basic precautions aren’t followed. Here’s what not to do:
- Don’t hose it down. Water intrusion into the motor housing can cause rust, short circuits, or permanent damage.
- Avoid abrasive pads or steel wool. These scratch plastic and metal finishes, making future cleaning harder and affecting appearance.
- Never force moving parts. If the oscillation joint feels stiff, lubrication may be needed—but only after consulting the manual.
- Skipping the unplugging step. Working on a plugged-in fan—even if “off”—is dangerous and violates basic electrical safety.
- Using ammonia-based cleaners. These can yellow plastic grilles over time and emit harsh fumes when mixed with dust.
Real-World Example: Maria’s Summer Refresh
Maria, a homeowner in Phoenix, noticed her living room fan was louder than usual and blowing dusty air every time she turned it on. She had avoided cleaning it for two summers, assuming she’d need to open the casing. After reading about non-invasive methods, she decided to try a full clean without disassembly.
Using a vacuum, microfiber cloths, and a can of compressed air, she spent about 40 minutes following the steps outlined above. The difference was immediate: the fan ran almost silently, airflow improved noticeably, and the room felt fresher. More importantly, she didn’t break a single clip or lose any screws. Now, she cleans her fan every three months during peak season and reports it’s lasted five years—well beyond the average lifespan of similar models.
Do’s and Don’ts Summary Table
| Action | Do | Don't |
|---|---|---|
| Cleaning frequency | Every 1–3 months during regular use | Wait until performance declines visibly |
| Moisture application | Apply to cloth, not directly to fan | Spray liquids onto grilles or blades |
| Blade access | Use cloth wrapped around fingers or tool | Insert sharp objects between blades |
| Drying time | Allow 15+ minutes before reuse | Plug in immediately after wiping |
| Storage | Cover with breathable fabric when idle | Leave exposed in dusty areas |
Frequently Asked Questions
Can I clean a fan while it's assembled and still get good results?
Absolutely. While full disassembly allows deeper access, most dust accumulates on accessible surfaces—grilles, blades, and exteriors. Using compressed air and careful wiping reaches 90% of problem areas. For typical household use, non-invasive cleaning is sufficient and safer.
How often should I deep clean my standing fan?
During active cooling seasons (spring through summer), perform a deep clean every 4–8 weeks. In homes with pets, allergies, or high dust levels, clean every 4 weeks. Off-season, give it one thorough cleaning before storage.
Is it safe to use rubbing alcohol on plastic parts?
Yes, when diluted (70% isopropyl alcohol with water) and applied sparingly via cloth or swab. Avoid soaking plastic. Alcohol is effective for sanitizing controls and removing sticky residues without damaging most fan materials.
Expert-Recommended Maintenance Checklist
Follow this checklist monthly during peak usage to keep your fan running like new:
- ✅ Unplug the fan before starting
- ✅ Vacuum front and rear grilles
- ✅ Blow out internal dust with compressed air
- ✅ Wipe blades using a damp microfiber cloth
- ✅ Clean control panel and buttons
- ✅ Inspect cord and plug for wear
- ✅ Dry all surfaces before re-plugging
- ✅ Run test cycle at multiple speeds
Final Thoughts: Keep It Clean, Keep It Running
A standing fan doesn’t need to be taken apart to be deeply cleaned. In fact, avoiding disassembly often leads to longer appliance life and fewer repair issues. By adopting a consistent, gentle cleaning routine, you protect both the mechanical integrity and air-purifying function of your fan. Dust isn’t just unsightly—it reduces efficiency, increases noise, and circulates allergens. A few minutes of maintenance every few weeks pays off in better airflow, quieter operation, and cleaner indoor air.
Your fan works hard for you. Return the favor with smart, safe care that doesn’t risk breaking it apart. Whether you live in a dusty climate, share your space with pets, or simply want fresh airflow all season, this method delivers professional-level results without the hassle.


 浙公网安备
33010002000092号
浙公网安备
33010002000092号 浙B2-20120091-4
Comments
No comments yet. Why don't you start the discussion?