
A blender is one of the hardest-working appliances in any kitchen. Whether you're whipping up smoothies, soups, or nut butters, food residue builds up quickly—especially in hard-to-reach areas like the blade assembly and along the jar's seams. Over time, this can lead to odors, bacterial growth, and reduced blending efficiency. While deep cleaning is essential, many people unknowingly damage their blender jars by using abrasive tools or harsh chemicals. Scratches not only mar the appearance but also create micro-harbors for bacteria and weaken the glass or plastic over time. The good news? You can achieve a spotless, sanitized blender without compromising its integrity. This guide outlines safe, proven methods to deep clean your blender jar effectively while preserving its surface.
Why Non-Abrasive Cleaning Matters
Blender jars are typically made from either tempered glass or high-grade plastic such as Tritan. Both materials are durable but vulnerable to fine scratches when exposed to rough scrubbing pads, steel wool, or gritty cleaners. These microscopic grooves accumulate oils, pigments, and organic matter that resist standard washing. Once scratched, the surface becomes harder to clean in the future and may cloud over time, especially with plastic jars.
Scratches also compromise safety. In glass jars, structural weaknesses can develop under pressure or thermal stress—such as when blending hot soups. For plastic jars, scratches increase the risk of chemical leaching, particularly if exposed to acidic ingredients like citrus or vinegar over long periods.
“Maintaining a scratch-free blender jar isn’t just about aesthetics—it’s critical for hygiene and longevity. A single deep scratch can harbor ten times more bacteria than a smooth surface.” — Dr. Lena Peterson, Food Safety Microbiologist, University of Illinois
Step-by-Step: Safe Deep Cleaning Process
Cleaning your blender doesn’t require disassembling it every time, but a thorough monthly deep clean ensures optimal performance and sanitation. Follow this detailed process to remove stubborn buildup without damaging the jar.
- Unplug and disassemble safely: Always disconnect the blender from power before handling. Remove the jar from the base and unscrew the blade assembly if possible (check your model’s manual). Place small parts on a soft towel to avoid dropping or chipping.
- Rinse immediately after use: If you’re not cleaning right away, fill the jar halfway with warm water and pulse briefly to loosen debris. Empty and set aside until full cleaning.
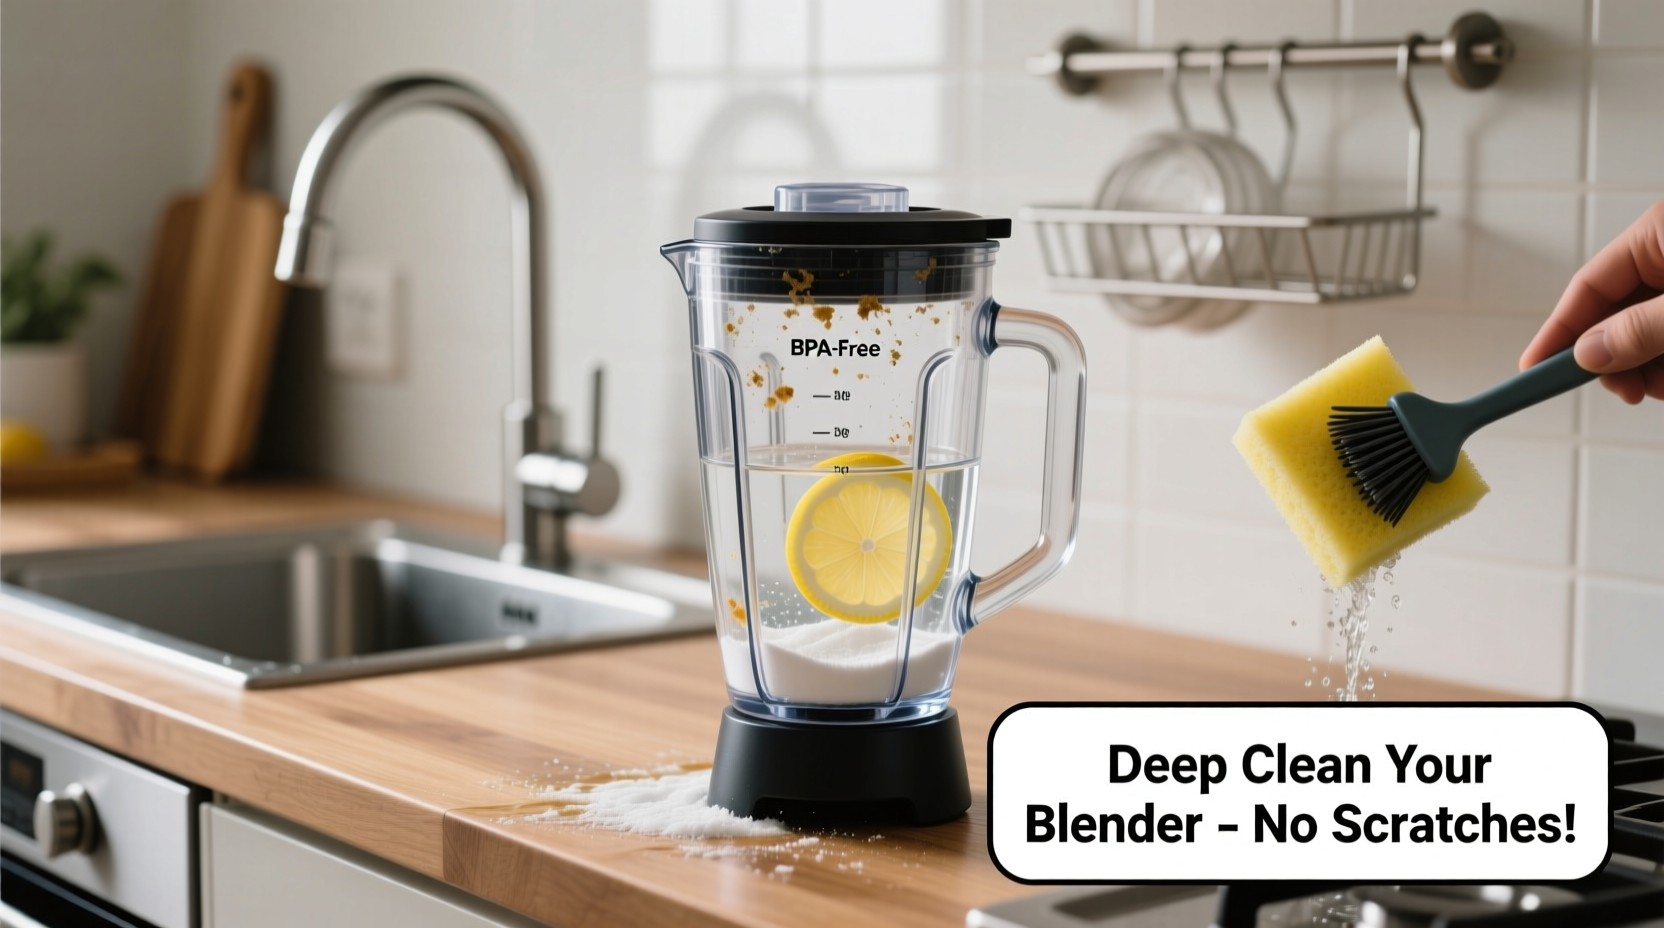
- Create a natural cleaning paste: Mix 1 tablespoon of baking soda with 1–2 teaspoons of water to form a thick paste. Baking soda is mildly abrasive yet gentle enough for delicate surfaces.
- Apply paste below the blade seal: Using a soft silicone brush or toothbrush (dedicated to cleaning, not oral care), gently apply the paste around the gasket and threads where grime accumulates. Avoid metal brushes or stiff nylon bristles.
- Wipe interior walls: Spread the paste evenly inside the jar, focusing on stained or oily spots. Let sit for 5–10 minutes to break down residues.
- Scrub gently with a non-scratch sponge: Use a white Scotch-Brite® Non-Scratch Scrub Sponge or a microfiber cloth. Apply light pressure in circular motions. Never use green scrubbing pads or scouring powders like Comet.
- Rinse thoroughly: Flush all paste and loosened particles with warm running water. Inspect the blade housing for trapped fibers or seeds.
- Sanitize with vinegar solution: Fill the jar one-quarter full with distilled white vinegar and three-quarters with warm water. Replace the lid securely and blend for 30 seconds. This kills bacteria and removes lingering odors.
- Air dry completely: Place the jar upside down on a drying rack. Allow at least two hours for full air drying, especially around the rubber gasket, which can trap moisture and mildew.
- Reassemble carefully: Ensure the blade unit is fully dry before reattaching. Hand-tighten only—over-tightening can crack plastic jars or damage seals.
Alternative Deep Cleaning Methods
Sometimes traditional scrubbing isn’t enough for tough stains or persistent odors. Here are three alternative approaches that deliver powerful results without risking damage.
1. The Soak-and-Spin Method
For blenders that struggle with stuck-on smoothie remnants, combine 1 cup warm water, 1 tablespoon dish soap, and a handful of uncooked rice into the jar. Blend on low for 30–45 seconds. The rice grains act as gentle abrasives, lifting debris without scratching. Rinse thoroughly afterward.
2. Lemon and Ice Descale
To tackle mineral deposits or cloudy film (common in hard water areas), add half a lemon (cut side down), one cup of ice cubes, and a splash of water. Run the blender for 45 seconds. The citric acid cuts through grease and lime scale, while ice provides mechanical action. Discard contents and rinse well.
3. Dishwasher-Safe Components Only
If your blender jar and blades are labeled dishwasher-safe, place them on the top rack. Use a phosphate-free detergent to prevent etching. However, frequent dishwashing can degrade rubber gaskets faster, so limit this to once every few weeks and hand wash in between.
| Cleaning Method | Best For | Frequency | Risk Level |
|---|---|---|---|
| Baking Soda Paste + Soft Brush | General deep cleaning, oil removal | Monthly | Low |
| Vinegar Sanitizing Blend | Killing bacteria, odor elimination | Bi-weekly | None |
| Rice & Soap Pulse Clean | Removing fibrous residue (greens, celery) | As needed | Low |
| Lemon-Ice Scrub | Mineral buildup, cloudiness | Every 6–8 weeks | Very Low |
| Dishwasher Wash | Convenience, multi-part cleanup | Occasionally (max once/month) | Moderate (gasket wear) |
Common Mistakes That Damage Blender Jars
Even well-intentioned cleaning habits can shorten your blender’s lifespan. Avoid these common errors:
- Using steel wool or metal scrapers: These leave visible scratches and compromise material integrity.
- Soaking plastic jars for extended periods: Prolonged exposure to water, especially hot water, can warp plastic or degrade adhesives in the blade unit.
- Stacking blenders improperly: Storing another appliance or heavy pot on top of the jar can cause microfractures.
- Ignoring the gasket: The rubber or silicone seal beneath the blade traps food and moisture. Failing to clean it leads to mold and foul smells.
- Using bleach-based cleaners: Chlorine bleach can discolor plastic and weaken seals over time. It’s unnecessary when vinegar and baking soda work just as well.
Mini Case Study: Reviving a Neglected Blender
Sarah, a busy mom of two, used her blender nearly every morning for green smoothies. After six months, she noticed a persistent grassy smell and dark streaks near the blade. She tried scrubbing with a regular kitchen sponge, but the stains remained. Reluctant to replace the $80 appliance, she researched safe cleaning methods.
Following the baking soda paste and vinegar blend protocol, she spent 20 minutes one evening disassembling, treating, and sanitizing each component. To her surprise, the black specks turned out to be oxidized spinach fibers trapped under the gasket. After soaking the seal in warm soapy water and gently brushing it, the odor vanished. Now, Sarah performs a full deep clean every five weeks and runs a vinegar rinse weekly. Her blender looks and functions like new—proof that consistent, careful maintenance pays off.
Checklist: Monthly Blender Deep Clean Routine
Use this checklist to ensure no step is missed during your deep cleaning session:
- ☐ Unplug blender and remove jar from base
- ☐ Unscrew blade assembly (if removable)
- ☐ Inspect gasket for cracks or trapped debris
- ☐ Clean gasket with soft brush and soapy water
- ☐ Prepare baking soda paste
- ☐ Apply paste below blade and on stained areas
- ☐ Gently scrub interior with non-scratch sponge
- ☐ Rinse thoroughly with warm water
- ☐ Sanitize with vinegar-water blend (¼ vinegar, ¾ water)
- ☐ Air dry all components completely
- ☐ Reassemble only when fully dry
- ☐ Wipe motor base with damp cloth
Frequently Asked Questions
Can I use baking soda every time I clean my blender?
Yes, baking soda is safe for regular use due to its mild abrasiveness and natural deodorizing properties. However, reserve paste applications for weekly or bi-weekly cleans. For daily rinses, plain water or a drop of dish soap suffices.
Why does my blender still smell after washing?
Odors usually originate from the blade gasket or tiny cracks in the jar. If the smell persists, remove the blade unit and soak the seal in a mixture of equal parts water and white vinegar for 15 minutes. Also, run a blend cycle with lemon juice and water to freshen the entire chamber.
Is it safe to blend cleaning solutions in my blender?
Yes, as long as you use food-safe ingredients like vinegar, baking soda, lemon, or dish soap. Never use industrial degreasers or toxic chemicals. Always rinse the jar thoroughly afterward to remove any residual taste or film.
Conclusion: Maintain Performance and Hygiene Without Compromise
Your blender works hard to keep your diet fresh and convenient—return the favor with thoughtful, scratch-free maintenance. By adopting gentle yet effective cleaning practices, you protect both the functionality and lifespan of your appliance. Simple habits like using non-abrasive tools, sanitizing regularly, and inspecting hidden parts make a lasting difference. A well-cared-for blender not only performs better but also contributes to safer, more enjoyable food preparation. Take a few extra minutes each month to deep clean properly, and you’ll avoid premature wear, unpleasant odors, and costly replacements.


 浙公网安备
33010002000092号
浙公网安备
33010002000092号 浙B2-20120091-4
Comments
No comments yet. Why don't you start the discussion?