
Gaming mice are precision instruments, designed for responsiveness, accuracy, and durability. But like any frequently used device, they accumulate dirt, oils, dust, and grime over time—especially in crevices around buttons and under the scroll wheel. A dirty mouse can lead to sticky clicks, tracking issues, or even sensor degradation. While a deep clean is essential for peak performance, many users hesitate, fearing that opening or cleaning their mouse might void the manufacturer’s warranty. The good news? You can thoroughly clean your gaming mouse without risking coverage—if you know the right techniques.
This guide walks through safe, effective methods to deep clean your gaming mouse while respecting warranty terms. From identifying what counts as tampering to using the correct tools and avoiding irreversible damage, every step is designed to preserve both hygiene and your protection plan.
Understanding Warranty Terms: What Actually Voids Coverage?
Before touching a screwdriver or applying any liquid, it’s crucial to understand what constitutes warranty violation. Most manufacturers—including Logitech, Razer, Corsair, and SteelSeries—explicitly state that opening the mouse casing will void the warranty. This typically means removing screws on the bottom or prying apart the shell. However, surface cleaning and maintenance using non-invasive methods are almost always permitted.
The key distinction lies in whether the cleaning process alters the internal structure or leaves visible signs of disassembly. For example, wiping down the exterior with a damp cloth won’t trigger a warranty claim rejection. But if a technician finds evidence of opened panels, residue from improper solvents, or damaged internal components due to moisture exposure, the claim may be denied.
“Warranty policies protect against manufacturing defects, not user neglect. Routine maintenance is expected—but only when done correctly.” — David Lin, Senior Support Engineer at a leading peripheral manufacturer
Always check your product manual or the manufacturer’s website for specific care instructions. Some brands even publish approved cleaning guidelines, which can serve as a reference if you ever need to dispute a claim.
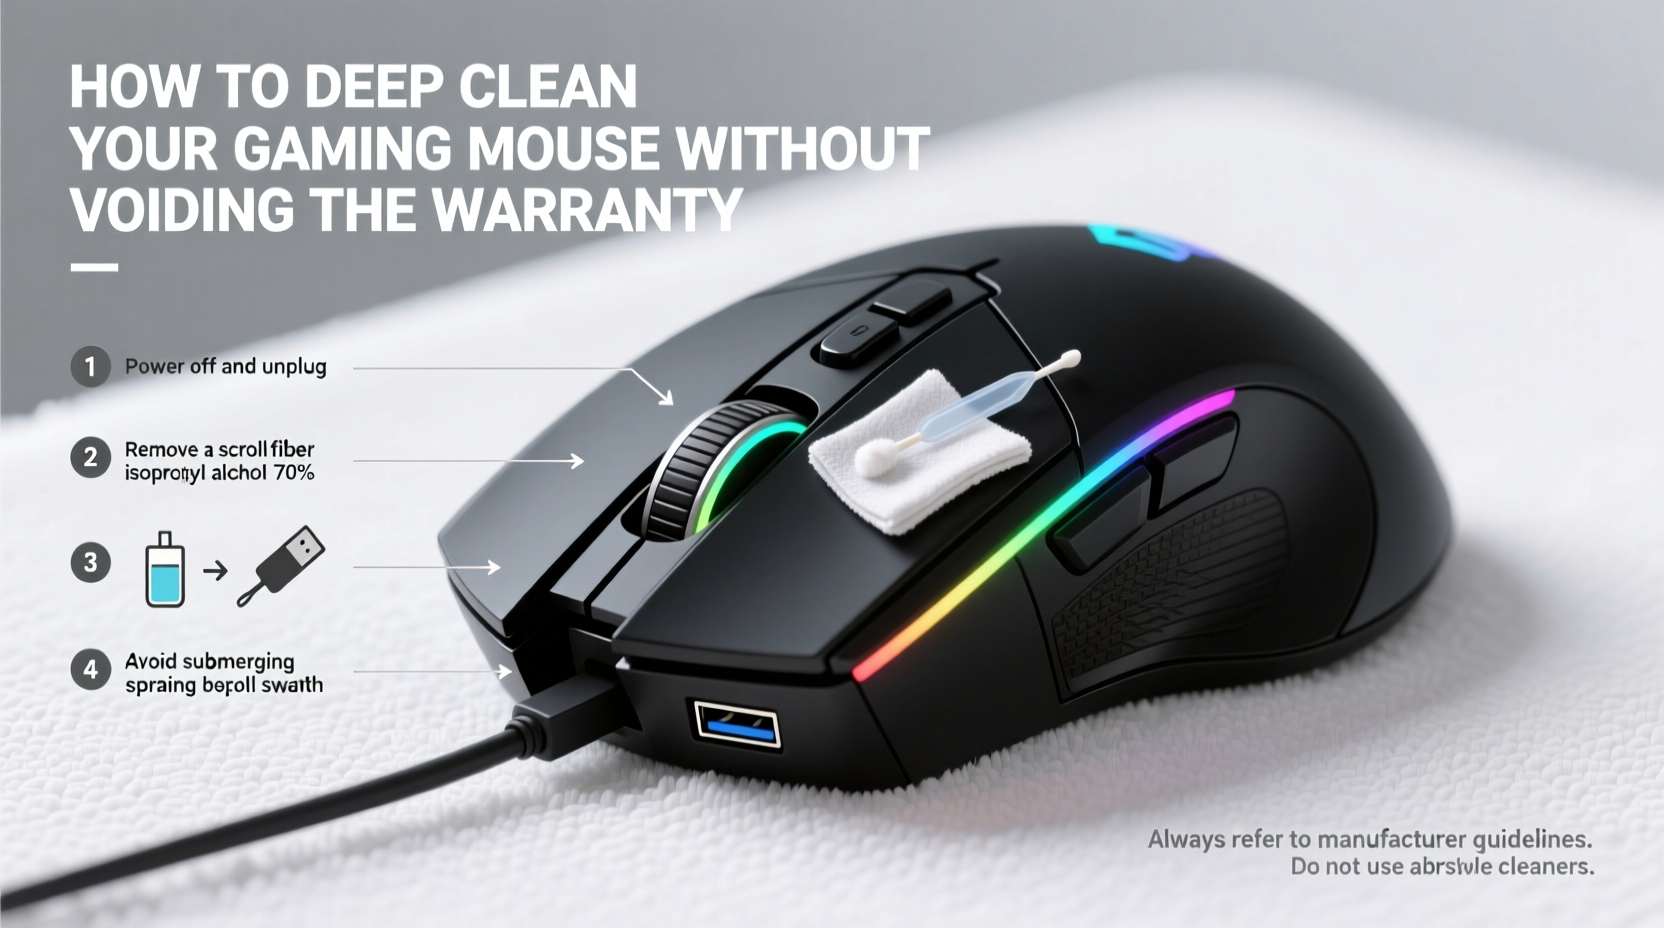
Step-by-Step Guide to a Safe Deep Clean
You don’t need to open the mouse to achieve a meaningful deep clean. With patience and the right tools, you can remove built-up debris from high-contact areas without compromising structural integrity. Follow this timeline-based process for optimal results:
- Unplug the mouse (or turn off wireless connection) – Prevent accidental input or electrical risk during cleaning.
- Remove large debris with compressed air – Hold the can upright and spray short bursts into gaps around buttons, under the scroll wheel, and along seams.
- Clean the sensor lens gently – Use a dry cotton swab to wipe the red LED or laser lens on the bottom. Never use liquids here.
- Wipe exterior surfaces – Dampen a microfiber cloth slightly with 70% isopropyl alcohol. Wring it until nearly dry, then wipe all surfaces, focusing on thumb rests and click zones.
- Tackle stubborn grime in crevices – Use a soft-bristled toothbrush or a wooden dental pick to dislodge dirt. Avoid metal tools that could scratch plastic.
- Dry completely before use – Allow the mouse to sit for 10–15 minutes to ensure no residual moisture remains.
This entire process takes less than 30 minutes and requires minimal supplies. It effectively removes oils from fingerprints, dead skin, and environmental dust—all without exposing internal components.
Do’s and Don’ts: Cleaning Practices That Protect Your Investment
To avoid accidental damage or warranty complications, follow this comparison table outlining recommended versus risky behaviors.
| Do’s | Don’ts |
|---|---|
| Use 70% isopropyl alcohol on a microfiber cloth | Use household cleaners like Windex or bleach |
| Clean every 2–4 weeks depending on usage | Wait until performance degrades significantly |
| Use compressed air to clear debris from joints | Blow with your mouth (adds moisture and saliva) |
| Inspect cable connectors for dust buildup | Insert objects into USB ports to clean them |
| Store mouse on a clean mousepad when not in use | Leave it exposed on dusty desks or near food |
Adhering to these best practices ensures consistent performance and reduces the temptation to resort to invasive cleaning later. Remember, prevention is far more effective—and safer—than attempting to fix problems caused by neglect.
A Real-World Example: Recovering Performance Without Opening the Case
Consider Mark, an avid FPS player who noticed his high-end optical mouse began registering double-clicks and occasional lag. Frustrated, he considered opening the device to “fix” the switches but hesitated because it was still under warranty. Instead, he followed a non-invasive cleaning protocol similar to the one outlined here.
Using compressed air, he cleared dust trapped beneath the left-click button. He then used a slightly dampened microfiber cloth to clean the top shell and sides, where sweat and oil had created a tacky film. After drying, he ran a quick sensor calibration via his mouse software. To his surprise, responsiveness improved dramatically—no disassembly required.
When he later contacted customer support about minor scroll wheel resistance, the technician confirmed that external cleaning was acceptable and did not affect eligibility for future service. Mark avoided voiding his warranty and extended his mouse’s life by over a year.
Essential Tools and Supplies Checklist
Having the right equipment on hand makes regular maintenance easier and safer. Keep this checklist handy for your next cleaning session:
- Microfiber cleaning cloths (lint-free)
- Bottle of 70% isopropyl alcohol
- Can of compressed air (with straw nozzle)
- Soft-bristled brush (e.g., clean toothbrush)
- Dry cotton swabs (Q-tips)
- Wooden dental picks or plastic spudgers
- Small bowl of water (for rinsing cloths only)
- Timer or clock (to track drying time)
These items are inexpensive and widely available. Investing in them means you’re always prepared to maintain your gear properly—without resorting to risky improvisation.
Frequently Asked Questions
Can I use hand sanitizer to clean my mouse?
No. While hand sanitizers contain alcohol, they also include fragrances, glycerin, and other additives that can leave behind a sticky residue. Stick to pure 70% isopropyl alcohol applied via cloth.
What should I do if liquid gets inside the mouse?
Immediately power it off (unplug or remove batteries), shake gently to drain excess, and place it in a dry, ventilated area for at least 24 hours. Do not use heat sources like hairdryers, as they can warp plastic or damage sensors.
Is it safe to clean a wireless mouse differently than a wired one?
The cleaning method is identical. However, for wireless models, remove the battery before cleaning if possible. Also, avoid spraying near the charging port or contacts.
Expert-Approved Tips for Long-Term Mouse Care
Professional esports teams and tech reviewers maintain their peripherals rigorously—and not by dismantling them. Here are advanced habits used by experts to keep mice performing like new:
- Rotate mice during long sessions – Alternating between two mice reduces wear and gives each time to air out.
- Use removable grip tapes – These provide traction and can be replaced instead of cleaning grimy rubberized shells.
- Clean your mousepad weekly – A dirty surface transfers contaminants back to the mouse quickly.
- Wash hands before gaming – Reduces oil transfer at the source, minimizing buildup.
One professional streamer reported cutting cleaning frequency in half simply by washing hands before play sessions. Small behavioral changes yield outsized results in device longevity.
“The best cleaning strategy is the one you never have to do too aggressively. Consistent light maintenance beats emergency deep cleans every time.” — Lena Park, Peripheral Technician at a Major Esports Organization
Conclusion: Maintain Performance, Preserve Protection
Deep cleaning your gaming mouse doesn’t require technical expertise or risky disassembly. By understanding warranty boundaries and using proper tools and techniques, you can restore smooth operation and extend the lifespan of your device. Regular maintenance prevents performance decline, enhances hygiene, and protects your investment—all without jeopardizing manufacturer support.
Take action today: gather your supplies, schedule a cleaning session, and adopt a routine that keeps your mouse responsive and reliable. Whether you're climbing leaderboards or working on creative projects, a clean mouse makes every click count.


 浙公网安备
33010002000092号
浙公网安备
33010002000092号 浙B2-20120091-4
Comments
No comments yet. Why don't you start the discussion?