
A microwave is one of the most frequently used appliances in any kitchen, but it's also one of the most neglected when it comes to cleaning. Over time, splatters, dried-on food, and lingering odors accumulate on the interior walls, turntable, and ceiling. The result? A less efficient appliance, unpleasant smells, and potential health concerns from bacterial buildup.
The good news: you don’t need harsh chemicals or expensive cleaners. In fact, you can achieve a spotless, sanitized microwave using ingredients already in your pantry—vinegar, lemon, water, and baking soda. With just a few minutes and basic supplies, you can restore your microwave to near-new condition. This method is safe for all microwave-safe interiors, environmentally friendly, and leaves behind no toxic residue.
Why Pantry Staples Work Better Than Commercial Cleaners
Many store-bought microwave cleaners contain ammonia, bleach, or synthetic fragrances that can leave behind fumes or residues. These chemicals may transfer to your food during heating, especially if not rinsed thoroughly. In contrast, natural pantry ingredients offer powerful cleaning properties without the risk.
- Vinegar: Acetic acid in white vinegar breaks down grease, kills bacteria, and neutralizes odors.
- Lemon: Citric acid cuts through grime while leaving a fresh scent; its natural antibacterial properties help sanitize surfaces.
- Baking Soda: A gentle abrasive that lifts stubborn stains without scratching surfaces.
- Water: Acts as a carrier for steam, which loosens dried-on debris.
“Natural acids like vinegar and lemon juice are excellent at dissolving organic buildup—exactly what accumulates in microwaves.” — Dr. Lena Torres, Environmental Health Scientist
Steam generated from heated liquids penetrates stuck-on food particles, softening them so they wipe away easily. This combination of chemistry and physics makes pantry-based cleaning both fast and highly effective.
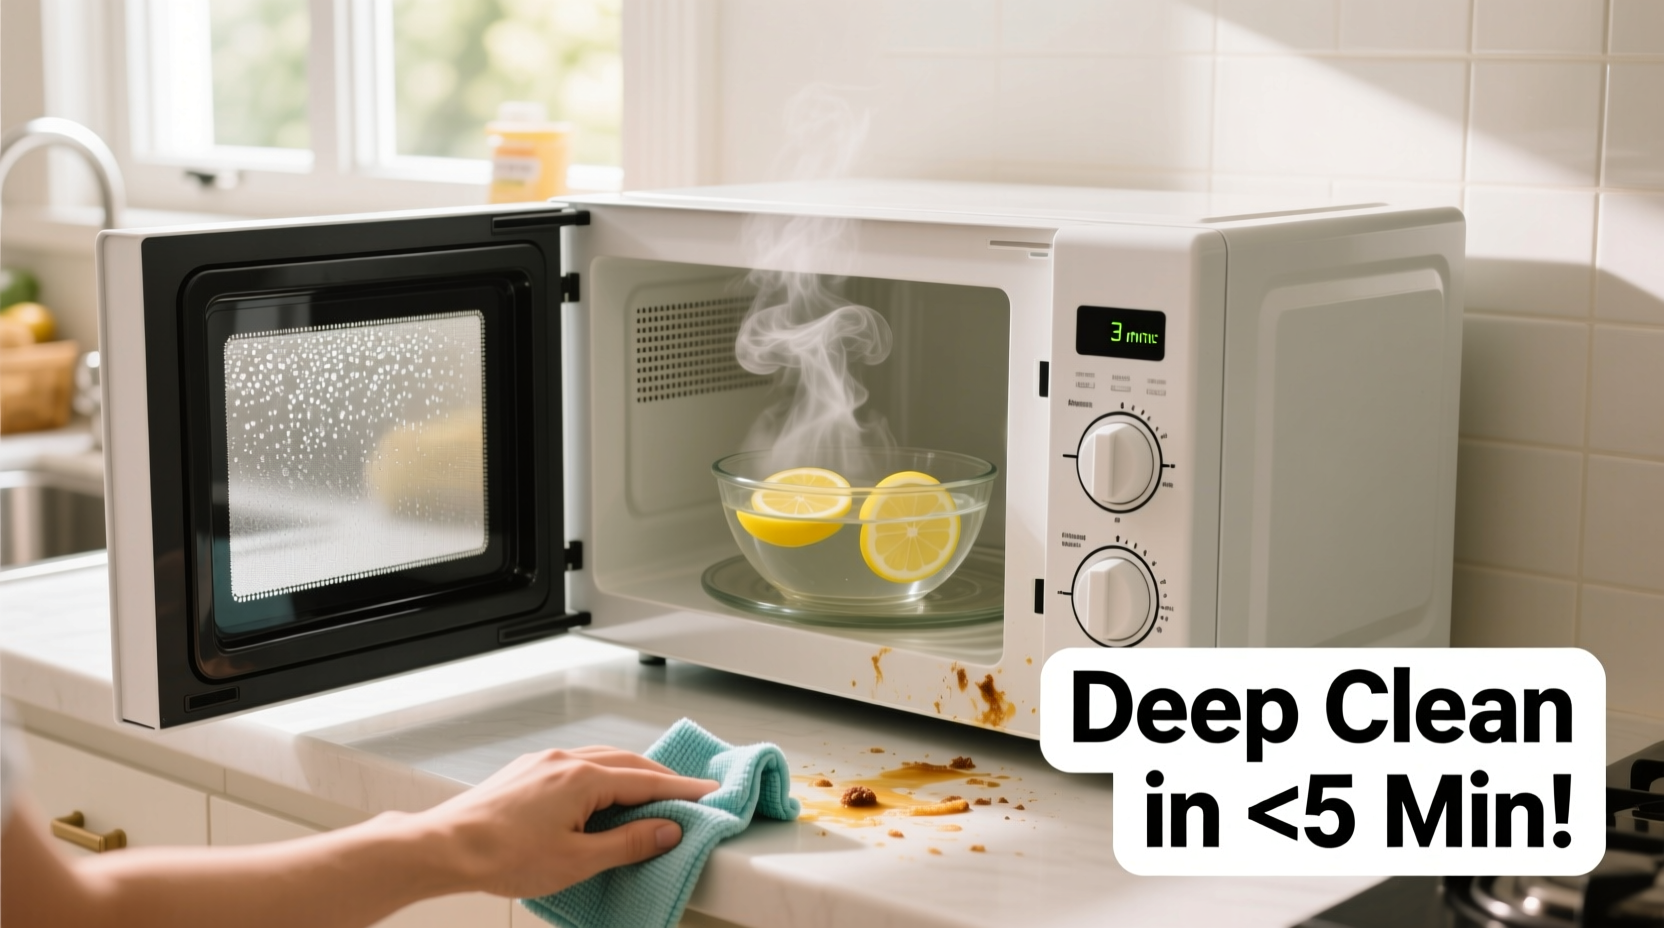
Step-by-Step Guide: Deep Clean Your Microwave in Under 5 Minutes
This streamlined process uses heat and steam to do most of the work. You’ll spend less than two minutes preparing and about three minutes wiping—total active effort: under five minutes.
- Remove the turntable and wash separately. Take out the glass plate and supporting ring (if applicable). Wash these with warm, soapy water and set aside to dry.
- Prepare the cleaning solution. Choose one of the following options based on availability:
- Vinegar Method: Mix 1 cup of water with 1/4 cup of white distilled vinegar in a microwave-safe bowl.
- Lemon Method: Fill a bowl with 1 cup of water and add the juice of half a lemon (or 2 tablespoons of bottled lemon juice). Drop in the squeezed halves for extra potency.
- Microwave on high for 3–4 minutes. Place the bowl in the center of the microwave. Run it on high until the mixture boils and produces steady steam. Watch carefully—once boiling begins, let it continue for 60–90 seconds. The steam will coat the interior, loosening grime.
- Let it sit for 1–2 minutes (optional but effective). After the timer stops, leave the door closed. This allows the trapped steam to soften even the toughest spots.
- Wipe down the interior. Open the door carefully (steam will escape). Using a damp microfiber cloth or sponge, wipe all interior surfaces—walls, ceiling, door, and control panel edges. Most residue should come off effortlessly.
- Tackle stubborn spots with baking soda paste (if needed). For areas that resist wiping, make a quick paste: mix 1 tablespoon of baking soda with a few drops of water. Gently scrub the spot, then wipe clean with a damp cloth.
- Dry and reassemble. Dry the interior with a clean towel. Reinstall the turntable and support ring once everything is completely dry.
Comparison: Vinegar vs. Lemon – Which Works Best?
Both vinegar and lemon are effective, but each has unique benefits depending on your needs. Here’s a breakdown to help you choose the right option:
| Factor | Vinegar Solution | Lemon Solution |
|---|---|---|
| Cleaning Power | High – strong acetic acid dissolves grease and protein buildup efficiently | Moderate – citric acid is effective but slightly less potent than vinegar |
| Odor Removal | Excellent – eliminates strong odors like fish, garlic, burnt popcorn | Good – masks odors with citrus freshness; may not fully eliminate very strong smells |
| Scent Left Behind | Sharp initially, dissipates quickly | Pleasant, fresh citrus aroma |
| Allergy/Sensitivity Friendly | Potentially irritating to sensitive individuals due to strong smell | Better tolerated; natural fragrance preferred by many |
| Availability | Almost always on hand in households | May require fresh purchase unless regularly used |
| Best For | Deep cleaning after heavy use, removing burnt residues, sanitizing | Routine maintenance, light cleaning, refreshing scent |
For maximum effectiveness, rotate between both methods: use vinegar monthly for deep sanitization and lemon weekly for maintenance and odor control.
Real Example: How Sarah Revived Her Neglected Microwave
Sarah, a busy mother of two in Portland, hadn’t cleaned her microwave in over six months. Between school lunches, reheating leftovers, and frozen meals, it had become a sticky mess. “There was dried cheese splatter on the ceiling, coffee spills on the walls, and every time I opened it, there was this weird sour-milk smell,” she recalls.
One Tuesday morning, while making oatmeal, she decided to try the vinegar method after reading about it online. She mixed water and vinegar in a measuring cup, microwaved it for four minutes, and waited an extra minute before opening. “I couldn’t believe how much condensation built up inside. When I wiped it down, the gunk came off like butter. Even the turntable looked brand new after soaking in soapy water.”
The entire process took her four minutes and 37 seconds—including drying time. “Now I do it every two weeks. It’s so easy, I don’t know why I waited so long.”
Common Mistakes That Reduce Cleaning Effectiveness
Even simple tasks can go wrong if done incorrectly. Avoid these common pitfalls:
- Using metal scrubbers: Steel wool or abrasive pads can scratch the microwave’s interior coating, leading to rust and reduced efficiency.
- Skipping the rest period: Opening the door immediately after microwaving reduces steam penetration. Letting it sit enhances cleaning power.
- Not cleaning the door seal: Food particles often collect in the rubber gasket around the door, harboring bacteria and affecting closure tightness.
- Overlooking the exterior: Control panels, handles, and vents also accumulate grease and germs. Wipe them with a damp cloth and mild cleaner.
- Using undiluted vinegar or lemon juice: Full-strength acids can degrade plastic components over time. Always dilute with water.
Essential Checklist: Quick Microwave Maintenance Routine
Follow this checklist to keep your microwave consistently clean and functional:
- ☑ Remove turntable and wash with warm, soapy water weekly
- ☑ Wipe interior spills immediately after they occur
- ☑ Perform deep steam-cleaning every 2–4 weeks
- ☑ Inspect and clean door seal monthly
- ☑ Deodorize naturally with lemon or vanilla if odors persist
- ☑ Check for error codes or performance issues after cleaning
- ☑ Dry all parts completely before reassembling
Consistent light maintenance prevents the need for aggressive scrubbing later. Think of it as preventive care for your appliance.
Frequently Asked Questions
Can I use apple cider vinegar instead of white vinegar?
Yes, but white distilled vinegar is more effective due to its higher acetic acid concentration (typically 5–6%). Apple cider vinegar works in a pinch but may leave behind a faint color or scent residue.
Is it safe to microwave vinegar?
Yes, as long as it’s diluted with water and monitored. Pure vinegar should never be microwaved alone, as it can superheat and become dangerous. The 3:1 water-to-vinegar ratio ensures safe heating.
What if my microwave still smells bad after cleaning?
Try placing a small bowl of activated charcoal or baking soda inside overnight to absorb lingering odors. Alternatively, microwave a cup of water with a teaspoon of vanilla extract for 1 minute—this leaves a pleasant, neutral scent.
Final Thoughts: Make Microwave Cleaning Effortless and Routine
Cleaning your microwave doesn’t have to be a dreaded chore. By leveraging the natural power of pantry staples and the science of steam, you can achieve a deep clean in under five minutes—no special tools, no toxic sprays, no scrubbing battles. The key is consistency. Just like brushing your teeth or wiping down countertops, integrating quick microwave maintenance into your routine prevents buildup and keeps your kitchen hygienic.
Start today. Choose your vinegar or lemon solution, set the timer, and watch the steam do the work. You’ll be amazed at how such a small action can transform both the appearance and function of a vital kitchen appliance.


 浙公网安备
33010002000092号
浙公网安备
33010002000092号 浙B2-20120091-4
Comments
No comments yet. Why don't you start the discussion?