
A steady, strong shower is one of life’s small luxuries—until mineral buildup, soap scum, and bacteria start interfering. If your showerhead sprays unevenly, sputters, or looks dingy, it’s likely overdue for a deep clean. The good news? You don’t need harsh chemicals or hours of scrubbing. With common household supplies and a few smart techniques, you can restore your showerhead’s performance in under 15 minutes.
This guide walks you through everything from identifying clogs to executing fast, effective cleaning methods. Whether you have a fixed overhead showerhead or a handheld model, these steps will improve flow, enhance hygiene, and extend the lifespan of your fixture.
Why Your Showerhead Needs Regular Cleaning
Over time, hard water deposits—primarily calcium and magnesium—accumulate inside your showerhead. These minerals form scale that blocks individual spray nozzles, reducing water pressure and creating inconsistent spray patterns. In areas with soft water, soap residue and body oils combine with dust and biofilm (a slimy layer of microorganisms), leading to similar issues.
Beyond performance, a dirty showerhead poses health risks. A study published in the journal *Applied and Environmental Microbiology* found that bathroom showerheads can harbor mycobacteria, including species linked to respiratory infections. While most are harmless to healthy individuals, those with compromised immune systems may be at risk.
“Regular cleaning of showerheads isn’t just about water pressure—it’s a basic hygiene practice. Biofilm buildup can aerosolize bacteria during use, making inhalation possible.” — Dr. Lena Patel, Environmental Health Specialist
Cleaning every 1–3 months prevents long-term damage and maintains sanitary conditions, especially in homes with well water or older plumbing systems.
What You’ll Need: Quick-Access Supplies
The best part about this process is that you probably already have everything you need. No specialty cleaners or tools required. Here’s a checklist:
- White distilled vinegar (1–2 cups)
- A plastic resealable bag (gallon size)
- Rubber band or twist tie
- Soft-bristle toothbrush or pipe cleaner
- Microfiber cloth
- Old towel (to catch drips)
- Optional: Baking soda (for extra scrubbing power)
Avoid using bleach unless absolutely necessary. It can corrode metal components and degrade rubber seals over time. Vinegar is safer, effective, and eco-friendly.
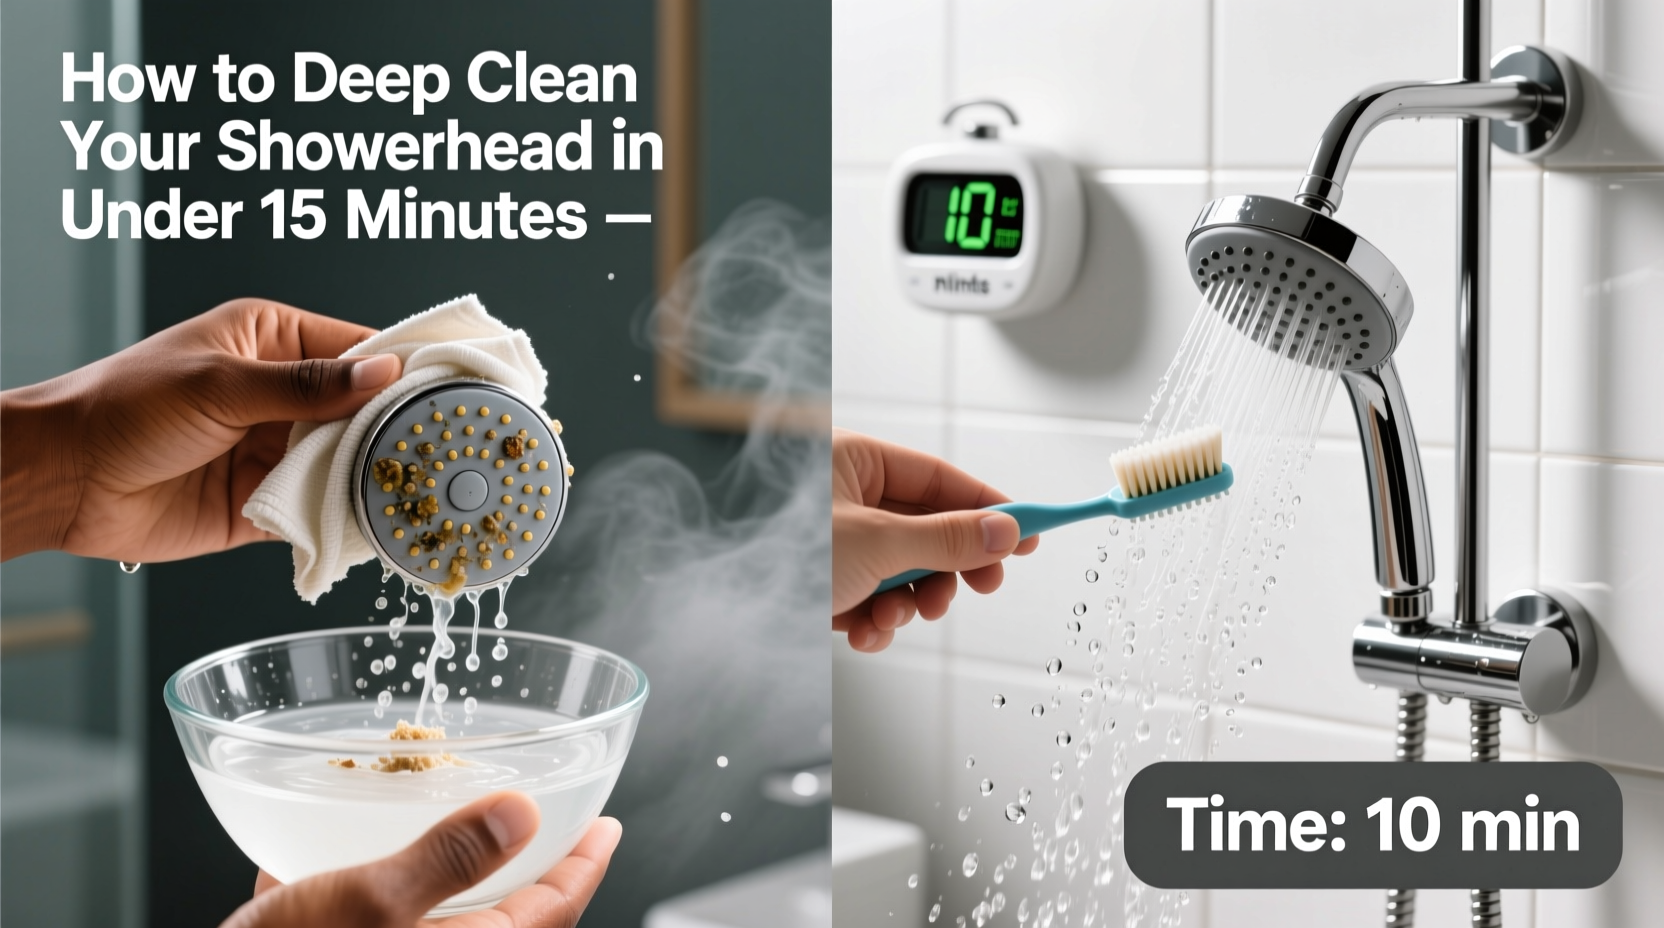
Step-by-Step: Deep Clean in Under 15 Minutes
Follow this efficient method to remove buildup without disassembling your showerhead (unless needed). This approach works for both chrome and plastic models.
- Remove loose debris: Wipe the exterior with a damp microfiber cloth. Use a dry toothbrush to gently sweep away visible dust or grime around the base and nozzle surface.
- Prepare the vinegar bath: Fill a plastic bag halfway with white vinegar. If your showerhead has heavy buildup, mix in 1 tablespoon of baking soda for mild abrasion and effervescence.
- Attach the bag: Place the bag over the showerhead so the nozzles are fully submerged. Secure it tightly with a rubber band or twist tie around the shower arm. Make sure the vinegar makes contact with all clogged areas.
- Soak for 10 minutes: Let the vinegar work its magic. During this time, the acetic acid dissolves limescale and loosens biofilm. Don’t exceed 30 minutes if your fixture is brass, nickel, or oil-rubbed bronze—prolonged exposure can damage finishes.
- Scrub stubborn spots: Remove the bag and use an old toothbrush to gently scrub the nozzles. For tight openings, insert a pipe cleaner or toothpick to push out residue. Be careful not to scratch the surface.
- Rinse thoroughly: Turn on the shower for 1–2 minutes to flush out any remaining vinegar and dislodged particles. Do this before removing the bag setup to minimize mess.
- Dry and inspect: Wipe the showerhead with a clean cloth. Check spray pattern and pressure. If flow is still weak, repeat the soak or consider full removal for deeper cleaning.
When to Remove the Showerhead for Deeper Cleaning
If soaking doesn’t restore full function, your showerhead may need complete removal. This is especially true for older models or units with visible internal blockages.
To remove:
- Wrap a cloth around the shower arm to protect the finish.
- Use adjustable pliers to unscrew the showerhead counterclockwise. Avoid tightening too much when reinstalling.
- Submerge the entire unit in a bowl of vinegar for 30–60 minutes.
- Use a toothbrush to clean threads and internal filters (many showerheads have small mesh screens).
- Rinse completely and reattach by hand-tightening first, then giving a slight turn with pliers if needed.
After reinstallation, run the shower for two minutes to clear any debris from the pipes.
Do’s and Don’ts of Showerhead Maintenance
| Do’s | Don’ts |
|---|---|
| ✔ Clean every 1–3 months based on water hardness | ✖ Use steel wool or abrasive pads that scratch surfaces |
| ✔ Use vinegar for natural descaling | ✖ Soak brass or gold-plated fixtures longer than 30 minutes |
| ✔ Inspect and rinse filters monthly | ✖ Ignore leaks or wobbling connections—tighten promptly |
| ✔ Dry the showerhead after cleaning to prevent water spots | ✖ Mix vinegar with bleach—this creates toxic fumes |
| ✔ Replace aging showerheads (over 5 years) for better efficiency | ✖ Over-tighten connections, which can crack fittings |
Real Example: Reviving a Low-Pressure Shower in a Rental Unit
Sarah, a tenant in a 1970s-built apartment in Denver, struggled with her bathroom shower for months. The spray was weak, uneven, and often started with a brownish trickle. Her landlord was slow to respond, so she decided to investigate herself.
She wrapped a vinegar-filled bag around the chrome showerhead overnight. The next morning, she noticed dark particles floating in the vinegar—rust and sediment from aging pipes. After a 10-minute soak and light brushing, the water flow improved dramatically. She repeated the process monthly and added a water filter to her shower system. Within weeks, her morning showers became more enjoyable, and she even convinced her landlord to replace the outdated fixture during a routine inspection.
Sarah’s experience shows that even in older buildings with challenging water conditions, proactive maintenance can make a tangible difference.
Alternative Cleaning Methods for Sensitive Fixtures
Not all showerheads react well to vinegar. Antique, gold-plated, or brushed nickel finishes can tarnish with acidic exposure. In these cases, opt for gentler solutions:
- Lemon juice: Naturally acidic but milder than vinegar. Soak for 15–20 minutes.
- Commercial lime remover: Choose non-abrasive, pH-balanced formulas labeled safe for your finish.
- Dish soap and warm water: Effective for soap scum on plastic heads. Soak removable parts for 10 minutes, then scrub.
Always test any solution on a small, inconspicuous area first. When in doubt, consult the manufacturer’s care instructions—many brands like Moen, Delta, and Kohler provide online maintenance guides.
Frequently Asked Questions
How often should I clean my showerhead?
At minimum, every three months. If you live in a hard water area or notice reduced pressure, clean monthly. Homes with well water or high iron content may require bi-weekly rinses.
Can I use apple cider vinegar instead of white vinegar?
It’s not recommended. Apple cider vinegar contains additional organic compounds and pigments that may stain or leave residue. Stick with clear, distilled white vinegar for best results.
Why does my showerhead still drip after cleaning?
Dripping is usually unrelated to cleanliness. It indicates a worn washer or cartridge inside the shower valve. Cleaning won’t fix this—check the faucet mechanism or call a plumber if the drip persists.
Conclusion: A Cleaner Showerhead, Better Showers Ahead
Spending less than 15 minutes to deep clean your showerhead pays off in stronger water pressure, improved hygiene, and extended fixture life. Vinegar, a plastic bag, and a little elbow grease are all it takes to dissolve mineral deposits and eliminate hidden bacteria. This simple habit protects your health and enhances daily comfort—without requiring expensive tools or professional help.


 浙公网安备
33010002000092号
浙公网安备
33010002000092号 浙B2-20120091-4
Comments
No comments yet. Why don't you start the discussion?