
Bag charms are more than just decorative accessories—they’re expressions of personality, style, and creativity. Once reserved for luxury handbags, they’ve become accessible, customizable, and deeply personal. Designing your own charm allows you to craft something that reflects your aesthetic, tells a story, or even serves as a meaningful gift. Whether you're new to crafting or an experienced DIY enthusiast, creating a one-of-a-kind bag charm is both satisfying and surprisingly simple when guided by the right process.
Why Create Your Own Bag Charm?
Mass-produced charms may be convenient, but they lack the individuality that handmade pieces offer. A custom charm can commemorate a trip, represent a hobby, or symbolize a personal milestone. Beyond aesthetics, the act of making your own accessory fosters mindfulness and creative confidence. As textile artist Lila Nguyen notes:
“Handmade details transform everyday objects into keepsakes. A charm isn’t just decoration—it’s a tiny narrative stitched onto your life.” — Lila Nguyen, Textile Artist & Craft Educator
Creating your own also ensures durability and quality. You choose the materials, control the craftsmanship, and avoid cheap hardware that might tarnish or break prematurely.
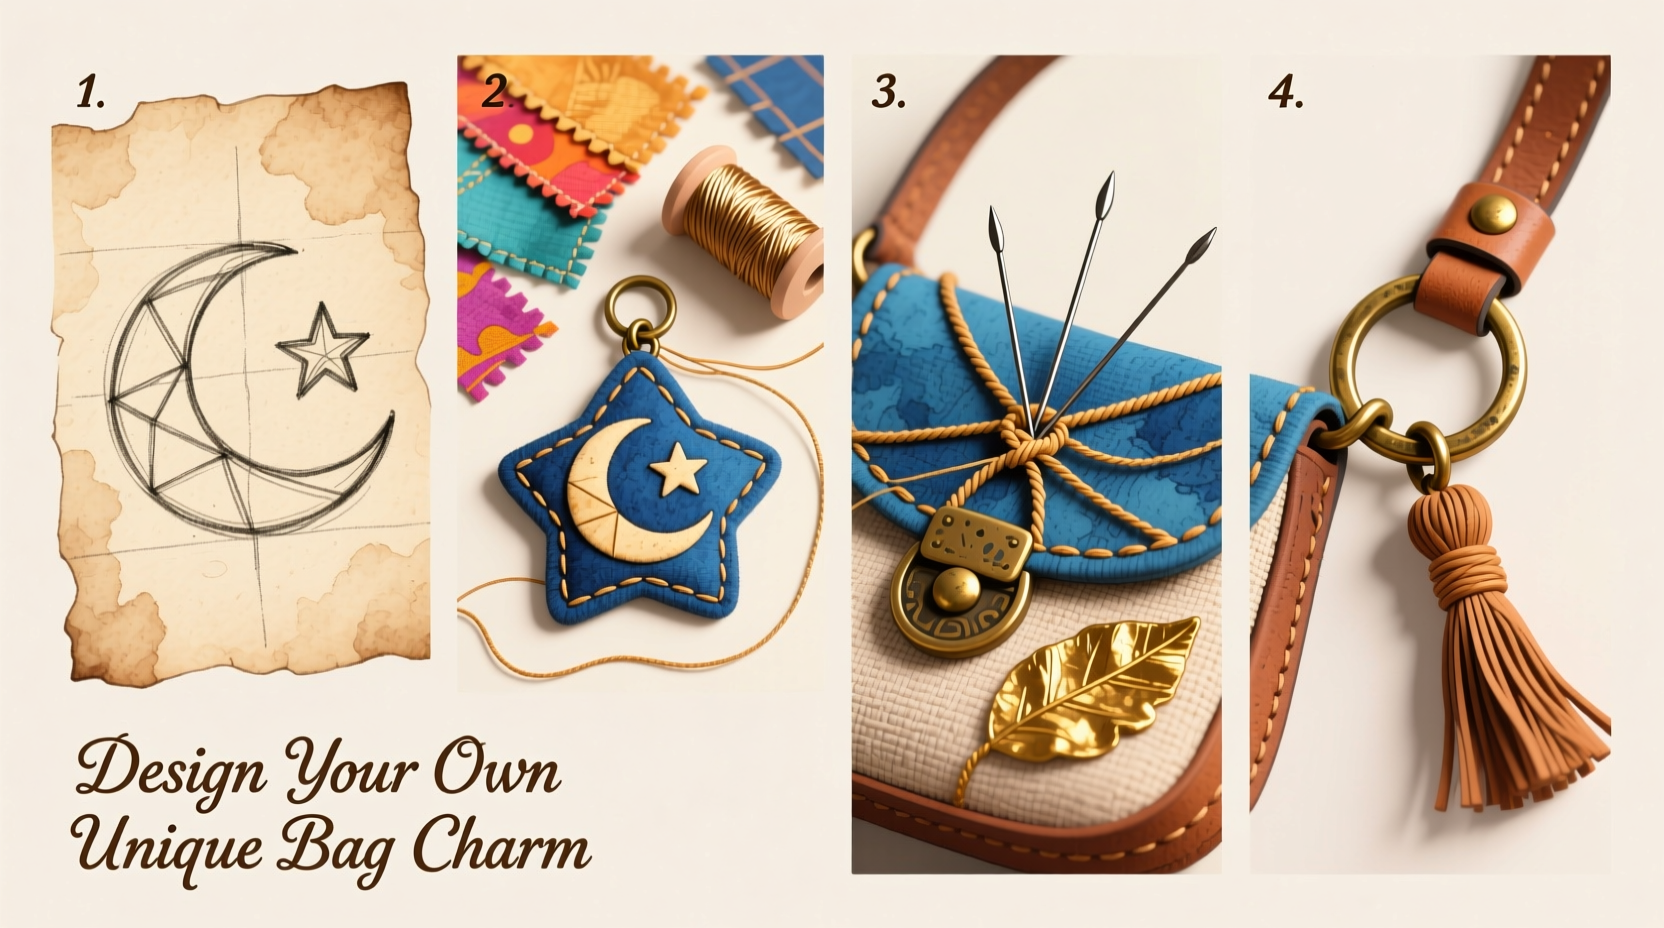
Step-by-Step Guide to Designing Your Unique Bag Charm
Follow this structured process to bring your vision to life—from concept to completion.
- Define Your Purpose and Style
Ask yourself: Is this charm decorative, sentimental, or functional? Are you aiming for minimalist elegance, whimsical fun, or bold statement-making? Sketch a few rough ideas or create a mood board using words like “vintage,” “boho,” “modern,” or “playful” to anchor your direction. - Select Your Base Material
The foundation of your charm determines its weight, texture, and longevity. Common options include:- Felt – Soft, easy to cut, ideal for embroidered or layered designs.
- Resin – Allows encapsulation of small items (dried flowers, glitter, photos).
- Clay (polymer or air-dry) – Moldable, paintable, and durable once cured.
- Metal findings – Use pre-made pendants or engrave custom metal tags.
- Gather Tools and Supplies
Basic tools include scissors, glue (E6000 for strong hold), pliers, needles, thread, and a jump ring. Depending on your medium, you may also need molds, baking trays (for polymer clay), or resin kits. - Create the Main Element
This is where your creativity shines. Shape your clay, pour your resin, stitch your felt, or assemble components. If using polymer clay, bake according to package instructions. For resin, work in a dust-free area and allow 24 hours to cure fully. - Add Personal Details
Embellishments define uniqueness. Consider:- Hand-painted symbols or initials
- Miniature beads or sequins
- Embedded trinkets (tiny keys, shells, vintage buttons)
- Embroidery or cross-stitch patches
- Attach the Connector
Securely fasten a jump ring or split ring to your charm using pliers. Then, attach a lobster clasp, carabiner, or simple loop so it can easily clip onto bags, zippers, or straps. Ensure the hardware is rust-resistant—brass or stainless steel works best. - Test and Refine
Clip the charm onto a bag and assess balance, comfort, and visual appeal. Does it dangle too much? Is the clasp secure? Make adjustments before finalizing.
Material Comparison: Pros and Cons
| Material | Best For | Pros | Cons |
|---|---|---|---|
| Polymer Clay | Sculpted shapes, miniatures | Durable, paintable, oven-baked | Requires baking; fumes if overheated |
| Felt Fabric | Soft, layered designs | No fray, easy to sew, lightweight | Less durable outdoors |
| Epoxy Resin | Encapsulating memories | Glass-like finish, waterproof | Precise mixing needed; long cure time |
| Wood or Laser-Cut Acrylic | Geometric or engraved styles | Smooth finish, eco-friendly options | Requires cutting tools or laser access |
Real Example: From Grief to Gift – Maya’s Memory Charm
After losing her grandmother, Maya wanted a subtle way to carry her memory. She collected tiny items from her grandmother’s sewing box: a spool of vintage thread, a thimble charm, and a scrap of floral fabric. Using air-dry clay, she molded a miniature sewing machine, painted it by hand, and embedded the thread inside a resin dome. She attached it to a brass keyring engraved with “Mama N.” Now, clipped to her tote, the charm serves as both tribute and conversation starter. Friends often ask about it, allowing Maya to share stories she might otherwise keep private.
This example illustrates how deeply personal a bag charm can become—not just an accessory, but a wearable heirloom.
Creative Tips for Lasting Appeal
- Balance size and weight – Large charms should be lightweight to avoid pulling down bag straps.
- Use UV-resistant glue and varnish – Prevents yellowing if exposed to sunlight.
- Layer meaning – Combine symbols (e.g., a compass for travel + a heart for love) to tell richer stories.
- Keep duplicates – Make two of each charm—one to use, one to store as backup.
Essential Checklist: Before You Finish Your Charm
- Is the clasp securely attached and easy to open?
- Have all porous materials been sealed?
- Does the charm reflect your intended theme or emotion?
- Is it balanced when hanging? (No tilting or spinning awkwardly)
- Are sharp edges filed down or covered?
- Have you tested it on your actual bag?
Frequently Asked Questions
Can I make a bag charm without crafting experience?
Absolutely. Start with simple materials like pre-cut felt shapes or ready-made resin blanks. Use sticker embellishments or washi tape for instant customization. No advanced skills required—creativity matters most.
How do I prevent my resin charm from getting cloudy?
Cloudiness usually comes from moisture or improper mixing. Use a digital scale to measure resin and hardener precisely. Work in a warm, dry room, and blow gently with a heat gun or lighter (from a safe distance) to pop bubbles before curing.
What’s the best way to attach delicate items like dried flowers?
Press flowers first between book pages for 3–5 days. Seal them lightly with Mod Podge before embedding in resin. Avoid direct contact with water or prolonged sun exposure to preserve color.
Bring Your Vision to Life
Designing your own bag charm isn’t just about aesthetics—it’s about intention. Each decision, from material to motif, adds depth to an object that travels with you through daily life. Whether you’re commemorating a moment, expressing identity, or gifting thoughtfully, the process connects you to the art of mindful creation.
You don’t need expensive tools or years of training. All you need is curiosity, a few basic supplies, and the willingness to try. Let your charm be imperfect, authentic, and uniquely yours.


 浙公网安备
33010002000092号
浙公网安备
33010002000092号 浙B2-20120091-4
Comments
No comments yet. Why don't you start the discussion?