
In photography, graphic design, and digital branding, presentation matters as much as content. A clean black background can instantly elevate an image—whether it’s a product shot, portrait, or social media post—by eliminating distractions and drawing focus to the subject. Unlike cluttered or mismatched backdrops, a solid black background offers timeless elegance and versatility across platforms.
Contrary to popular belief, you don’t need advanced editing skills or expensive software to achieve this effect. With the right techniques and tools, even beginners can transform ordinary images into sleek, studio-quality visuals in minutes. This guide walks through practical methods, best practices, and real-world applications to help you master this essential visual enhancement.
Why a Black Background Works
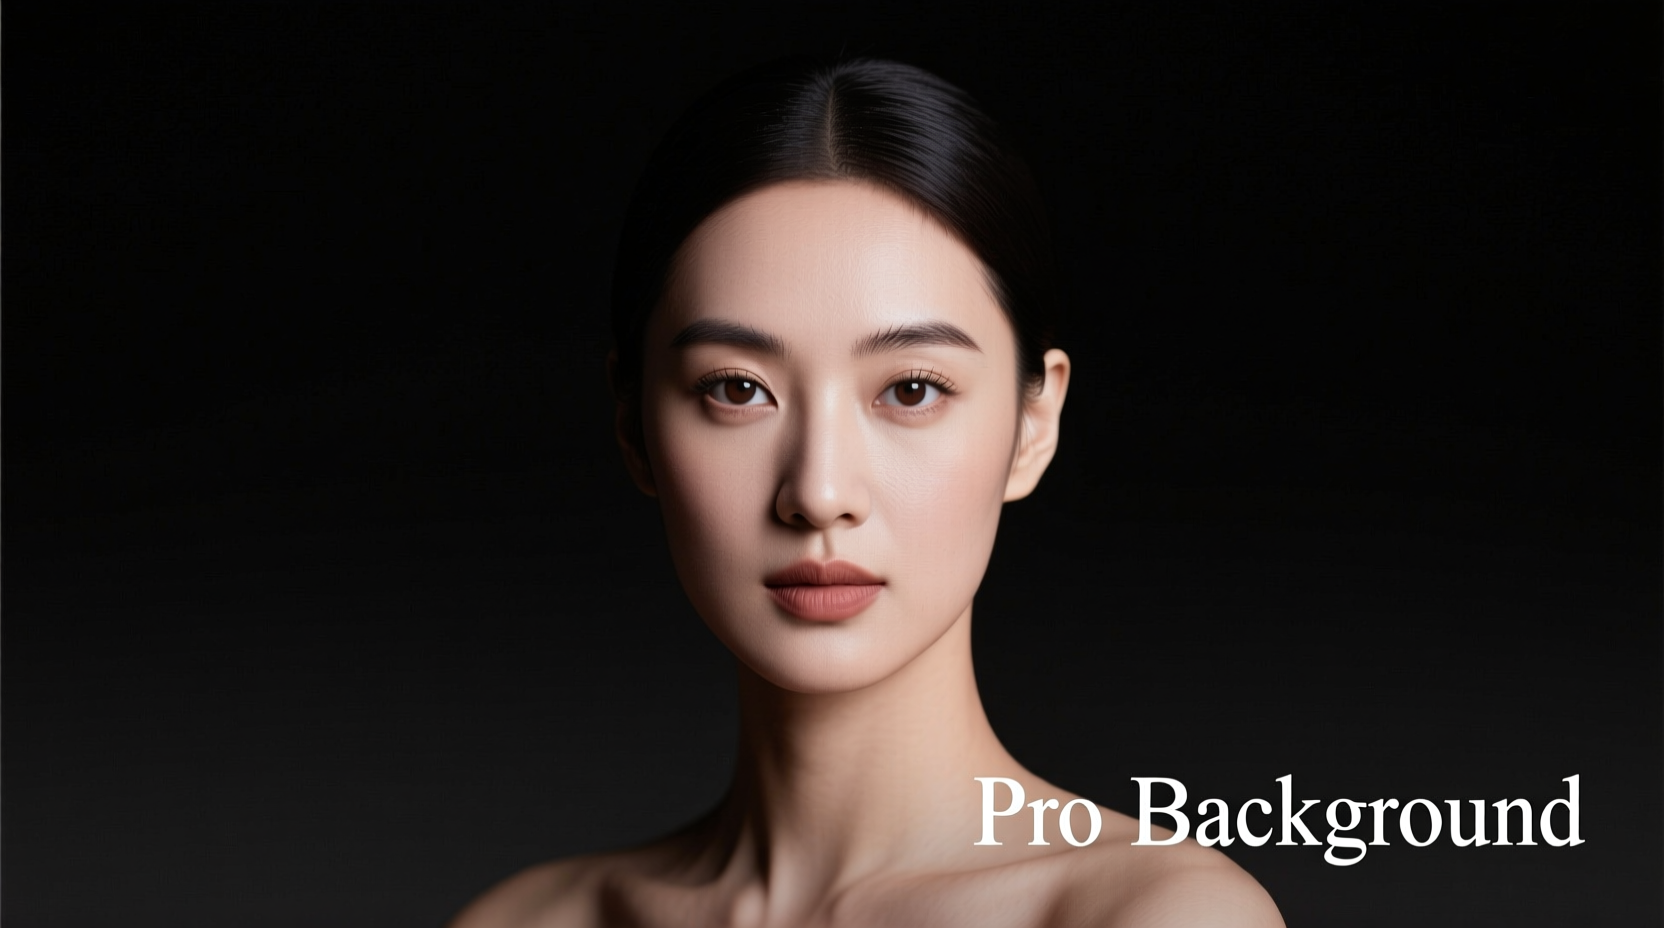
A black background isn’t just a stylistic choice—it serves functional purposes in visual communication. It enhances contrast, especially for light-colored or reflective subjects, making details stand out. In e-commerce, black backgrounds are frequently used for jewelry, watches, and cosmetics because they simulate high-end retail lighting and packaging aesthetics.
From a psychological standpoint, black conveys sophistication, power, and minimalism. When applied correctly, it frames the subject without competing for attention. Designers often use black backgrounds in portfolios, presentations, and editorial layouts to create dramatic impact and ensure readability of overlaid text.
“Black is not merely a color; it’s a canvas that amplifies everything placed upon it.” — Lena Torres, Visual Storytelling Director at StudioFrame
Step-by-Step: How to Add a Black Background
The process varies slightly depending on your toolset and the complexity of the image, but the core steps remain consistent. Follow this universal workflow to achieve professional results:
- Select the Subject: Isolate the main object or person from the original background using selection or masking tools.
- Refine the Edges: Clean up fringes, especially around hair, fur, or transparent elements like glass.
- Create a New Black Background Layer: Place a solid black layer beneath the subject.
- Adjust Lighting and Shadows: Ensure the subject blends naturally with the new backdrop.
- Export in High Quality: Save in appropriate format (JPEG or PNG) with sufficient resolution.
Using Free Tools: Canva and Photopea
For users who prefer accessible, no-cost solutions, web-based editors like Canva and Photopea offer surprisingly powerful capabilities.
- Canva: Upload your image, click “BG Remover” under “Edit Image,” remove the background, then drag a black rectangle behind the subject.
- Photopea: A free online clone of Photoshop. Use the “Select Subject” tool, invert the mask, delete the background, and fill a new layer with #000000.
Both tools require only basic navigation and deliver excellent results for simple compositions. They’re ideal for social media content creators, bloggers, and small business owners.
Premium Software: Adobe Photoshop and Lightroom
For greater precision and control, professionals rely on Adobe’s ecosystem. In Photoshop, the process is streamlined:
- Open your image and unlock the background layer.
- Go to Select > Subject to automatically detect the main figure.
- Add a layer mask to hide the background.
- Right-click the mask and choose “Select and Mask” to refine edges using the Refine Edge Brush.
- Create a new layer below, fill it with black via Edit > Fill > Color.
- Adjust levels or add subtle shadows if needed for realism.
In Lightroom, while full background replacement isn’t possible, you can darken existing backgrounds significantly using the Graduated Filter or Adjustment Brush set to low exposure and increased blacks.
Checklist: Preparing Your Image for a Black Background
- ✅ Shoot against a plain or contrasting background for easier selection
- ✅ Use high-resolution images (minimum 150 DPI)
- ✅ Ensure sharp focus on the subject, especially edges
- ✅ Avoid busy patterns or similar tones between subject and background
- ✅ Back up original files before editing
- ✅ Test output on multiple devices to confirm true black rendering
Common Mistakes and How to Avoid Them
Even experienced editors occasionally fall into traps that undermine the final result. Awareness of these pitfalls leads to cleaner outcomes.
| Mistake | Consequence | Solution |
|---|---|---|
| Poor edge refinement | Halo effects or jagged outlines | Use feathering and zoom in during masking |
| Ignoring lighting mismatch | Subject looks pasted in | Add soft drop shadow or adjust brightness to match |
| Over-compressed export | Pixelation or banding in black areas | Save as PNG for transparency or high-quality JPEG |
| Using pure #000000 on large screens | Loss of depth or texture | Consider near-black shades like #0A0A0A for subtlety |
Real Example: Transforming a Product Photo
Jessica runs a handmade candle shop on Etsy. Her initial product photos were taken near a window with a wooden wall behind them. While natural, the warm tones clashed with her brand’s modern aesthetic. She wanted a cohesive, premium look across listings.
Using Canva’s background remover, she stripped the original backdrop from five product shots in under ten minutes. She added a black background and slightly boosted contrast to make the wax textures pop. The updated images led to a 34% increase in engagement and several customer comments praising the “luxurious presentation.”
This example shows how a simple edit can align visual content with brand identity and influence consumer perception.
Frequently Asked Questions
Can I add a black background on my phone?
Yes. Apps like Snapseed, PicsArt, and Adobe Express allow background changes directly on iOS and Android. Use the “Cutout” or “Replace Background” feature, select your subject, and choose a solid black preset.
Why does my black background look gray on some screens?
Different displays interpret black differently, especially OLED vs. LCD. To maintain consistency, avoid relying solely on visual judgment during editing. Use histogram tools to confirm low luminance values and test on multiple devices before publishing.
Is a black background suitable for all types of images?
Not always. Images with dark subjects or low contrast may blend into a black backdrop. In such cases, consider a dark gray (#121212) or textured background to maintain separation. Evaluate each image individually based on tone and composition.
Final Thoughts and Next Steps
Adding a black background is more than a cosmetic tweak—it’s a strategic move toward professional-grade visuals. Whether you're curating a portfolio, launching an online store, or refining personal photos, this technique enhances clarity, consistency, and visual authority.
The tools are accessible, the learning curve is gentle, and the payoff is immediate. Start with one image today. Apply the steps outlined here, review the result critically, and refine your approach. Over time, this skill will become second nature, elevating every piece of visual content you produce.


 浙公网安备
33010002000092号
浙公网安备
33010002000092号 浙B2-20120091-4
Comments
No comments yet. Why don't you start the discussion?