
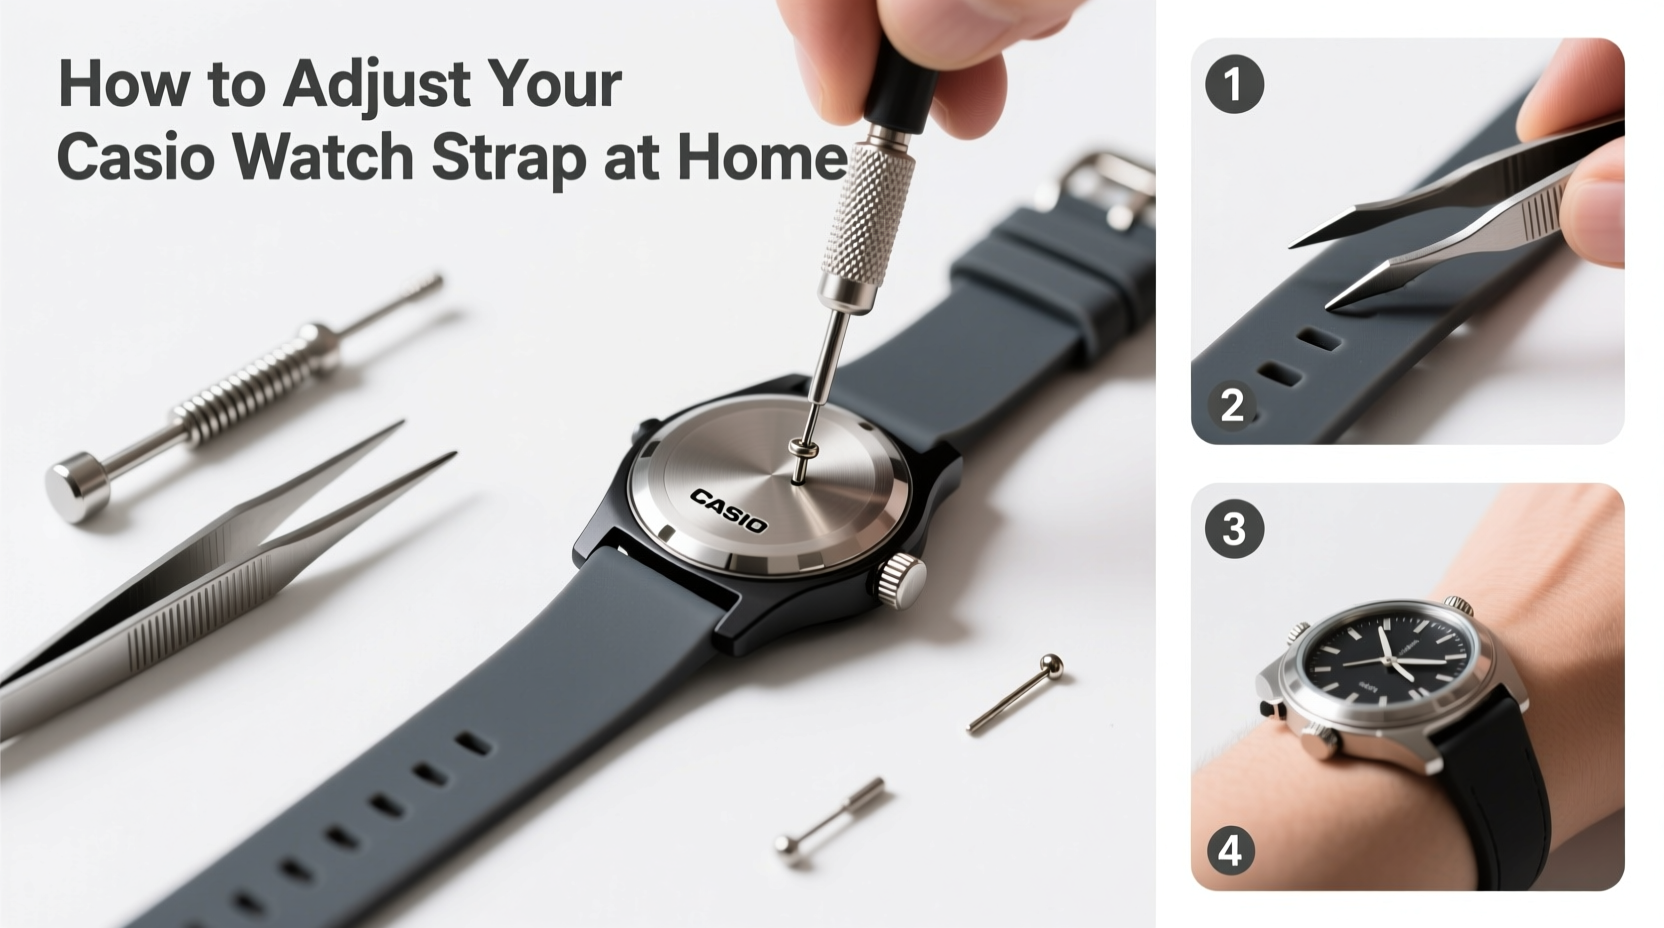
A well-fitted watch enhances both comfort and style. Many people overlook the importance of a properly adjusted watch strap, leading to discomfort, slipping, or even damage over time. Casio watches, known for their durability and functionality, often come with metal bracelets or resin bands that can be fine-tuned at home. Whether you’ve inherited a watch, received one as a gift, or noticed your current strap has loosened, adjusting it yourself is simpler than you might think. With minimal tools and clear guidance, you can achieve a snug, secure fit tailored to your wrist size.
Understanding Your Casio Watch Strap Type
Casio produces a wide range of watches with different strap types, each requiring a slightly different adjustment method. The two most common are:
- Metal Bracelets – Typically found on G-Shock, Edifice, and Wave Ceptor models. These use removable links and pins for sizing.
- Resin (Rubber/Plastic) Bands – Common on digital and sport models like the classic F-91W or newer Pro Trek series. These adjust via holes and buckles.
Before making any changes, identify your strap type. This determines whether you’ll be removing links, bending pins, or simply repositioning the clasp.
Step-by-Step Guide to Adjusting a Metal Bracelet Strap
If your Casio features a metal band and feels too loose or too tight, follow these steps to resize it precisely:
- Gather Your Tools: You’ll need a small hammer, a push pin or specialized link removal tool, a flat surface, and a soft cloth to protect the watch face.
- Determine How Many Links to Remove: Wrap the watch around your wrist and note where the clasp sits. Ideally, the end should align with the middle hole. Each link removed shortens the band by about 5–6mm.
- Lay the Watch Flat: Place it on a padded surface with the bracelet facing up. Avoid placing pressure on the screen or crown.
- Locate the Pins: Metal bands use split pins or solid pins to connect links. Look for small notches on the edge of the links—these indicate where to insert the pin pusher.
- Push Out the Pin: Align the push pin with the hole and gently tap it with a hammer. Move slowly to avoid damaging the pin or surrounding metal. Push in the direction shown by the arrow on the link (if present).
- Remove Excess Links: Once the pin is partially out, pull it the rest of the way using pliers if needed. Remove the necessary number of links from both sides for symmetry.
- Reconnect the Remaining Links: Slide the pin back into place from the correct side (again, follow the arrow). Tap it gently until flush with the link. Do not overextend the pin beyond the edge.
- Test the Fit: Put the watch on your wrist. It should sit snugly without sliding excessively or pinching the skin.
Some Casio models use screws instead of pins. In those cases, use a precision screwdriver to remove and replace fasteners carefully.
Adjusting a Resin Strap Without Tools
Resin straps are simpler to adjust but offer less precision. Most feature multiple holes along the band and a standard buckle system.
- Unbuckle the Watch: Open the clasp and slide the strap out slightly to access the existing hole.
- Mark the Desired Hole Position: Try the watch on and determine if you need a tighter or looser fit. If no hole aligns perfectly, consider creating a new one.
- Create a New Hole (Optional): Use a heated needle or awl to melt a new hole through the resin. Be cautious—apply steady pressure and avoid cracking the material. Let it cool before testing.
- Trim Excess Length (If Needed): On longer straps, especially on unisex models, you may cut off extra length behind the last hole. Use sharp scissors and finish the edge with heat to prevent fraying.
- Secure the Clasp: Reinsert the strap and close the buckle. Ensure it clicks securely and doesn’t slip under tension.
Do’s and Don’ts of Watch Strap Adjustment
| Do’s | Don’ts |
|---|---|
| Work on a soft, clean surface to avoid scratches. | Use excessive force when pushing out pins. |
| Count and remove equal links from both sides of the bracelet. | Discard removed links immediately—save them in case you need to reassemble later. |
| Double-check pin direction using manufacturer markings. | Attempt adjustments while wearing rings or jewelry that could scratch the watch. |
| Test the clasp mechanism after reassembly. | Expose resin straps to open flames when finishing cut edges. |
Real-Life Example: Fixing a Loose G-Shock for Daily Wear
James, a warehouse supervisor, received a Casio G-Shock GA-2100 as a birthday gift. While he loved its sleek design and toughness, the metal bracelet was too large for his slim wrists. It rotated constantly during shifts, distracting him during tasks. Rather than visiting a jeweler, he decided to adjust it at home.
Using a thumbtack and a small rubber mallet, he carefully removed two links from each side of the bracelet, following online guides and checking alignment arrows. After reassembling the band, the watch sat securely without movement. “It fits like it was made for me now,” James said. “And I saved $20 on a professional service.”
“Most modern Casio metal bands are designed for user-level adjustments. As long as you proceed slowly and respect the mechanics, you can achieve a factory-like fit at home.” — Daniel Reyes, Watch Technician & Repair Specialist
Essential Checklist Before You Begin
- Identify your strap type (metal or resin)
- Check for directional arrows on metal links
- Gather appropriate tools: push pin, hammer, pliers, ruler
- Protect the watch face with a cloth or foam pad
- Remove the same number of links from both sides (for symmetry)
- Test the clasp function after adjustment
- Store removed links and pins in a safe place
Frequently Asked Questions
Can I adjust my Casio watch strap without any tools?
Yes, for resin straps—simply use the existing holes or carefully create a new one with a heated pin. For metal bracelets, basic household items like a thumbtack and small hammer can substitute for professional tools, though results vary by model.
How tight should my Casio watch fit?
The strap should allow one finger to slide comfortably between the band and your wrist. It should stay in place during movement but not leave marks or restrict circulation.
What if I remove too many links or make the strap too short?
If you’ve shortened the strap excessively, contact Casio customer support or a local jeweler. Replacement links are sometimes available, though availability depends on the model and region. Always err on the side of caution—remove one link at a time and test frequently.
Final Thoughts: A Perfect Fit Is Within Reach
Adjusting your Casio watch strap at home is a practical skill that enhances both comfort and longevity. Whether you're customizing a new purchase or reviving an old favorite, taking the time to achieve the right fit makes a noticeable difference in daily wear. With patience, attention to detail, and the right approach, you can complete the process safely and effectively—without needing professional help.


 浙公网安备
33010002000092号
浙公网安备
33010002000092号 浙B2-20120091-4
Comments
No comments yet. Why don't you start the discussion?