
Uploading a video to YouTube doesn’t mean it has to be seen by everyone right away. Whether you're sharing footage with a select group, testing content with collaborators, or preparing for a big launch, YouTube’s privacy settings give you full control over who sees your videos and when. But what happens when it's time to make a private video public—or switch it to unlisted? Many creators assume they need to re-upload, but the process is far simpler. With just a few clicks, you can adjust your video’s visibility directly from your account.
This guide walks through every method available—desktop, mobile, and bulk editing—so you can confidently manage your content’s reach. Whether you're a new creator or managing a channel with hundreds of videos, understanding these tools ensures your content appears exactly where and when you want it to.
Understanding YouTube Privacy Options
Before making changes, it's essential to understand the three main privacy settings YouTube offers:
- Public: Anyone on or off YouTube can view the video. It appears in search results, recommendations, and your channel.
- Unlisted: The video won’t appear in search results or recommendations, but anyone with the link can watch it. It also shows up on your channel under “Videos” if you choose to display it there.
- Private: Only you and up to 50 people you invite via email can view the video. It does not appear on your channel or in any public area of YouTube.
Switching between these settings is non-destructive—you don’t lose views, comments, or engagement data. This flexibility makes it safe to experiment with visibility as your content strategy evolves.
“Creators often delay publishing because they fear losing progress. YouTube’s privacy system is designed to protect your work while giving you room to refine timing and audience.” — Lena Park, Digital Content Strategist
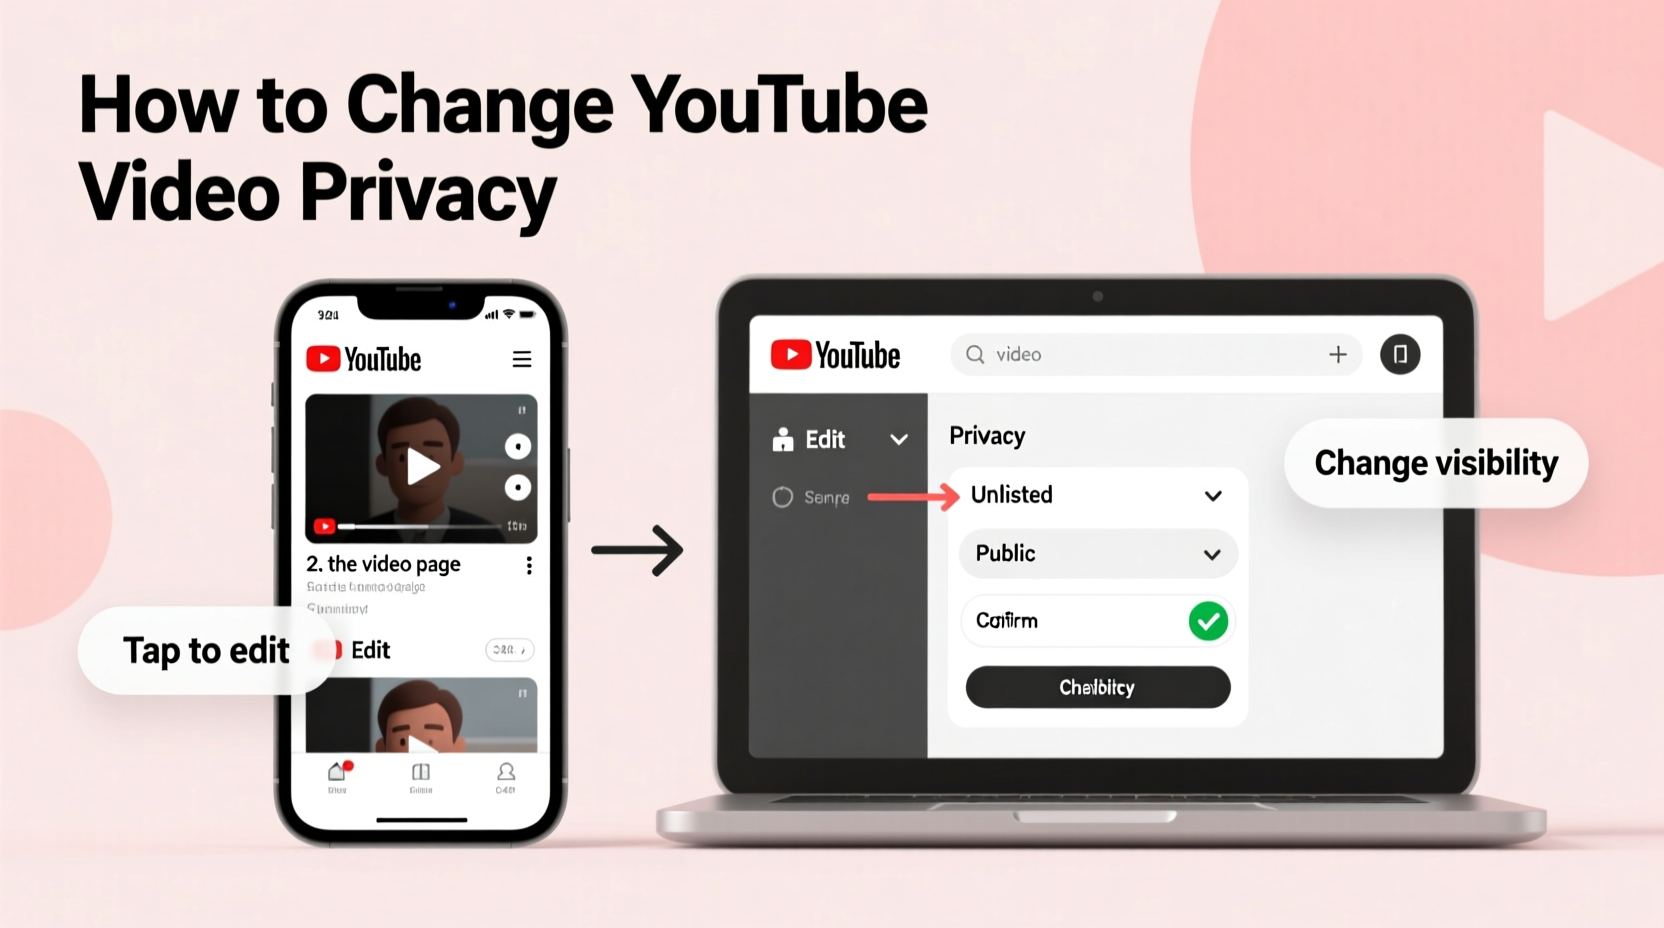
Step-by-Step: Change Video Privacy from Desktop
The most reliable way to update privacy settings is through YouTube Studio on a desktop browser. Here’s how:
- Go to YouTube Studio and sign in.
- In the left sidebar, click Content to see all your uploaded videos.
- Locate the video you want to edit. Use the search bar or filters if needed.
- Hover over the video thumbnail and click the pencil (edit) icon, or click directly on the video title to open its details.
- Scroll down to the Visibility section.
- Select either Public or Unlisted from the dropdown menu.
- Click Save at the top or bottom of the page.
Once saved, the change takes effect immediately. If switching to public, the video may take a few minutes to appear in search results and recommendations as YouTube indexes it.
Using the YouTube Mobile App
If you’re on the go, you can still adjust privacy settings using the YouTube Studio app (not the standard YouTube app).
- Open the YouTube Studio app on your iOS or Android device.
- Tap Content from the bottom menu.
- Find the video and tap the pencil (edit) icon next to it.
- Tap Visibility.
- Choose Public or Unlisted.
- Tap Save.
Note: The mobile interface may load slower with large libraries, and some advanced features aren’t available. For best results, use desktop for complex edits or batch updates.
Bulk Editing Multiple Videos
If you’ve uploaded several private videos—such as event recordings or internal training clips—and now want to publish them together, YouTube allows bulk privacy changes.
- In YouTube Studio (desktop), go to Content.
- Check the box next to each video you want to update.
- Click the Actions dropdown above the list.
- Select Edit visibility.
- Choose your desired setting: Public or Unlisted.
- Confirm and click Apply.
This feature saves significant time when launching a playlist or seasonal content series. Just ensure each video is finalized—titles, thumbnails, descriptions—before going public.
| Setting | Appears in Search? | Shared via Link? | Visible on Channel? | Recommended? |
|---|---|---|---|---|
| Public | Yes | Yes | Yes | Yes |
| Unlisted | No | Yes | Optional | No |
| Private | No | No* | No | No |
*Private videos can only be viewed by invited users via email invitation from YouTube.
Real Example: Launching a Product Demo Series
Sophie runs a small tech review channel and records a four-part demo of a new gadget. She uploads all videos as private while she finalizes scripts and thumbnails. Her team reviews each one using the private links.
After two weeks, the product launches. Sophie logs into YouTube Studio, selects all four videos, and changes their visibility to “unlisted” so she can send the links to her newsletter subscribers early. The next day, she switches them to “public,” schedules social posts, and adds them to a playlist titled “Full Review Series.”
By using privacy settings strategically, Sophie maintained control over timing, avoided premature exposure, and maximized viewer retention during launch week.
Common Mistakes to Avoid
- Assuming unlisted means secure: Unlisted videos can be shared by anyone with the link. They are not password-protected.
- Forgetting SEO elements: Changing privacy doesn’t auto-fill titles or tags. Always review metadata before going public.
- Publishing too fast: A sudden shift from private to public without promotion can limit reach. Plan a soft launch with email or community posts first.
- Misunderstanding comment behavior: Comments cannot be left on private videos. They only become available once the video is public or unlisted.
FAQ
Can I revert a public video back to private?
Yes. You can change a video from public back to private or unlisted at any time. However, views, likes, and comments will no longer be publicly visible if set to private.
Do unlisted videos get copyright claims?
Yes. YouTube’s Content ID system scans all videos regardless of privacy setting. Uploading copyrighted material—even privately—can trigger claims or strikes.
Will changing privacy affect my video’s algorithm performance?
When a video goes from private to public, YouTube treats it as newly published. Early engagement (likes, shares, watch time) becomes crucial for recommendation placement. Consider promoting it initially to boost signals.
Final Checklist Before Going Public
- ✅ Finalize title, description, and tags
- Optimize for search and clarity.
- ✅ Set an engaging custom thumbnail
- Use high-contrast visuals that reflect the content.
- ✅ Review subtitles and captions
- Improve accessibility and retention.
- ✅ Confirm privacy setting
- Double-check before saving.
- ✅ Share strategically
- Post on social platforms, embed on blogs, or email to subscribers.
Conclusion
Managing YouTube video privacy isn’t just about hiding content—it’s about controlling your narrative. Whether you're building anticipation, collaborating behind the scenes, or scaling your content rollout, the ability to switch from private to public or unlisted gives you strategic flexibility. The tools are built directly into YouTube Studio, accessible on any device, and simple enough for beginners yet powerful for professionals.
Take a few minutes today to review your unpublished videos. Are there hidden gems ready to be shared? Update their settings, optimize their presentation, and let your audience discover what you’ve been working on. Your next most-watched video might already be uploaded—just waiting for the right moment to go live.


 浙公网安备
33010002000092号
浙公网安备
33010002000092号 浙B2-20120091-4
Comments
No comments yet. Why don't you start the discussion?