
Transparent PNGs are essential for designers, marketers, and content creators who need clean, professional graphics. Whether you're preparing a logo for a website, creating social media assets, or designing product mockups, removing the background and saving in PNG format ensures your image blends seamlessly into any layout. The good news? You don’t need advanced design skills to achieve flawless results. With the right tools and techniques, anyone can create high-quality transparent PNGs quickly and consistently.
Why Transparent PNGs Matter
PNG (Portable Network Graphics) is one of the few image formats that support transparency. Unlike JPEG, which always has a solid background, PNG allows pixels to be fully or partially transparent. This makes it ideal for logos, icons, text overlays, and digital illustrations where a clean integration with varying backgrounds is required.
Transparency preserves visual integrity across different contexts—imagine placing a black logo on both a dark and light background. Without transparency, you’d need two separate versions. With a transparent PNG, one file works everywhere.
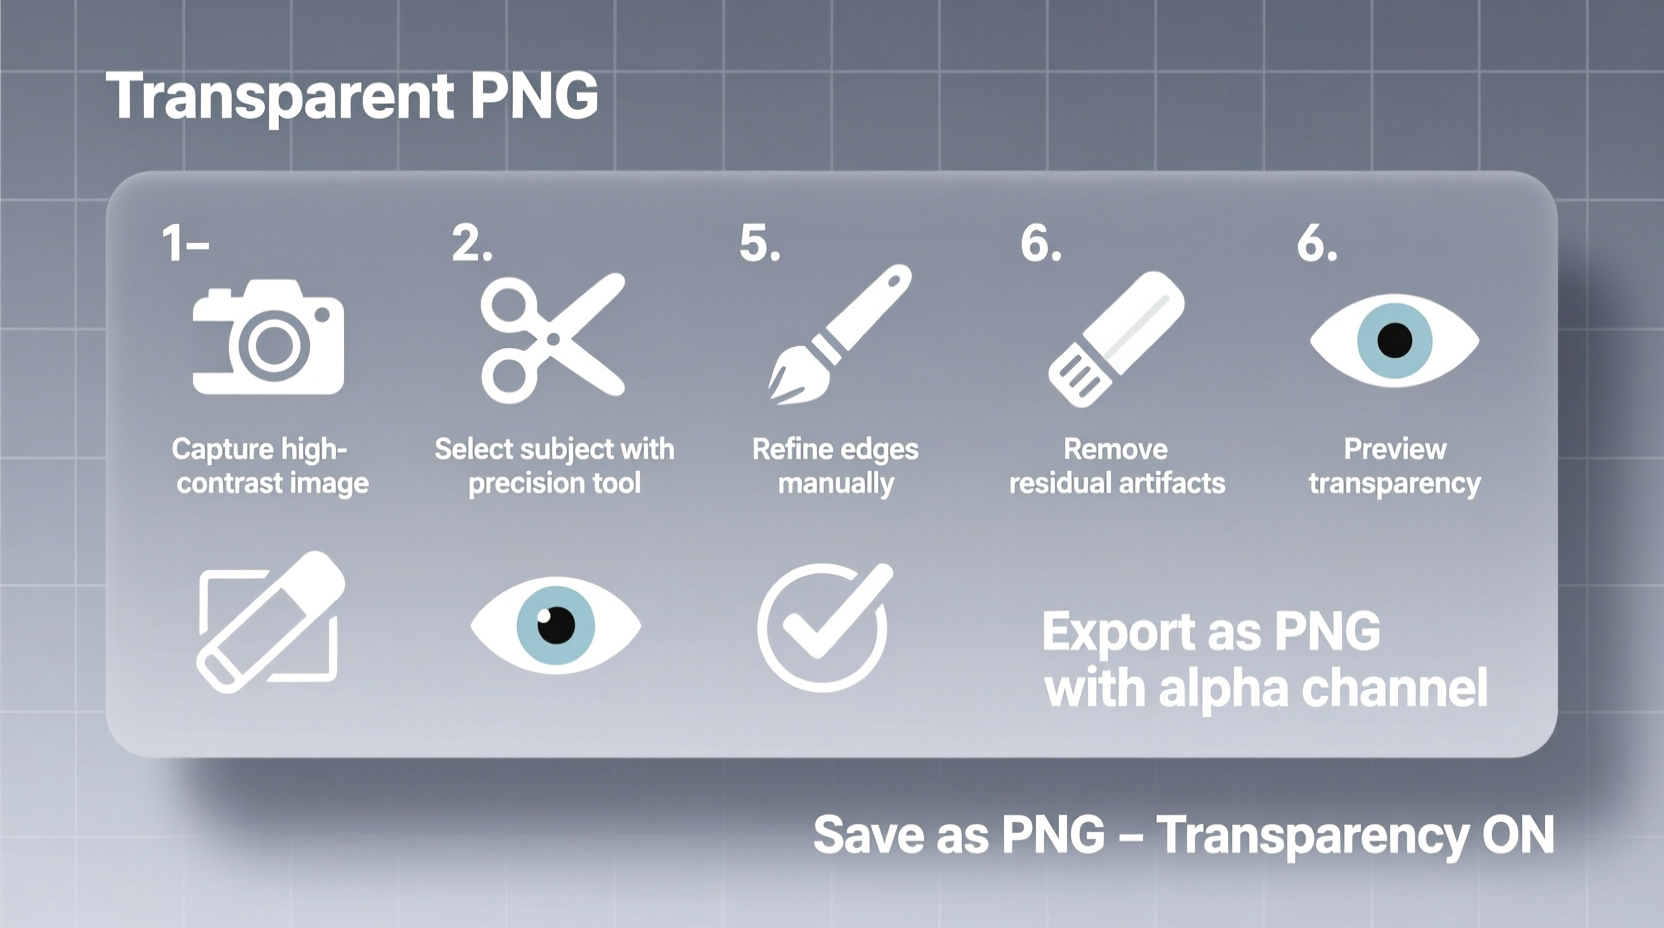
Step-by-Step Guide to Creating Transparent PNGs
The process of creating a transparent PNG involves three core stages: selecting the subject, removing the background, and exporting correctly. Follow these steps carefully to ensure precision and quality.
- Choose the Right Tool: Use software that supports layer-based editing and transparency. Recommended options include Adobe Photoshop, GIMP (free), Canva Pro, or online tools like Remove.bg.
- Open Your Image: Import the image into your chosen editor. Make sure the background layer is unlocked (in Photoshop, double-click the layer to convert it).
- Select the Subject: Use selection tools like the Magic Wand, Quick Selection Tool, or Pen Tool to outline the object you want to keep. For complex edges (hair, fur, fine details), use Refine Edge or Select Subject features.
- Invert and Delete Background: Once the subject is selected, invert the selection (Ctrl+Shift+I / Cmd+Shift+I) to target the background. Press Delete to remove it. You should now see a checkerboard pattern—this indicates transparency.
- Refine Edges: Zoom in and inspect the edges. Use the Eraser or Masking tool to clean up stray pixels or halos. Feathering slightly (0.5–1px) can soften harsh lines.
- Export as PNG: Go to File > Export > Export As (or Save for Web). Choose PNG-24 format, which supports full alpha transparency. Ensure “Transparency” is checked before saving.
Best Tools Compared
| Tool | Best For | Pros | Cons |
|---|---|---|---|
| Adobe Photoshop | Professional editing, complex images | Precision tools, layer control, batch processing | Paid subscription, steep learning curve |
| GIMP | Budget-conscious users, open-source lovers | Free, powerful features, cross-platform | Interface less intuitive, slower performance |
| Remove.bg | Quick removals, portraits, e-commerce | Fully automated, fast, no install needed | Limited customization, paid for HD downloads |
| Canva Pro | Social media creators, non-designers | User-friendly, integrates with templates | Background remover not always precise |
| Figma | Digital designers, UI/UX workflows | Free, collaborative, real-time editing | Not optimized for photo-heavy work |
Common Mistakes to Avoid
- Saving as JPEG instead of PNG: This will fill the background with white or another color, defeating the purpose.
- Overlooking anti-aliasing: Jagged edges often result from poor edge handling. Use smoothing or feathering tools carefully.
- Ignoring resolution: Low-res images become pixelated when scaled. Always start with high-quality source files (300 DPI for print, 72+ DPI for web).
- Forgetting to zoom: Work at 100–200% zoom to catch tiny imperfections around edges.
- Skipping layer masks: Instead of deleting parts permanently, use masks. They allow non-destructive editing if changes are needed later.
Real Example: E-Commerce Product Image Cleanup
Jamila runs an online boutique selling handmade jewelry. She takes product photos against a white backdrop, but shadows and slight color spill make them look unprofessional on her website. Her goal: turn these into clean, transparent PNGs for use on colored banners and promotional flyers.
She uploads one image to Remove.bg and gets a quick result—but notices faint gray fringes around the pendant. So she imports the original into GIMP. Using the Free Select Tool and a layer mask, she manually refines the edges. After applying a slight Gaussian blur (0.8px) to smooth transitions, she exports as PNG-24. The final image integrates perfectly into her marketing materials, enhancing perceived quality and consistency.
This hybrid approach—automated removal followed by manual touch-ups—saved her hours while delivering studio-grade results.
“Precision in background removal isn’t just about aesthetics—it directly impacts conversion rates. Clean visuals build trust.” — Marcus Lin, Digital Design Lead at Shopify Studios
Essential Checklist for Flawless Transparent PNGs
Use this checklist every time you prepare a transparent image to ensure quality and compatibility:
- ✅ Start with a high-resolution image (minimum 72 DPI for web)
- ✅ Unlock the background layer in your editor
- ✅ Use selection tools appropriate to the subject complexity
- ✅ Refine edges using feathering, masking, or AI-assisted tools
- ✅ Verify transparency with a checkerboard background
- ✅ Export as PNG-24 with transparency enabled
- ✅ Test the image on multiple background colors (white, black, gradient)
- ✅ Keep the original file for future edits
Frequently Asked Questions
Can I make a transparent PNG for free?
Yes. Tools like GIMP, Photopea (browser-based Photoshop alternative), and Remove.bg offer free tiers that let you create transparent PNGs without cost. While premium versions unlock higher resolutions and batch processing, basic needs are covered in free plans.
Why does my PNG still have a white background?
This usually happens when the image was saved in JPEG format after editing or exported without enabling transparency. Double-check your export settings—ensure you’re choosing PNG-24 and that the “Transparency” option is active. Also, confirm the canvas shows a checkerboard pattern before saving.
How do I remove a semi-transparent background like glass or smoke?
These require advanced masking techniques. In Photoshop, use the Channel Masking method: go to Channels panel, find the one with highest contrast, duplicate it, enhance contrast with Levels, then load it as a selection. This isolates subtle tones better than standard tools.
Master Transparency, Elevate Your Visuals
Creating transparent PNGs is a foundational skill in modern digital creation. From simple logo cutouts to detailed portrait extractions, the ability to cleanly remove backgrounds empowers your designs with flexibility and polish. By combining smart tools with careful attention to detail, you can produce professional-grade results regardless of experience level.
The key is consistency—follow a repeatable workflow, verify each output, and never assume automation alone is enough. A few extra minutes refining edges can dramatically improve how your graphics are perceived.


 浙公网安备
33010002000092号
浙公网安备
33010002000092号 浙B2-20120091-4
Comments
No comments yet. Why don't you start the discussion?