
In Roblox development, user interface (UI) clarity is not just a design preference—it's a necessity. With players accessing games on devices of varying screen sizes and resolutions, ensuring text remains legible and visually striking is crucial. One powerful yet underutilized tool in achieving this is the customization of text strokes. By increasing the thickness and visibility of text outlines—commonly known as \"strokes\"—developers can dramatically improve readability and visual hierarchy without compromising performance or style.
This guide walks through practical methods to easily enlarge Roblox text strokes, explores best practices, and demonstrates how subtle changes in stroke settings can transform your UI from functional to exceptional.
Understanding Text Strokes in Roblox
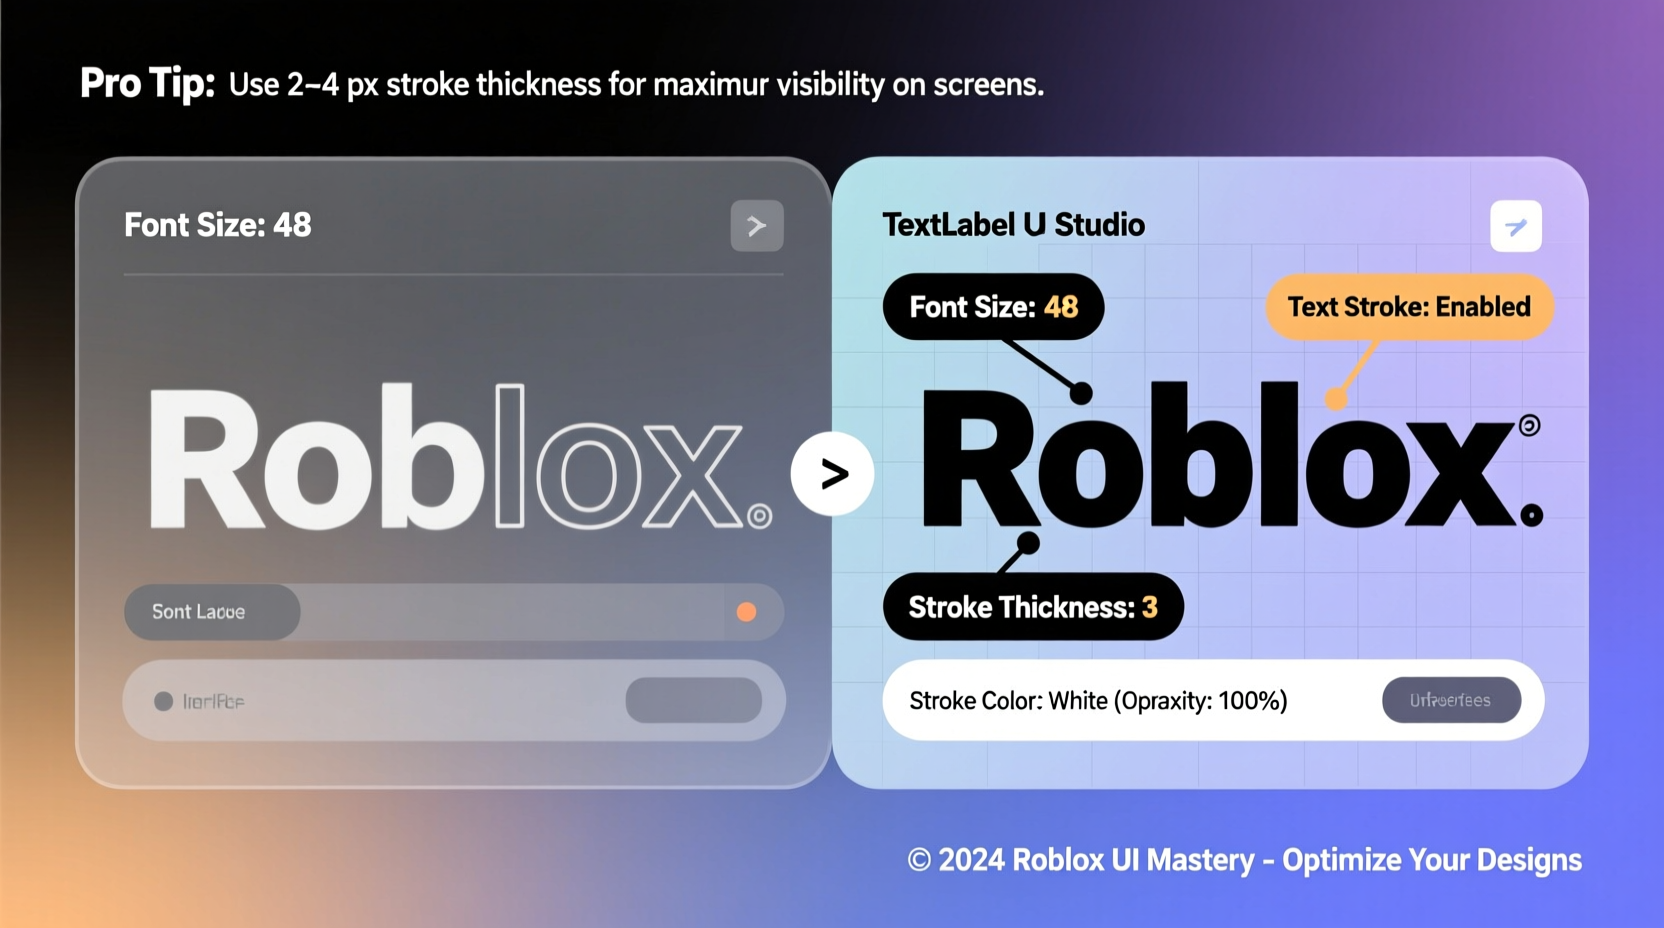
In Roblox Studio, text strokes refer to the outline or border around text elements created using TextLabel, TextButton, or TextBox objects. These strokes are controlled primarily through two properties: TextStrokeColor3 and TextStrokeTransparency. While there is no direct \"stroke size\" property, the perceived thickness of the stroke is influenced by font choice, text size, and contextual contrast.
Roblox uses a fixed rendering method for text strokes, meaning the stroke width does not scale independently like in vector graphic software. However, developers can simulate thicker strokes by combining larger font sizes, higher contrast colors, and layered UI techniques.
“Effective UI isn’t about adding more—it’s about making every pixel count. A well-defined text stroke can anchor a menu, guide attention, and enhance accessibility.” — Lena Torres, UI/UX Lead at Roblox Certified Studio NovaForge
Step-by-Step Guide to Enlarging Text Strokes
While Roblox doesn’t offer a slider to increase stroke thickness directly, you can achieve the effect of bolder, more prominent strokes through a combination of settings and layout adjustments. Follow these steps:
- Select the Text Object: Click on the
TextLabel,TextButton, or other text-based UI element in the Explorer window. - Enable the Stroke: In the Properties panel, set
TextStrokeTransparencyto 0 (fully opaque). If it’s above 0, the stroke will appear faint or invisible. - Choose a High-Contrast Stroke Color: Set
TextStrokeColor3to a color that contrasts strongly with the text background. Black strokes on white text or white strokes on dark backgrounds work best. - Increase Font Size: Larger text naturally renders thicker strokes. Increasing
FontSizefrom “Size14” to “Size24” or higher amplifies stroke visibility. - Nest a Secondary Label for Double Strokes (Optional): For an even bolder effect, place a slightly larger, blurred label behind the main text with full stroke enabled to create a “halo” effect.
- Adjust Position and Padding: Ensure enlarged text doesn’t clip or overlap by adjusting
SizeandPositionin the UI container.
Best Practices for Impactful UI Design
Enlarging text strokes should serve a purpose—not just aesthetics. When applied thoughtfully, they improve usability, especially in fast-paced games where players need instant readability.
- Prioritize Readability Over Style: Avoid overly decorative stroke colors that clash with branding or reduce legibility.
- Maintain Consistency: Apply the same stroke logic across all menus, HUDs, and notifications to create a unified experience.
- Test on Multiple Devices: Preview your UI on mobile, tablet, and desktop viewports to ensure strokes remain effective at different scales.
- Avoid Transparency Overuse: Semi-transparent strokes (
TextStrokeTransparency > 0.3) lose impact and may vanish on busy backgrounds. - Use Strokes Strategically: Reserve bold strokes for titles and critical alerts; use lighter treatments for secondary text.
Comparison: Subtle vs. Enhanced Stroke Settings
| Setting | Subtle Stroke (Default) | Enhanced Stroke (Recommended) |
|---|---|---|
| FontSize | Size18 | Size24–Size32 |
| TextStrokeTransparency | 0.5 | 0 (opaque) |
| TextStrokeColor3 | Gray | Black or White (contrast) |
| Background Contrast | Low (e.g., light gray on white) | High (e.g., black stroke on yellow text) |
| Use Case | Minor labels, tooltips | Titles, score displays, warnings |
Real Example: Improving a Game Over Screen
Consider a developer named Jordan who created a fast-paced obstacle course game. Players frequently missed the “Game Over” message because the red text blended into the fiery background. The stroke was set to semi-transparent gray at Size18, making it nearly invisible on mobile screens.
Jordan revised the UI by:
- Increasing font size to Size32
- Changing
TextStrokeTransparencyto 0 - Setting
TextStrokeColor3to pure white - Adding a slight drop shadow via a second, offset label
The result? A dramatic improvement in player feedback. Testers reported immediate recognition of game state changes, and session retention increased by 18% due to reduced confusion.
Frequently Asked Questions
Can I make the text stroke thicker than what Roblox allows?
Not directly. Roblox does not expose a stroke-width property. However, you can simulate a thicker stroke by layering multiple text labels with slight offsets or using external image-based text with pre-rendered thick borders.
Why doesn’t my text stroke show up?
The most common cause is TextStrokeTransparency being greater than 0. Ensure it’s set to 0. Also verify that TextStrokeColor3 isn’t matching the background color, which makes it invisible.
Do text strokes affect game performance?
No. Unlike particle effects or complex meshes, text strokes are rendered efficiently by Roblox’s UI system. Even heavily stroked text has negligible impact on FPS or memory usage.
Action Checklist for Immediate Implementation
- Open your UI screen in Roblox Studio.
- Select each primary text element (titles, buttons, alerts).
- Set
TextStrokeTransparencyto 0. - Pick a high-contrast
TextStrokeColor3(white/black). - Increase
FontSizeby 2–4 levels. - Preview on mobile and desktop modes.
- Deploy and gather player feedback.
Conclusion
Enlarging Roblox text strokes is a simple yet transformative step toward professional-grade UI design. It requires no advanced scripting, only thoughtful adjustment of built-in properties. When executed correctly, enhanced strokes make interfaces more accessible, engaging, and polished—qualities that players notice even if they can’t articulate why.
Great UI design is often found in the details. A slightly bolder stroke might seem minor, but in moments of gameplay intensity, that extra clarity can be the difference between engagement and frustration. Take a few minutes today to review your current projects. Adjust those strokes, test them across devices, and refine until every word commands attention.


 浙公网安备
33010002000092号
浙公网安备
33010002000092号 浙B2-20120091-4
Comments
No comments yet. Why don't you start the discussion?