
Few things are more frustrating than discovering your favorite wooden table has become your dog’s personal chew toy. Whether it's a vintage side table or a family heirloom, a gnawed leg can compromise both appearance and stability. The good news? Most damage is repairable with common household tools and a little patience. This guide walks you through a complete restoration process—no woodworking degree required. With the right approach, you can return your furniture to its former glory while setting boundaries for your furry friend.
Assessing the Damage: Know What You’re Dealing With
The first step in any repair is understanding the extent of the damage. Not all chew marks are created equal. Some dogs merely scrape the surface; others gouge deep into the wood, weakening structural integrity.
Examine the leg closely:
- Is the damage limited to the finish, or has the wood itself been compromised?
- Are there splinters, cracks, or missing chunks?
- Does the leg wobble when pressure is applied?
If the leg is structurally unsound—meaning it bends under weight or shows deep fractures—repair may not be enough. In such cases, reinforcement or replacement becomes necessary. For minor to moderate chewing, however, restoration is both feasible and cost-effective.
Essential Tools and Materials
Before beginning repairs, gather the following supplies. Most can be found at hardware stores or online:
| Tool/Material | Purpose | Recommended Brand/Type |
|---|---|---|
| Sanding block (120 & 220 grit) | Smooth rough edges and prepare surface | 3M Sandpaper Sheets |
| Wood filler or epoxy putty | Fill deep gouges and rebuild shape | Minwax High-Performance Wood Filler |
| Chisel or utility knife | Remove loose splinters | X-Acto Knife or Stanley FatMax |
| Wood stain (matching original) | Restore color after repair | Varathane Premium Wood Stain |
| Clear polyurethane finish | Protect repaired area | Minwax Fast-Drying Polyurethane |
| Clean cloth and gloves | Safe application and cleanup | Cotton rags, nitrile gloves |
Having the correct materials on hand prevents mid-repair delays and ensures a professional-looking finish.
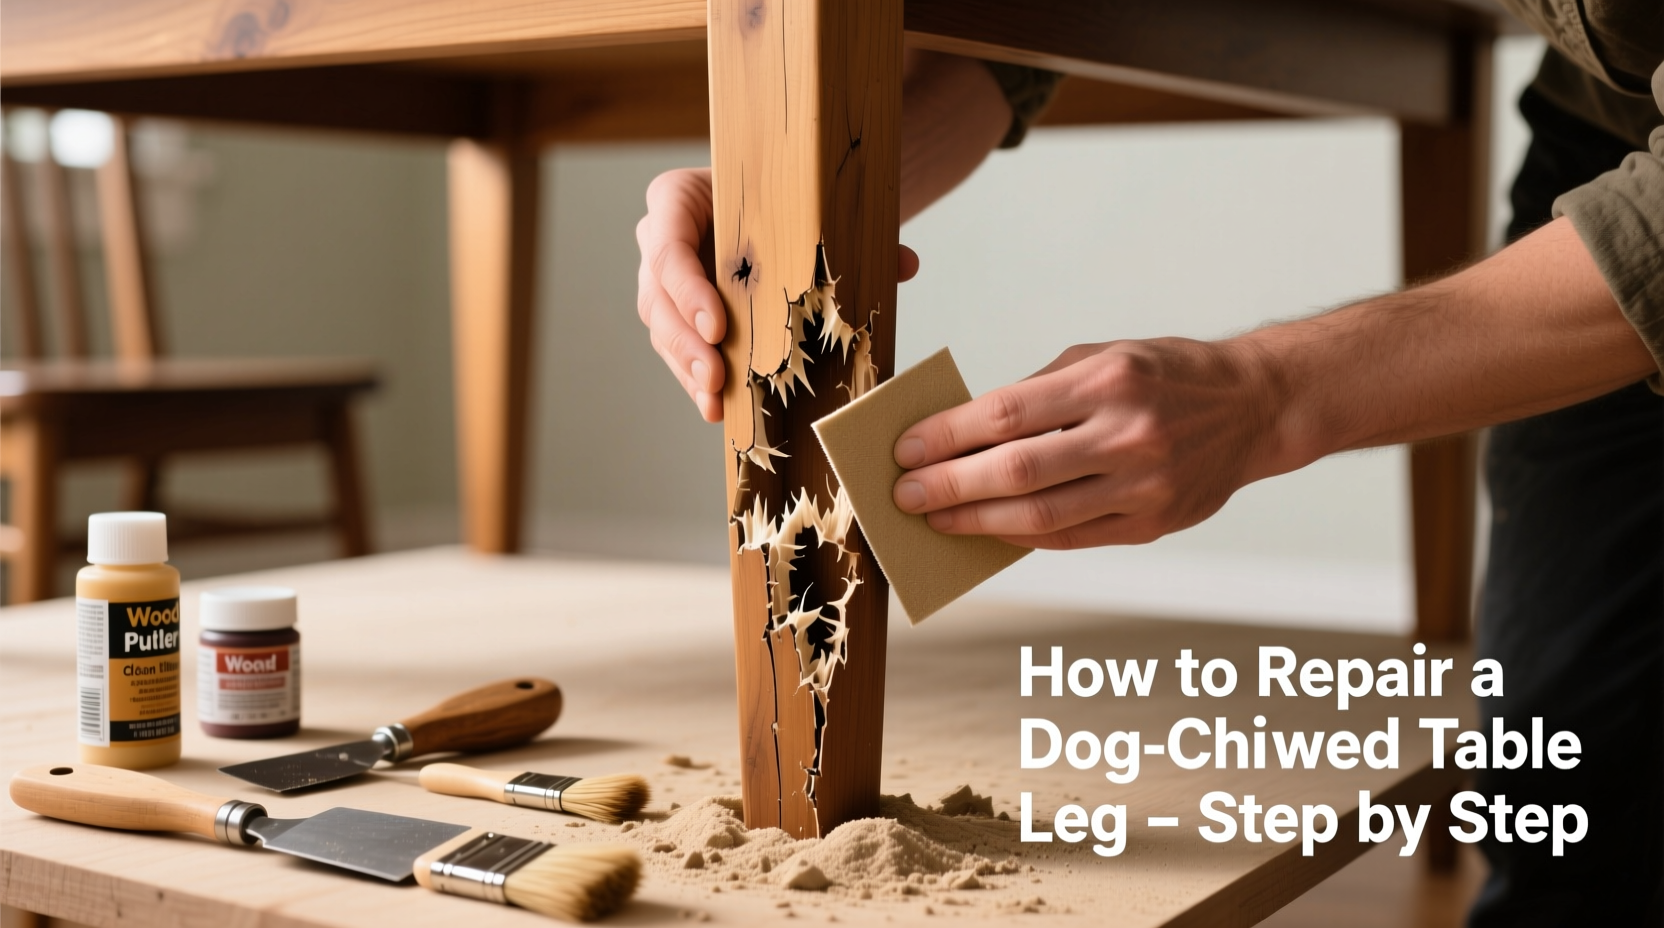
Step-by-Step Repair Process
- Secure the Table: Turn it upside down on a soft surface like a carpet or blanket to avoid scratching other legs or surfaces.
- Remove Loose Material: Use a utility knife or chisel to gently pare away frayed wood fibers. Work slowly to avoid expanding the damaged area.
- Clean the Area: Wipe the chewed section with a dry cloth. If needed, use a slightly damp rag to remove dust, then let it dry completely.
- Apply Wood Filler: For deep bites, press high-performance wood filler into the void using a putty knife. Overfill slightly to allow for sanding. Let cure per manufacturer instructions (usually 2–6 hours).
- Sand Smooth: Begin with 120-grit paper to level the filler, then switch to 220-grit for a smooth finish. Blend the edges into the original wood to eliminate visible seams.
- Stain the Repaired Section: Apply matching wood stain with a clean cloth or small brush. Test on an inconspicuous area first. Allow to dry, then apply a second coat if needed.
- Seal with Finish: Brush on a thin coat of clear polyurethane. Let dry, then lightly sand with 220-grit and apply a second coat for durability.
- Reassemble and Inspect: Return the table to upright position. Check for stability and touch up if necessary.
This process typically takes 4–6 hours, including drying time, and yields results indistinguishable from the original when done carefully.
Preventing Future Chewing: A Proactive Approach
Repairing the damage is only half the battle. Without intervention, your dog may return to the same spot. Dogs chew for various reasons: teething, anxiety, boredom, or lack of training.
Consider these strategies:
- Provide durable chew toys as alternatives.
- Use bitter-tasting deterrent sprays (e.g., Grannick’s Bitter Apple) on furniture legs.
- Supervise your dog during initial house-training phases.
- Engage in daily mental stimulation (puzzle toys, walks, training sessions).
“Dogs don’t chew out of malice—they respond to environment and opportunity. Redirecting behavior is more effective than punishment.” — Dr. Laura Sanders, Certified Animal Behaviorist
Real-Life Example: Restoring a Heirloom Dining Table
Sarah, a pet owner in Portland, returned home to find her 100-year-old oak dining table leg severely chewed by her 8-month-old Labrador, Max. The damage was deep—nearly a quarter of the leg’s circumference was missing near the base.
She followed the repair steps outlined here: cleaned the area, used epoxy-based wood filler for strength, sanded gradually, and matched the dark walnut stain. After two coats of satin polyurethane, the leg looked intact. She applied a pet-safe bitter spray and introduced Max to a frozen Kong toy filled with peanut butter. Six months later, no further damage occurred, and the table remains a centerpiece in her home.
Sarah’s experience shows that even significant damage can be reversed with patience and the right method.
Do’s and Don’ts of Furniture Repair After Pet Damage
| Do’s | Don’ts |
|---|---|
| Test stain on a hidden area first | Use regular spackle instead of wood-specific filler |
| Allow full drying time between coats | Rush the process—moisture trapped under finish causes peeling |
| Blend sanding into surrounding wood | Skip sealing—unprotected filler absorbs spills and stains |
| Address the behavioral cause, not just the symptom | Yell at your dog after the fact—it creates fear, not learning |
Frequently Asked Questions
Can I fix a chewed table leg without staining?
Yes, if the original finish is light and the repair is minor. However, unstained filler will remain visibly different over time. For best results, always match the stain—even on light woods.
What if the leg is too weak to support weight?
In cases of severe structural loss, consider installing a wooden dowel inside the leg for reinforcement before filling. Alternatively, replace the entire leg using a pre-cut replacement from a hardware store or custom woodworker.
Are there pet-safe wood finishes?
Yes. Water-based polyurethane and natural oils like tung oil are low-VOC and safe once fully cured (typically 72 hours). Always keep pets away during application and drying.
Final Thoughts and Next Steps
Restoring a dog-chewed table leg isn’t just about fixing wood—it’s about balancing pet ownership with home care. With basic tools and attention to detail, most damage can be reversed in a single weekend. More importantly, addressing the root cause of chewing protects your belongings and supports your dog’s well-being.
Start today: assess the damage, gather your supplies, and take the first sanding stroke. Your furniture—and your pet—will benefit from your thoughtful response.


 浙公网安备
33010002000092号
浙公网安备
33010002000092号 浙B2-20120091-4
Comments
No comments yet. Why don't you start the discussion?