
Losing personal items like keys, wallets, or backpacks is frustrating—and often avoidable. Apple’s AirTag offers a smart, reliable solution for keeping track of your essentials. Small, lightweight, and powered by the Find My network, AirTags use Bluetooth and precision finding technology to help you locate misplaced items quickly. Setting one up takes just minutes, and once in place, it works seamlessly across your Apple ecosystem. Whether you're attaching it to your keys, slipping it into your luggage, or securing it inside your purse, understanding how to properly set up and use an AirTag ensures maximum effectiveness from day one.
What You Need Before Setup
Before you begin pairing your AirTag, make sure you have the following:
- An iPhone or iPad running iOS 14.5 or later (or iPadOS 14.5+)
- Bluetooth enabled on your device
- Your Apple ID signed in to iCloud
- The AirTag itself (batteries are pre-installed and non-replaceable until depleted)
AirTags rely on Apple’s secure Find My network, which uses end-to-end encryption to protect your location data. This means no one else—including Apple—can see where your AirTag has been. The system is designed with privacy at its core, ensuring peace of mind while tracking your belongings.
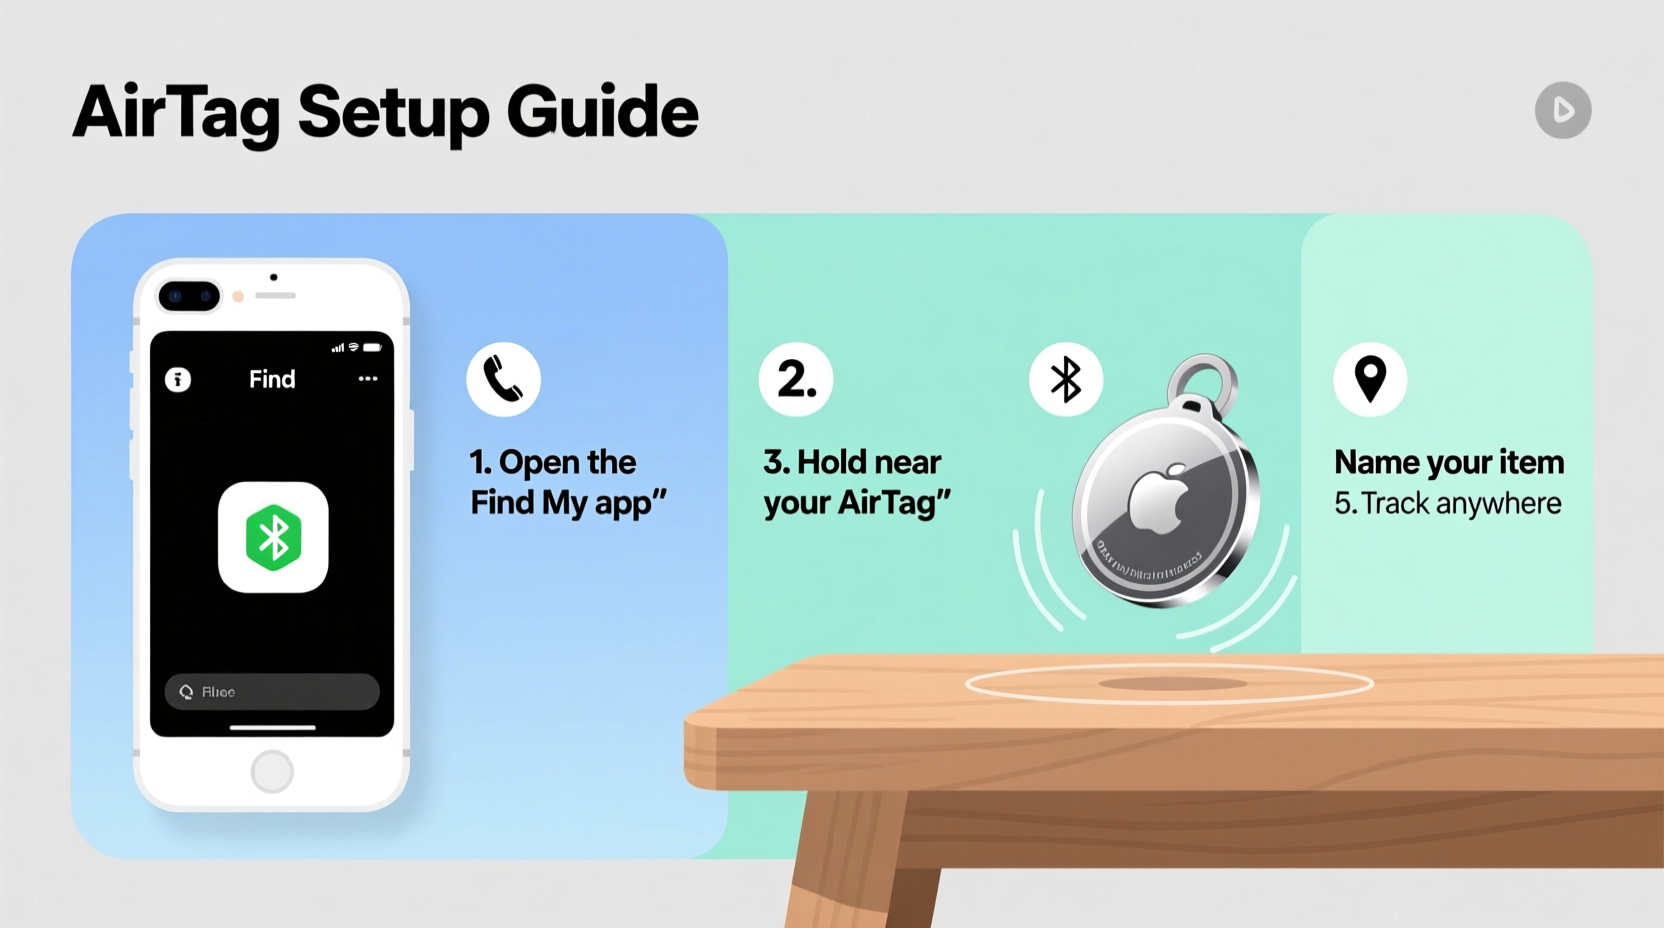
Step-by-Step Guide to Pairing Your AirTag
Pairing an AirTag is as intuitive as connecting AirPods. Follow these steps to get started:
- Remove the AirTag from its packaging and peel off the plastic tab to activate the battery.
- Hold your iPhone near the white side of the AirTag. A setup animation will appear on your screen.
- Tap “Connect” when prompted.
- Give your AirTag a custom name (e.g., “Car Keys,” “Work Bag”) or choose from suggested names based on item type.
- Select a notification sound so you can identify it easily if nearby.
- Confirm ownership by signing in with your Apple ID. This links the AirTag securely to your account.
- Wait for confirmation that setup is complete.
Once paired, your AirTag appears in the Find My app under the \"Items\" tab. From here, you can view its last known location, play a sound, enable Lost Mode, or check battery status.
“The beauty of AirTag lies in its simplicity—setup takes less than two minutes, yet it integrates deeply with Apple’s ecosystem for powerful, private tracking.” — Jordan Lee, Senior Tech Analyst at MobileInsight Group
Optimizing Placement and Usage
Where you place your AirTag matters. Poor positioning can block Bluetooth signals or prevent Precision Finding from working correctly. Consider these best practices:
- Avoid metal enclosures: Metal interferes with Bluetooth and U1 chip signals. Don’t tape it inside a metal keychain or attach it behind a metallic surface.
- Ensure clear exposure: Leave the white side unobstructed. If placing in a bag, avoid burying it under thick layers of fabric or electronics.
- Use compatible accessories: Apple offers a range of loops, key rings, and leather holders designed specifically for AirTags. Third-party options should allow full signal access.
- Check orientation: When using Precision Finding (available on iPhone 11 and later), hold your phone naturally—the system uses AR and haptic feedback to guide you directly to the tag.
Real-World Example: Tracking a Lost Backpack
Sophie, a university student, attached an AirTag to her everyday backpack. One afternoon after class, she realized her bag was missing—likely left in the library. She opened the Find My app on her iPhone, selected her backpack’s AirTag, and saw it was still on campus. The map showed it hadn’t moved in 30 minutes. Using Precision Finding as she walked toward the library, her iPhone displayed directional arrows and distance estimates. Within two minutes, she located the backpack tucked behind a study carrel. Thanks to the AirTag, she avoided losing her laptop, textbooks, and wallet.
This scenario highlights how fast and accurate AirTag can be—even in crowded indoor spaces—when properly set up and positioned.
Do’s and Don’ts of AirTag Use
| Do’s | Don’ts |
|---|---|
| Label your AirTag clearly (e.g., “Keys – Jane Smith”) | Attach it to someone else’s belongings without permission |
| Enable Lost Mode if your item goes missing | Use it to track people or pets (despite marketing claims, it's not ideal for real-time pet tracking) |
| Regularly check battery status in the Find My app | Ignore unwanted AirTag alerts—if your iPhone detects an unknown AirTag traveling with you, investigate promptly |
| Replace the battery when low (CR2032, user-replaceable) | Assume it works offline—it relies on proximity to other Apple devices to update location |
Frequently Asked Questions
How far can an AirTag be tracked?
An AirTag uses Bluetooth, which typically reaches up to 100 feet (30 meters) in open space. However, its true tracking range extends globally through the Find My network. If your lost item is outside Bluetooth range, any nearby Apple device can anonymously detect its signal and relay its location back to you—without compromising privacy.
Can someone else track my AirTag?
No. Each AirTag is end-to-end encrypted and tied to your Apple ID. Even if someone finds your AirTag, they cannot access your identity unless you enable Lost Mode and provide contact details. Additionally, if an unknown AirTag is detected moving with someone over time, their iPhone will alert them and the tag will emit a sound after a period of separation from its owner.
Does the AirTag need Wi-Fi or cellular?
No. The AirTag itself doesn’t connect to Wi-Fi or cellular networks. Instead, it uses Bluetooth to communicate with nearby Apple devices, which then use their internet connection to update the tag’s location in the Find My network. Your own device needs internet access only to view the tag’s location in the app.
Maximizing Long-Term Performance
To keep your AirTag functioning optimally, perform routine checks every few months:
- Verify its position hasn’t shifted inside a case or accessory.
- Listen to the chime to ensure the speaker works.
- Review battery level in the Find My app (under “Item Battery”).
- Clean the stainless steel edge gently with a dry cloth to maintain conductivity.
Battery life typically lasts about one year. When replacement time comes, twist the back counterclockwise to open the casing and insert a new CR2032 coin battery. No tools required.
Conclusion: Take Control of What Matters Most
Setting up and using an AirTag is one of the simplest yet most effective upgrades you can make to your daily organization. With instant pairing, precise location tracking, and unmatched integration across Apple devices, it transforms how you manage your belongings. From preventing minor inconveniences to avoiding major losses, an AirTag pays for itself in peace of mind. Now that you know how to set it up, optimize placement, and use its full range of features, there’s no better time to start protecting what you carry every day.


 浙公网安备
33010002000092号
浙公网安备
33010002000092号 浙B2-20120091-4
Comments
No comments yet. Why don't you start the discussion?