
Sending large video files via email or messaging apps often fails due to size limits. Whether it’s a wedding highlight, a business presentation, or a family vacation clip, you need a reliable way to deliver high-quality footage without compression or frustration. The solution? Share videos as links instead of attachments. This method bypasses file size restrictions, ensures better quality, and gives recipients instant access. Here's how to do it efficiently and securely.
Why Sending Videos as Links Is the Best Approach
Email providers like Gmail cap attachments at 25MB. Messaging platforms such as WhatsApp limit media to 16MB. Most recorded videos—especially in HD or 4K—easily exceed these limits. Uploading your video to a cloud service and sharing a link solves this instantly.
Link-based sharing also offers additional benefits:
- No quality loss: Avoid automatic compression from email or messaging apps.
- One link for multiple recipients: Send the same video to dozens without repeated uploads.
- Access control: Set passwords or expiration dates for sensitive content.
- Bandwidth efficiency: Recipients stream only what they watch, reducing data use.
“Over 70% of failed file transfers happen because users try to email large videos directly. A hosted link is faster, safer, and more professional.” — David Lin, Cloud Infrastructure Specialist
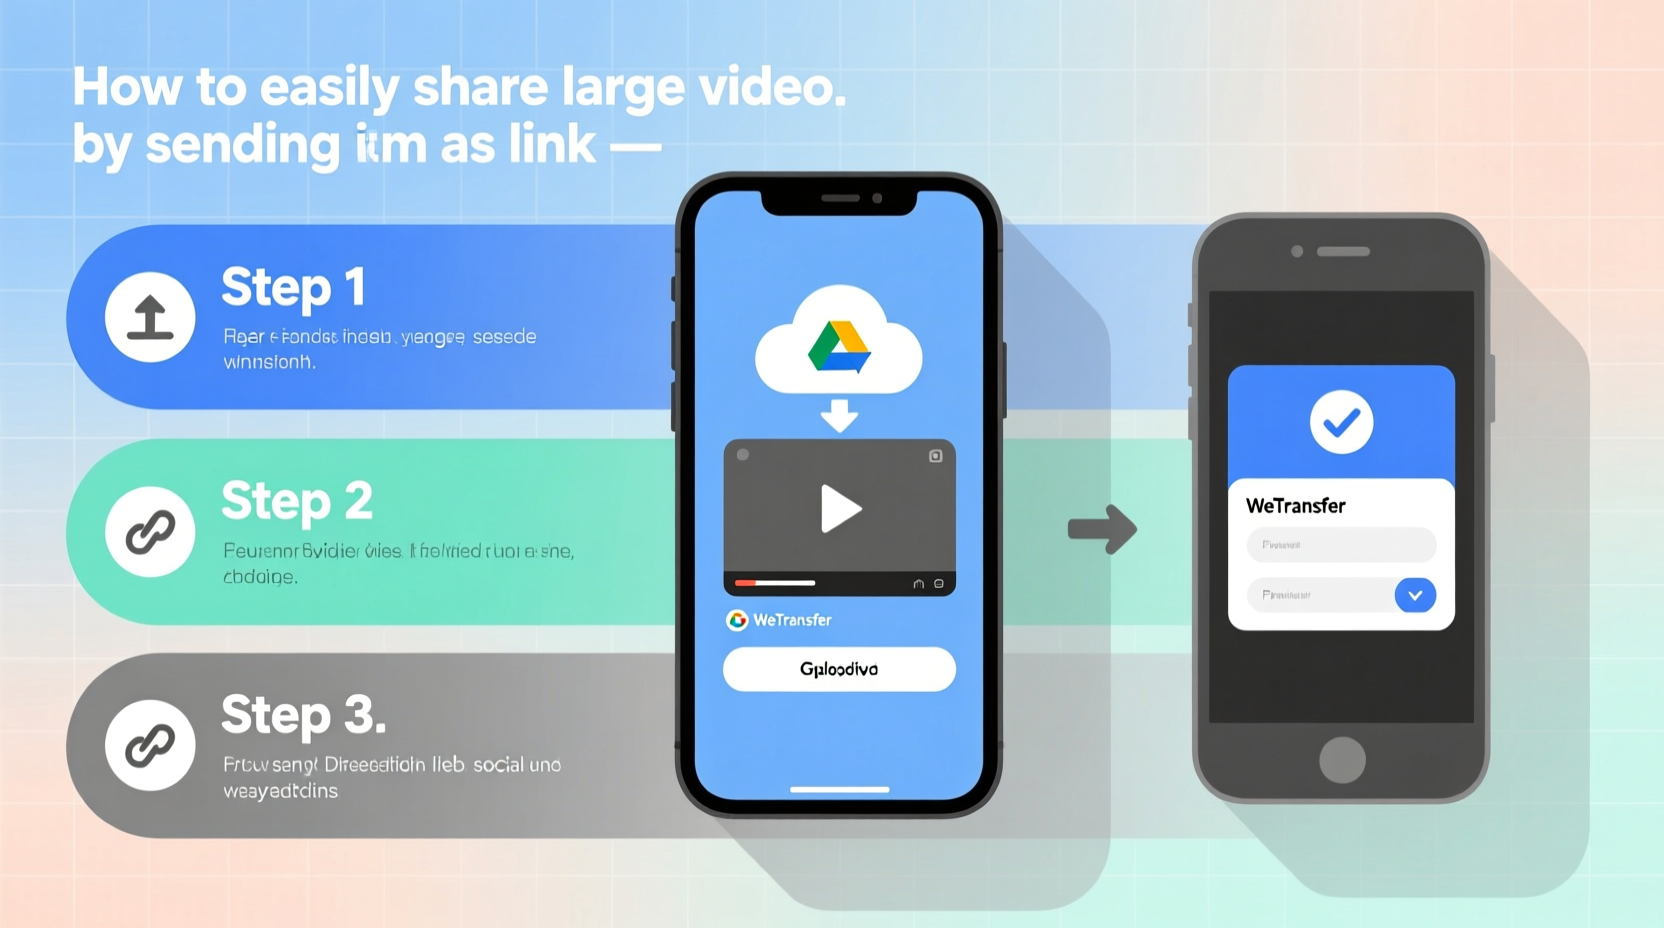
Step-by-Step: How to Share Large Videos as Links
Follow this clear process to upload and share any video—regardless of size—in under five minutes.
- Select your preferred cloud platform. Choose one based on storage space, ease of use, and privacy needs. Recommended options include Google Drive, Dropbox, OneDrive, WeTransfer, or Vimeo.
- Upload the video file. Log into your account and click “Upload” or drag the file into the browser window. Larger files may take several minutes depending on internet speed.
- Wait for processing to complete. Some services generate a playback-optimized version. This can take time but improves streaming performance.
- Generate a shareable link. Once uploaded, locate the “Share” button. Click it and choose “Get link” or “Create link.”
- Adjust permissions. Set the link to “Anyone with the link can view” (for public sharing) or restrict access to specific people via email.
- Copy and send the link. Paste it into an email, text message, social media post, or collaboration tool like Slack.
Top Platforms Compared: Which One Should You Use?
Not all file-sharing services are equal. Below is a comparison of leading platforms based on key features for video sharing.
| Service | Free Storage | Max File Size | Password Protection | Best For |
|---|---|---|---|---|
| Google Drive | 15 GB | 5 TB | Yes (with Google Workspace) | General sharing, Google ecosystem users |
| Dropbox | 2 GB | 2 GB (free), larger with paid plans | Yes | Professional collaboration |
| Microsoft OneDrive | 5 GB | 100 GB per file | Yes (Personal & Family plans) | Windows and Office users |
| WeTransfer | 2 GB per transfer | 2 GB (free), up to 20 GB paid | No (Pro version supports password) | Quick one-time sends |
| Vimeo | 5 GB (free plan) | Unlimited (on paid), 500 MB/week (free) | Yes | Creative professionals, portfolio sharing |
For occasional sharing, Google Drive is ideal due to its generous free tier and seamless integration with Gmail. For creatives who want polished playback, Vimeo offers superior viewing experiences with customizable players and no ads.
Real Example: Sharing a 4K Wedding Video
A videographer named Marcus recently filmed a full-day wedding in 4K resolution. The final file was 28GB—far too large for email. Instead of burning DVDs or using a USB drive, he used Google Drive.
He uploaded the video to his Drive folder, set sharing permissions to “Anyone with the link,” and sent the URL to the couple via text. They accessed it immediately on their phones, shared it with family, and downloaded a copy for safekeeping. Total time: 12 minutes. Cost: $0.
This method saved time, eliminated physical delivery risks, and provided a seamless experience—all thanks to a simple link.
Checklist: Ensure Your Video Link Is Ready to Share
Before hitting send, verify the following to avoid common issues:
- ✅ Confirm the upload completed successfully
- ✅ Test the link in an incognito browser to simulate recipient access
- ✅ Disable download option if you only want streaming (available on Dropbox, Vimeo)
- ✅ Add a custom message explaining what the video contains
- ✅ Set expiration date for sensitive content (e.g., confidential presentations)
- ✅ Use a URL shortener (like bit.ly) for cleaner appearance in messages
Frequently Asked Questions
Can someone hack my video if I share a link?
If the link is set to “Anyone with the link,” anyone who obtains it can view the video. To enhance security, use platforms that support password protection and two-factor authentication. Avoid posting public links on social media unless intended for broad audiences.
What if my internet is slow? Can I still upload large videos?
Yes, but it will take longer. Schedule uploads during off-peak hours when your connection is less congested. Consider compressing the video first using tools like HandBrake or Clipchamp to reduce file size without noticeable quality loss.
Do recipients need an account to view the video?
Most platforms—including Google Drive, Dropbox, and WeTransfer—allow viewing without login if the link is publicly shared. However, some services prompt users to sign in unless the owner adjusts settings. Always test the link in a private browser to confirm accessibility.
Final Tips for Smooth Video Sharing
To make your video-sharing experience even smoother, follow these expert-backed practices:
- Name files clearly: Use descriptive titles like “Project_Demo_2024_Final.mp4” instead of “VID_1234.mp4”.
- Organize with folders: Store related videos in labeled folders for easier management.
- Monitor views: Services like WeTransfer Pro and Vimeo provide analytics showing who viewed your video and when.
- Delete old links: Remove expired or unnecessary shares to free up space and maintain privacy.
Start Sharing Smarter Today
Sending large videos doesn’t have to be a technical hurdle. By switching from attachments to links, you gain speed, reliability, and professionalism. Whether you're a parent sharing baby’s first steps or a marketer distributing campaign footage, this method works across devices and platforms.
Pick a service you trust, follow the steps outlined here, and start sharing videos effortlessly. The next time you’re about to struggle with an email error, remember: a link is all you need.


 浙公网安备
33010002000092号
浙公网安备
33010002000092号 浙B2-20120091-4
Comments
No comments yet. Why don't you start the discussion?