
There are few things more unsettling than realizing your iPhone is missing. Whether it’s left behind at a café or misplaced during travel, the urgency to locate it is real. Fortunately, Apple has built robust tools into its ecosystem that allow users to pinpoint their device’s last known location—even when it’s offline. Understanding how to access and interpret this information can make the difference between recovery and permanent loss.
The key lies in Apple’s “Find My” network, a secure and privacy-focused system that leverages Bluetooth, Wi-Fi, and cellular data to track devices. With the right setup, you can retrieve not only your iPhone’s current status but also its final connected position before the battery died or it went out of range.
How the Last Known Location Feature Works
When your iPhone loses power or disconnects from the internet, it doesn’t vanish from Apple’s tracking grid. Before shutting down, the device sends a final update to Apple’s servers with its GPS coordinates. This data becomes the “last known location,” stored securely in your iCloud account.
This feature relies on several technologies working together:
- GPS: Provides precise outdoor location data.
- Wi-Fi triangulation: Uses nearby networks to estimate position indoors or in dense urban areas.
- Bluetooth proximity: Allows other Apple devices in the Find My network to anonymously detect and relay your iPhone’s signal if it’s nearby.
Importantly, this system operates end-to-end encrypted. Even Apple cannot access your location data—only you, with your Apple ID credentials, can view your device’s whereabouts.
“Apple’s Find My network represents one of the most effective consumer-grade device recovery systems available today.” — Dr. Alan Reyes, Mobile Security Researcher at Stanford University
Step-by-Step: How to Access Your iPhone’s Last Known Location
If your iPhone is missing, follow this sequence to retrieve its last recorded position quickly and accurately.
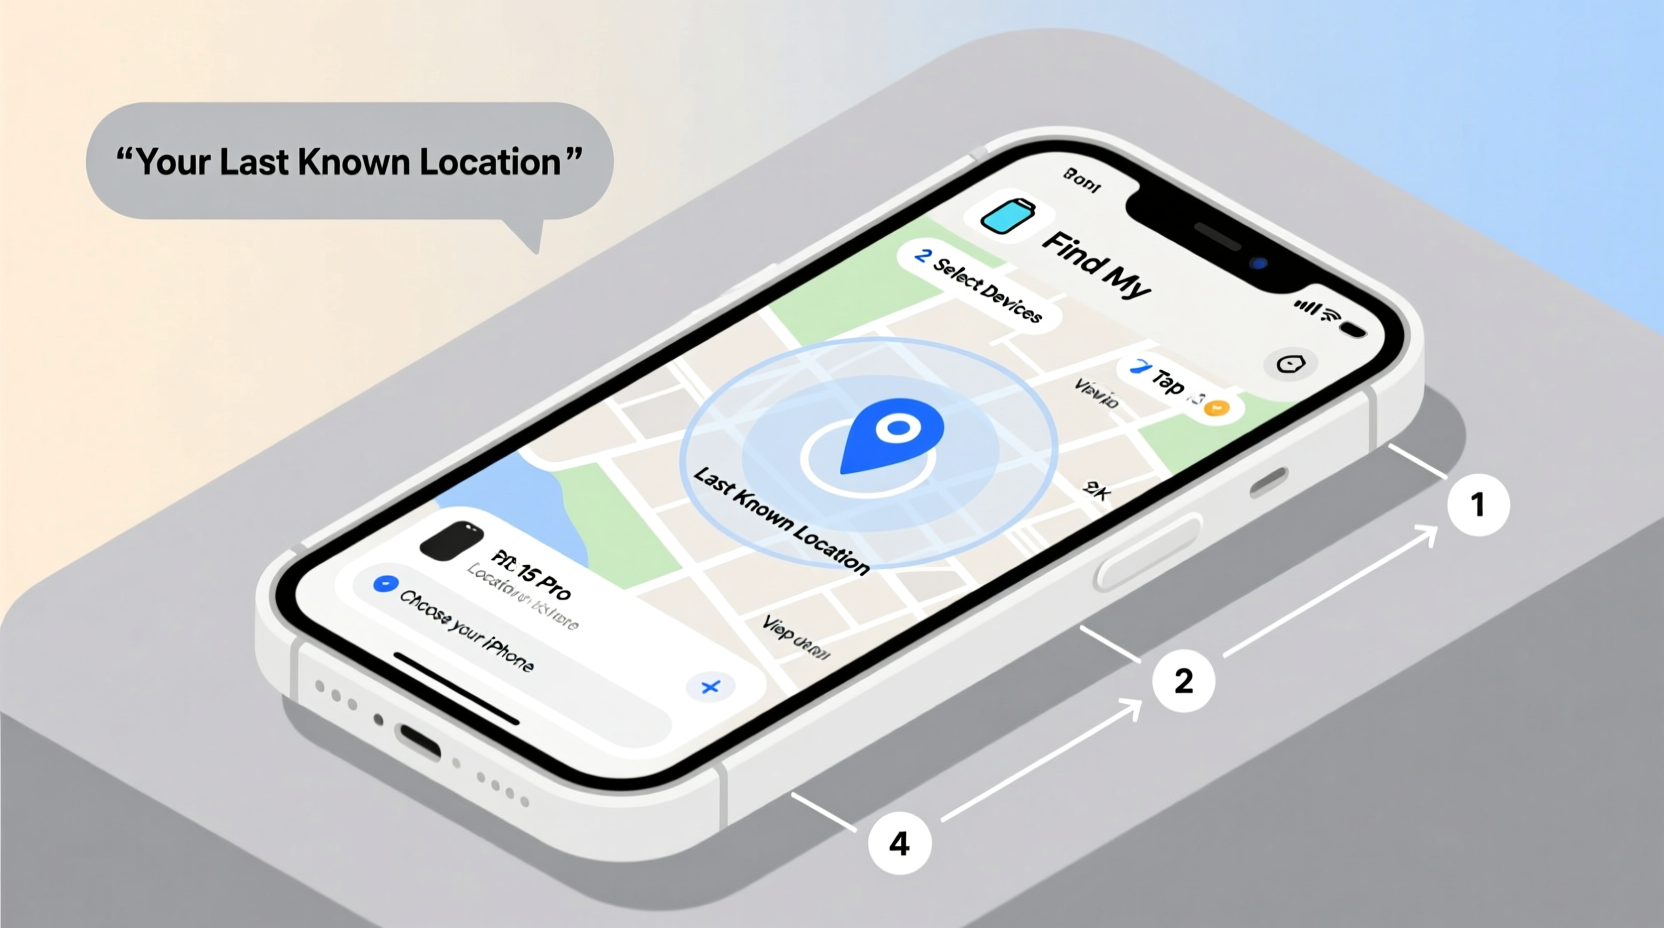
- Use Another Apple Device: Open the “Find My” app on any iPad, Mac, or another iPhone signed into the same Apple ID.
- Select Devices: Tap the “Devices” tab at the bottom of the screen.
- Choose Your Missing iPhone: From the list, select the device you’re trying to locate.
- View Location: If online, the device will appear in real time. If offline, you’ll see a gray dot labeled “Offline” with a timestamp indicating when it was last connected.
- Enable Notifications (Optional): Tap “Notify When Found” to receive an alert once the device reconnects to the internet.
Alternatively, use a web browser:
- Go to iCloud.com/find.
- Sign in with your Apple ID.
- Click “All Devices” and select your iPhone.
- Review the map and timestamp for the last known location.
Interpreting Location Accuracy and Status Messages
Not all location data is equally reliable. Understanding what the interface tells you—and what it doesn’t—can prevent wasted effort.
| Status | Meaning | Action Recommended |
|---|---|---|
| Green Dot | Device is online and actively reporting its location. | Use directions to recover immediately. |
| Gray Dot + Timestamp | Last known location; device is offline. | Check the area shown, especially if recent (within 30 minutes). |
| No Location Available | Never connected to Find My or disabled. | Contact carrier or file a report; recovery unlikely. |
| Location Not Available | Temporarily unreachable or location services turned off. | Wait and refresh; enable “Notify When Found.” |
The timestamp is critical. A location from two hours ago in a public transit hub may no longer be useful. Conversely, a 10-minute-old signal near your home suggests the phone might still be within range.
Real Example: Recovering a Misplaced iPhone at an Airport
Sophie, a business traveler, realized her iPhone 15 was missing after deplaning in Chicago. She used her MacBook Air to open iCloud.com/find while waiting for her luggage. The map showed a gray dot inside Terminal 3, timestamped 12 minutes prior.
Rather than panic, she noted the exact gate number displayed and contacted airport lost-and-found. Within 20 minutes, a staff member found the phone under a seat and confirmed its identity using Face ID. Sophie credited the precision of the last known location for the quick recovery.
This case highlights the importance of acting fast and trusting the data—even when the device appears offline.
Essential Checklist: Before and After Your iPhone Goes Missing
Preparation dramatically increases your chances of recovery. Use this checklist to stay ready.
- ✅ Enable “Find My iPhone” in Settings > [Your Name] > Find My > Find My iPhone.
- ✅ Turn on “Send Last Location” so your iPhone uploads its position before the battery dies.
- ✅ Ensure iCloud Backup is active to protect your data.
- ✅ Memorize your Apple ID and password—or store them securely.
- ✅ Label your lock screen with contact info (Settings > Wallpaper > Home Screen > Edit, then add a message).
- ✅ After loss: Use Find My to play a sound, mark as lost, or erase remotely if necessary.
Frequently Asked Questions
Can I see my iPhone’s last known location if Find My was never turned on?
No. The last known location feature requires “Find My iPhone” to be enabled before the device goes missing. Without it, neither iCloud nor third-party tools can retrieve location data.
Does the last known location work if the phone is turned off?
Yes, but only up to the moment it powered down. As long as “Send Last Location” is enabled, the iPhone automatically transmits its coordinates just before shutdown.
What if someone disables Find My or erases the phone?
Modern iOS versions require the original Apple ID and password to turn off Find My or erase the device—a security feature known as Activation Lock. Even if wiped, the phone remains traceable unless the thief has your credentials.
Maximizing Recovery Odds with Smart Habits
Technology alone isn’t enough. Human habits determine whether a lost phone becomes a recovered one. Always double-check pockets and bags before leaving public spaces. Consider using a bright case or AirTag-equipped wallet to reduce misplacement risk.
Additionally, regularly test your Find My setup. On a spare evening, ask a friend to help verify that your iPhone appears correctly in the app when moved across town. This ensures everything functions before an emergency arises.
“The best time to set up Find My is before you need it. The second-best time is now.” — Lisa Tran, Senior Support Advisor at AppleCare
Conclusion
Knowing how to view and interpret your iPhone’s last known location transforms a stressful situation into a manageable one. With Find My enabled and a clear understanding of what the data means, you gain a powerful advantage in recovering your device. These tools are not just convenient—they’re essential for anyone who relies on their phone for communication, work, or personal memories.


 浙公网安备
33010002000092号
浙公网安备
33010002000092号 浙B2-20120091-4
Comments
No comments yet. Why don't you start the discussion?