
A properly functioning pool pump is the heart of any swimming pool system. When air infiltrates the pump, it disrupts water flow, reduces filtration efficiency, and can cause serious mechanical damage over time. Air in the pump often leads to cavitation—where vapor bubbles form and collapse violently inside the impeller—resulting in noise, vibration, and premature wear. Recognizing and resolving air entrapment quickly ensures your pool circulates cleanly, operates efficiently, and avoids costly repairs. This guide walks through proven methods to identify, purge, and prevent air buildup in your pool pump.
Why Air in the Pump Is a Problem
Air doesn’t compress like water, so when it enters the pump chamber, it prevents the system from creating the necessary suction and pressure to move water effectively. Common symptoms include:
- Visible air bubbles in the sight glass or return lines
- Loud humming, grinding, or clicking noises from the pump motor
- Reduced water flow from return jets
- Pump failing to prime or losing prime shortly after starting
- Overheating due to lack of cooling water flow
If left unaddressed, an air-bound pump may burn out the motor seal or crack internal components. Early detection and correction are essential for maintaining system longevity.
“Air in the pump isn’t just inefficient—it’s destructive. Even short-term operation under air-bound conditions can degrade seals and impellers.” — James Ralston, Pool Equipment Technician with 20+ years of field experience
Step-by-Step Guide to Bleeding Air from Your Pool Pump
Bleeding air from your pool pump is a straightforward process if done methodically. Follow these steps carefully to restore full prime and circulation.
- Turn off the pump immediately. Do not run the pump dry. Continued operation without water can destroy the shaft seal within minutes.
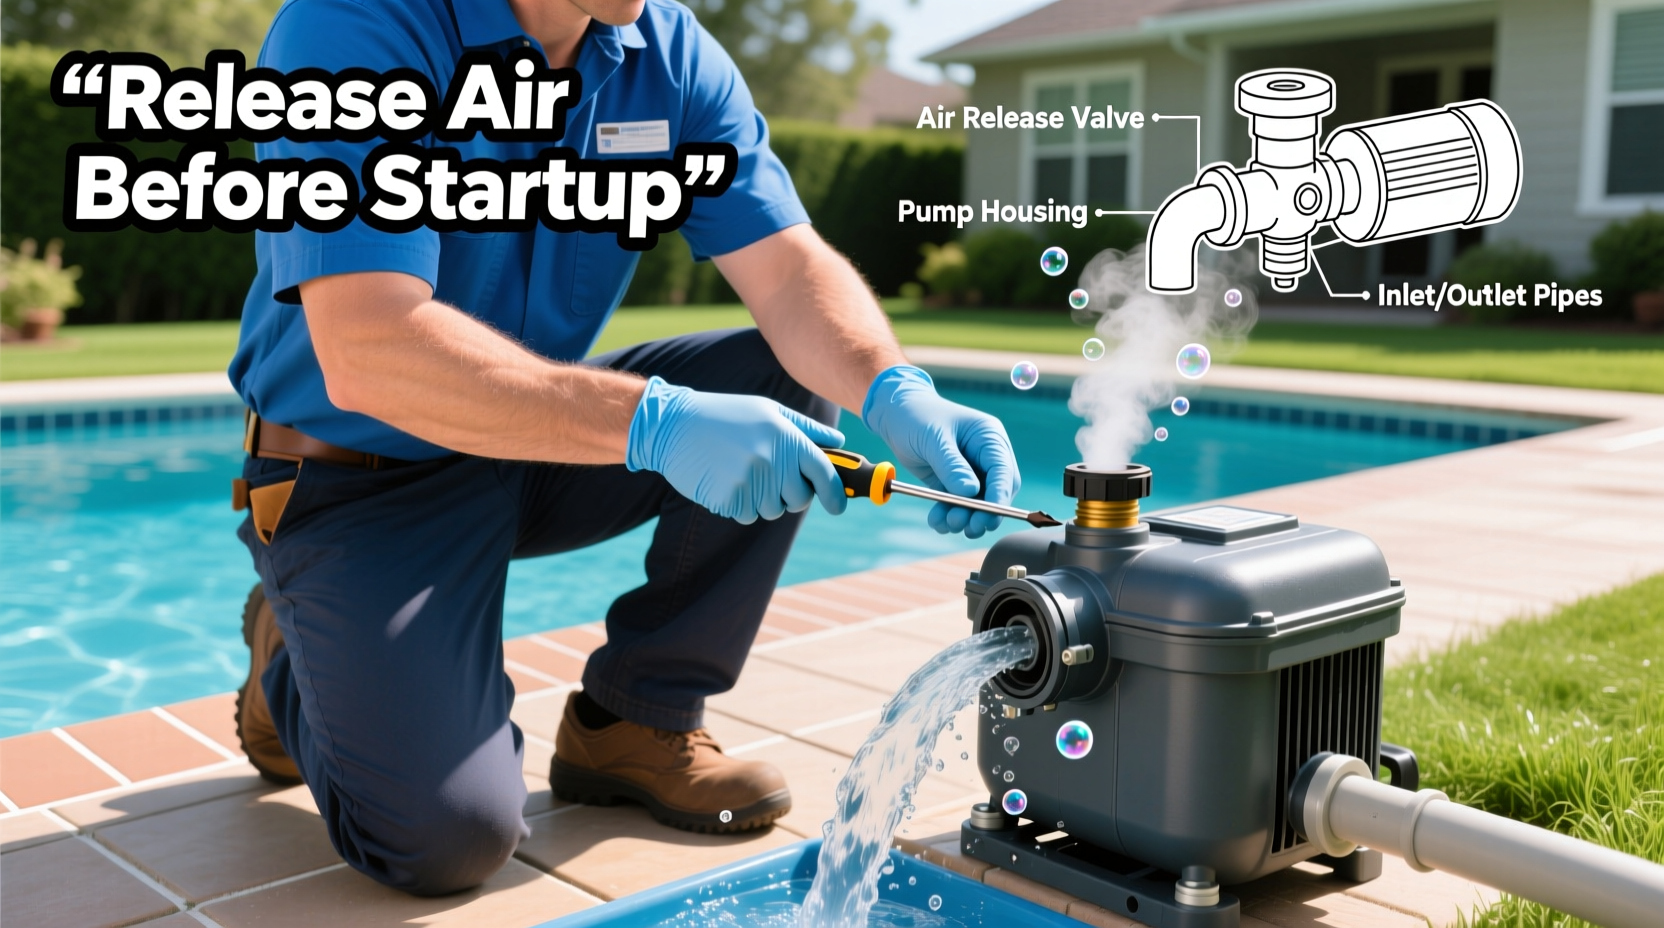
- Locate the air relief valve. Most modern pumps have a small silver or black knob on the top of the filter housing. If yours doesn’t have one, you’ll need to loosen the cover slightly to release trapped air.
- Open the air relief valve. Turn it counterclockwise by hand—no tools needed. You should hear air escaping.
- Restart the pump. Power it back on and observe the valve. Air will hiss out first, followed by a steady stream of water.
- Close the valve once water sprays out consistently. This indicates all air has been purged from the filter tank.
- Check the pump basket. Remove the lid, ensure the basket is clean and seated properly, then reassemble tightly using hand pressure only—overtightening can damage the threads or gasket.
- Inspect water level in the pool. It should be at least halfway up the skimmer intake. Low water levels allow air to be sucked into the system.
Identifying and Fixing Common Air Leak Sources
Even after successful bleeding, air may re-enter the system if there’s an underlying leak on the suction side (before the pump). These leaks are often subtle and occur at joints, seals, or valves. Here’s where to look:
| Component | Common Issue | Solution |
|---|---|---|
| Skimmer lid or weir door | Crack or worn gasket | Replace gasket or entire lid assembly |
| Pump lid & O-ring | Dry, cracked, or misaligned seal | Apply silicone lubricant; replace if damaged |
| Drain plugs or union fittings | Loose connection or faulty thread sealant | Tighten securely; use Teflon tape or pipe dope |
| Valves (multiport, diverter) | Cracked housing or worn spider gasket | Inspect for hairline fractures; replace gasket |
| Plumbing joints below water line | Micro-cracks in PVC or failed solvent weld | Repair with epoxy or replace section |
To test for suction-side leaks, conduct a simple bucket test: fill a bucket with pool water and submerge the suspected joint while the pump is running. If bubbles stop forming, that’s likely the leak source.
Real Example: The Case of the Persistent Prime Loss
A homeowner in Florida reported their pump losing prime every few hours despite repeated attempts to restart. Visual inspection showed no obvious cracks. A technician submerged the pump lid O-ring area in soapy water while the system ran—a technique known as a “bubble test.” Immediate bubbling revealed a pinhole leak in the lid’s plastic housing caused by UV degradation. Replacing the lid resolved the issue permanently. This case underscores that even non-moving parts can fail and introduce air silently.
Preventive Maintenance Checklist
Regular maintenance prevents most air-related issues. Use this checklist monthly during active pool season:
- ✅ Inspect pump lid O-ring for cracks, dryness, or flattening
- ✅ Lubricate O-ring annually with non-petroleum-based silicone grease
- ✅ Check skimmer water level—maintain midway up the opening
- ✅ Clean pump basket and verify secure lid closure
- ✅ Examine all visible plumbing connections for moisture or mineral deposits
- ✅ Verify multiport valve handle turns smoothly and seals tightly
- ✅ Bleed air from filter tank after cleaning or winterization
- ✅ Listen for unusual pump sounds indicating early cavitation
Frequently Asked Questions
Can I run the pump without water to clear air?
No. Running a pool pump dry—even for 30 seconds—can overheat and destroy the mechanical seal. Always ensure water is present before powering on.
Why does my pump keep losing prime after I bleed it?
Recurring air suggests a persistent suction-side leak. Check the pump lid seal, skimmer gaskets, drain plugs, and all threaded connections. Also confirm the pool water level is sufficient to cover the skimmer intake.
Is some air in the sight glass normal?
A few small bubbles occasionally passing through are typical, especially after backwashing or chemical addition. However, continuous streams of bubbles or foam indicate an air leak or low water level.
Conclusion: Keep Your System Air-Free and Efficient
Removing air from your pool pump isn’t just about restoring water flow—it’s about protecting your investment. An air-free system runs quieter, cools more effectively, and extends the life of your pump and filter. By understanding the signs of air entrapment, mastering the bleeding process, and conducting regular inspections, you maintain consistent performance and avoid emergency breakdowns. Don’t wait until your pump fails; proactive care today saves time, money, and frustration tomorrow.


 浙公网安备
33010002000092号
浙公网安备
33010002000092号 浙B2-20120091-4
Comments
No comments yet. Why don't you start the discussion?